18 Sustainment and Deployment of Solutions
model sustainment, ML Ops, CI-CD, renv, pre-commit, precommit, GitHub Actions, deployment, containers, Docker, Amazon Web Services, AWS
18.1 Introduction
18.1.1 Learning Outcomes
- Create strategies for sustaining and deploying R solutions in a changing world.
- Employ coding styles and function documentation to ease code maintenance.
- Use the {renv} package to maintain the set of packages used for a solution.
- Implement Continuous-Integration-Continuous-Development (CI-CD) workflows using GitHub Actions.
- Deploy a solution to a cloud environment.
18.1.2 References:
- {renv} package Wickham and Ushey (2024)
- pre-commit frameworkSottile, Struys, and Kuehl (2024)
- {precommit} package (Walthert 2024)
- GitHub Actions Documentation (GitHub 2024a)
- R-Infrastructure Actions on GitHub
- Docker Guides (Docker 11:50:25 -0700 -0700)
- The Rocker Project (Nüst et al. 2020)
- An Introduction to Rocker: Docker Containers for R} (Boettiger and Eddelbuettel 2017)
- {paws} Package for Amazon Web Services in R (AWS Open Source promotional credits program n.d.)
18.1.2.1 Other References
- Customizing Git- Git Hooks (Git 2024)
- Engineering Production Ready Shiny Apps (Fay et al. 2023)
- Hadley Wickham Keynote Address at the NYR10 Conference R in Production (Wickham 2024)
- htmlhint linter for HTML (“Htmlhint/HTMLHint” 2024)
- Implementing MLOps in the Enterprise (Haviv and Gift 2023)
- {lintr} package for R (Hester et al. 2024)
- MegaLinter (Vuillamy n.d.)
- Pylint Linter for Python (“Pylint - Code Analysis for Python Www.pylint.org” 2024)
- R Packages (2nd Edition) (Wickham and Bryan 2023)
- {roxygen2} package (Wickham et al. 2022)
- {styler} package (Muller, Walthert, and Patil 2024)
- {spelling} package (Ooms and Hester 2024)
- SQLFluff Linter for SQL (“SQLFluff” 2024)
- Stylelint Linter for CSS (“Styleling” 2024)
- Super-linter (Ferrari 2024)
- {testthat} package (Wickham n.d.), (Wickham 2011)
- The Tidyverse Style Guide (Wickham 2021)
- yamllint Linter for YAML (Vergé 2024)
18.2 Sustaining and Deploying Solutions
18.2.1 Data Science Solutions and Change
Data Science solutions occur across a wide spectrum of use cases in terms of scale, scope, complexity, and duration.
On one end of a spectrum are small single-developer, single-computer, single-user, single-use analyses/models created to answer a specific question with a given set of data at a specific point in time and then they are no longer used.
On the other end of the spectrum are models/analyses built by many developers deployed in the cloud with many users, with inputs being updated every second, that address changing set of questions, and they operate 24/7 for years. Consider a recommendation engine used by any of the major companies where they may be required by law to change their training data as users “opt out” of their data being used by the organization.
As soon as one leaves the small/single-use end of the spectrum, one will need to manage change. The requirements change, the data changes, the developers change, the conditions change, and as important, the world changes.
Sustaining data science solutions means developing your solutions in such a way that they are reproducible and maintainable as conditions change.
One can think of reproducibility with a small “r” as meaning you develop the solution in a way that you can rerun your analysis or model and get the same results with the same data right now.
In contrast, sustaining a solution requires thinking of “Reproducibility” with a capital “R”. This means you develop your solution in a way that future-you, or someone else, can rerun your analysis or model and get the same results with the same data despite the changes that may have occurred in the world.
As examples:
- Updated versions of R tend to be released every few months (see Previous Releases of R for Windows). While most are “non-breaking,” that is not guaranteed.
- Packages can be updated much more often, especially if they are new in development (see duckplyr releases).
Sustaining a solution over time means you also have to develop your analysis/model in a way that you (future you, someone else,) can maintain your solution to accommodate and manage change in the world over time.
- As examples:
- The source data may have new records or new or changed fields, e.g., from one date format to a different format.
- If you are working with an API or scraping a website, the API may change or the web page may be redesigned.
- If you are building a model, there may be changes to the way the world operates, e.g., changed laws or policies, new phenomena, or new methods you may want to incorporate for an updated solution.
- If you are monitoring the outputs of a model, you may detect that your solution is no longer as useful as before due to changes in user behavior demographics, preferences, or behaviors - see What is Model Drift? Types & 4 Ways to Overcome (Dilmegani 2024).
If you have a solution deployed into production, then you may be concerned about how to mitigate risk to your operating solution when the world changes or you have updated your solution. Best practices for managing change can help in deciding how to deploy a new solution in a way that mitigates risk of failure.
The challenge of sustaining and deploying solutions in the face of change are not new. They have existed over the millenia beginning with early models to forecast grain production and estimate taxes owed to the ruler - see Stressed About Taxes? Blame the Ancient Egyptians.
While the challenges are old, they are growing more complex. Fortunately there are constantly evolving methods and tools for easing the challenge of managing change for sustaining and deploying data science solutions.
18.2.2 Some Best Practices for Developing Sustainable Solutions
These notes and other sources have already emphasized several best practices for developing sustainable solutions. These include:
- Use literate programming for analysis e.g., with Quarto so you can document your actions and results as your proceed.
- Use relative paths and set seeds for code invoking random processes.
- Separate raw data from clean and transformed data and use R scripts to convert raw data to cleaned data.
- Develop code in accordance with a style guide, e.g., The Tidyverse Style Guide (Wickham 2021) so your code is easier to read, debug, understand, and maintain.
- Use tools such as in the {styler} package or {lintr} package to assess and correct your code to follow a style guide.
- Add comments to the code for custom scripts, apps, or functions to explain complex actions.
- Document custom functions with {roxygen2} package comments and examples to improve understanding of how to use the functions.
- Use Git (with branches) to manage versions of the code, documents, and data.
- Use GitHub to manage Git Repositories in the cloud to facilitate collaboration and sharing.
These best practices can help in sustaining and deploying solutions. However, the larger and more complex the solution and the longer it is required to operate, there are many other challenges these do not address.
Fortunately, there are other methods and tools that have been developed for sustaining and deploying large-scale solutions quickly, and at lower risk over time.
Machine Learning Operations (MLOps) is a framework for sustainment and deployment that has grown in popularity with data scientists.
18.2.3 A Machine Learning Operations (MLOps) Framework
The Machine Learning Operations (MLOps) framework covers the evolution and integration of best practices, methods, and tools from the multiple fields including data management, modeling and analysis, and computer software engineering.
The purpose for the framework is to identify and organize methods and tools for managing change at low-risk and low-cost and enabling rapid and continuous deployment for the uses cases on the many-developers-long-duration end of the spectrum.
Figure 18.1 provides one example of an MLOps workflow with three main areas of effort:
- The Data Pipeline: Managing changes in the state of the input data and the output data as well as the metadata describing the data.
- The Modeling/Analysis or ML Pipeline: Managing changes in the modeling approach and all the parameters used in building the model/analysis and the hyper-parameters used to tune the model.
- The Software Code Pipeline: Managing changes in the versions of software across a pipeline from individual developer through integration testing across developers and eventually on to deployment into production
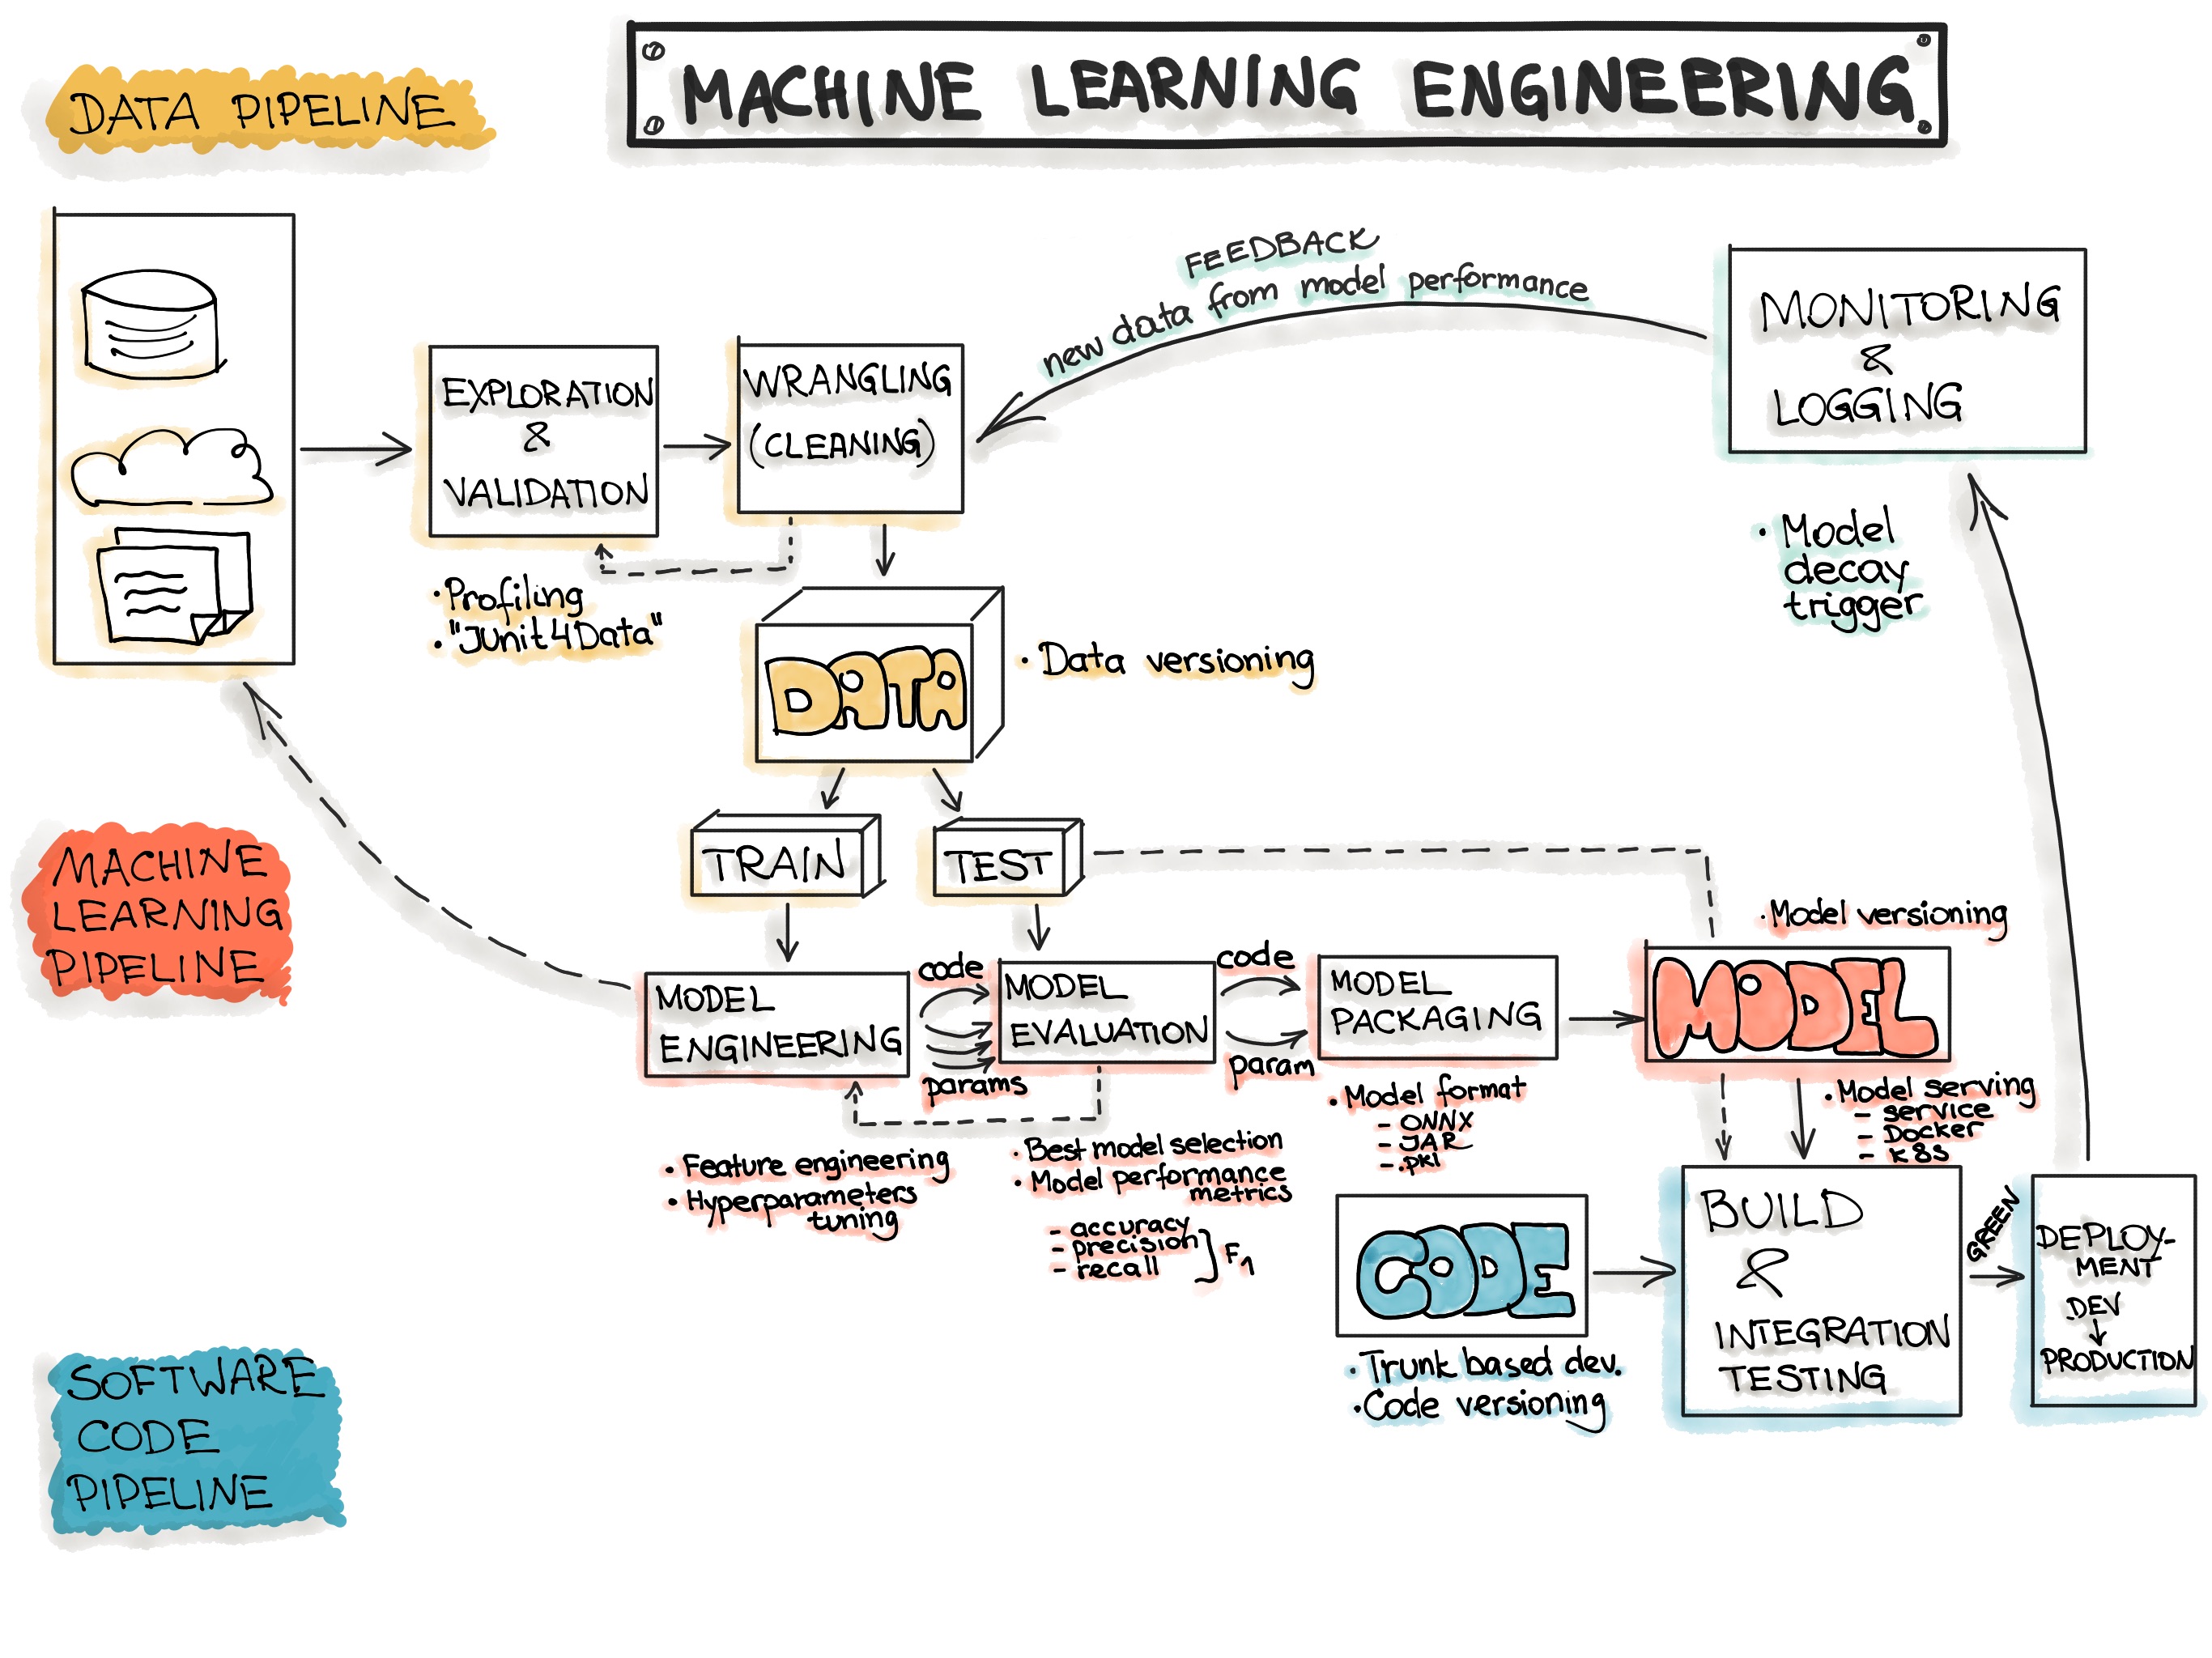
Even if you are not all the way on the large-and-long end of the spectrum or using machine learning, there are methods and tools to help you manage change for your solution. You already have experienced the best practices mentioned in Section 18.2.2.
For large-scale solutions, there are many more tools for managing change across the MLOps pipelines as described in Haviv and Gift (2023).
The software engineering community commonly uses the terms “Continuous Integration / Continuous Delivery/Deployment (CI/CD)” to describe the methods and tools for managing the software pipeline.
18.2.4 Continuous Integration / Continuous Delivery/Deployment (CI/CD) for Sustaining and Deploying Software
Continuous Integration /Continuous Delivery/Deployment (CI/CD) is a set of methods and tools developed in response to the increasing scale of software solutions, especially those that that are operating 24/7 in “production” environments.
The goal is to improve delivery of successful outcomes by balancing the risks of small mistakes found quickly with larger mistakes found later in larger builds when the cost of changing the software is higher.
CI/CD can be considered a full expression of the concept of build-a-little/test-a-little on a large scale fully-supported by automated tools.
Continuous Integration (CI) refers to the practice of integrating small changes in software into larger builds on a daily (or more frequent) basis to reduce risks and costs in debugging and operations.
- CI methods often incorporate software tools for automated evaluation and testing of software.
- Evaluation may include checking if the software is in accordance with established style guides, naming conventions or other constraints on the structure of the code.
- Testing may include checking new functionality with pre-coded tests for compliance and meeting expected results.
- Testing usually includes checking whether pre-existing functionality remains operational, so-called regression testing.
- CI evaluation and testing may occur with every commit, or even prior to a commit in what is known as pre-commit checks.
Continuous Delivery refers to the practice of updating the complete set of software on a frequent basis, often daily, to create what are known as daily builds. Daily builds ensure the results of continuous integration are available for production-level testing quickly to lower risk and allow for broader detection of errors.
You can see the RStudio Daily builds at Latest Builds.
CD methods also incorporate software tools for automated evaluation and testing of software in what is known as the deployment pipeline.
Continuous Deployment (CD) refers to the practice of moving daily builds into the production version of the software on a frequent basis, possibly daily. The goal is to get the maximum number of people using the software to identify any bugs as quickly as possible.
- This is usually reserved for low-risk software applications where the costs of a software failure are low.
- CD methods also incorporate software tools for automated evaluation and testing of software as checks prior to getting into the deployment phase.
The CI/CD pipeline often starts with attempting to make a commit using Git and then pushing to GitHub (or other version control system (VCS)) where automated tools begin the testing and review process. Depending upon the organization, concepts such as pull requests and bug reports engage humans in the loop to mitigate risk.
18.2.5 An Example MLOps Pipeline
The remaining sections in this chapter will walk through an example of building an MLOps pipeline for an R Shiny app.
The example will focus on the software pipeline activities and tools.
- Managing change in the R software environment
- Using Hooks and/or GitHub Actions to assess code
- Creating reproducible containers with Docker
- Deploying Docker Containers to Amazon Web Services (AWS)
- Using GitHub actions to automatically create and deploy Docker containers to AWS
These steps are common to many types of solutions but the example uses an R Shiny app due to availability in the course.
18.3 Managing Change in the R Software Environment
18.3.1 The R Software Environment
Creating solutions using R (or any language) requires software other than R because higher-level languages depend on the computer operating system (e.g., Unix, MacOS, or Windows OS) .
- R needs the operating system to perform basic administrative tasks such as managing access to the computer, handling interactions with the hardware and internet, and managing files.
- If the version of the operating system changes, it can affect the operation of R.
R is a language designed for combining “packages,” self-contained bundles of code/data designed to perform specific tasks.
- The language has standards for ensuring packages can be easily combined to work well with each other. There are standards for identifying conflicts among packages and resolving them. This “built-in” support for inter-operable packages is a significant advantage of R over other computer languages.
The Comprehensive R Archive Network (CRAN) is the primary “Repository” for R and its packages and performs rigorous testing to ensure packages meet and continue to meets the standards for interoperability and security.
- CRAN has over 21,000 available packages.
- There are also many packages available on other repositories or via GitHub that have not been submitted to CRAN or passed its testing yet (which can take a while).
The CRAN R Distribution comes with 14 “add-on packages” plus 15 recommended packages which are included in all of their binary distributions of R.
- When “base R” is started on a computer, (depending upon the version) it may automatically load and attach the base package plus 7 others (methods, utils, datasets, grDevices, graphics, stats, and tools).
- Since the other packages in the base R distribution are already installed, their contents can be accessed directly with
::or the package can be loaded and attached usinglibrary()as required.
- Since the other packages in the base R distribution are already installed, their contents can be accessed directly with
While the packages may be self contained, they usually use capabilities from other packages which is referred to as “taking a dependency” on another package.
- The R standards require that packages “declare” their dependencies on all the packages they use.
- While many packages try to minimize dependencies (to reduce how many packages a user has to have installed), there is an inherent trade off between duplication of code and taking a dependency (see It depends - A dialog about dependencies).
Finally, while many packages are distributed as already compiled binary code, if you want to compile directly from source code, you will need to ensure you have installed the necessary tools and libraries to compile the source code for your operating system. See How to Install an R Package from Source? for some ideas.
The R software environment for a solution depends upon multiple pieces of software including the operating system, Base R installation, any packages that are required, and, perhaps, the software tools needed for compiling the packages.
- All of this software is built by different organizations and has different releases and versions.
Keeping track of all the versions of software, OS, packages, and their dependencies is necessary for creating a reproducible software environment for a solution.
18.3.2 Use the {renv} Package to Create Reproducible Environments
The {renv} package helps users “create reproducible environments” for an RStudio Project (which is also a Git repository).
- The {renv} package is a complete update of an older package called {packrat} which may still be in use or referenced.
The {renv} package has functions to identify all the packages and dependencies used in your project and create a record of them and their versions. It also has functions to recreate the project environment and update the environment and history as you install more packages or new versions of them.
When working with {renv}, be sure to interpret the words Repository and Library within the correct context of managing packages.
- A “repository” is source from which to install packages e.g., CRAN is a package repository.
- A “library” is a directory on your computer where packages from a repository are installed.
Using {renv} with a project will create a private library for that project.
The overall {renv} workflow is shown in Figure 18.2 from the package website. (Wickham and Ushey 2024)
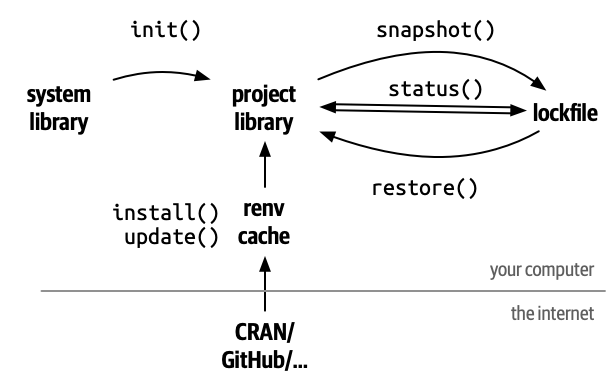
The user uses
renv::init()to extract packages and versions from the existing R system library to create a project specific library.The user then uses the
snapshot()function to create a “lockfile” which stores the package and version information.The user can query
status, update thesnapshot()as packages are updated or removed,restore()the library to the versions of packages in the lockfile,install()new packages orupdate()all packages.The following references offer more details:
18.3.3 Prepare an RStudio Project for Using {renv}
This section assumes the following:
- The user has an R Shiny app that works.
- You can create a new app at the top level of your course directory so it is Not inside a RStudio Project or Git Repository.
- You can use the default Old Faithful app for this example.
Take steps to ensure the Shiny App is in its own RStudio Project, is managed as a Git repository, and has a corresponding remote repository on GitHub for which you have write privileges.
To ensure they have full administrative privileges for their shiny app project, students with a shiny app in a GitHub classroom organization may want to copy that app (and any required files) to a new folder not in a current RStudio Project/Git repository.
Then create a new RStudio project and Git repository for the new folder.
Finally, create a new remote repository for their project under their personal organization on GitHub and connect the local repo to the new repo on GitHub.
- Ensure you have latest version of R and all packages needed for the package and the app still works.
- Use
R.versionand compare to the CRAN Current release. - Use the Packages pane in RStudio to update all packages.
- Remove any unnecessary code or other apps from the project. This includes removing any unused packages that may be loaded in the app but not used.
- Confirm your app still works.
You should now have a clean project ready for {renv}.
18.3.4 Create a New Project Library with {renv}
Every {renv} project library is just for a single repository/project.
Ensure you have the latest version of {renv}.
Use the console to enter {renv} functions for the remainder of this chapter.
- Use
renv::init()in the console to create a new “library” of packages specific to your project.
- You should get a response “The following package(s) will be updated in the lockfile:..” followed by a list of packages.
- Run
renv::status()to check.
- You should get a response: “No issues found – the project is in a consistent state.”
- You should now have a
renvfolder and arenv.locklock file in the repo. - Add, commit, and push to GitHub.
The renv folder is where {renv} maintains the project library.
- The content of these folders and files are updated by {renv} functions and you should not edit them.
- The
renv/libraryfolder has sub-folders for the platform operating system, the version of R, the operating system version, and clones of the repositories for individual packages, e.g.,renv/library/macos/R-4.4/aarch64-apple-darwin20/dplyrfor the {dplyr} package. - The
renv.lockfile is a JSON-formatted file with information on the version of R and its source repositories and then for each package, it has the following data.- Package: name, e.g., “dplyr”.
- Version: version number, e.g., “1.1.4”.
- Source: the type of source from where it was installed, typically “Repository”.
- Repository: which repository, e.g., CRAN or RSPM (now the Posit Package Manager).
- Requirements: A listing of the names of other packages for which this package takes a dependency.
- Hash: a unique identifier for the package version, e.g., “fedd9d00c2944ff00a0e2696ccf048ec”.
- Package: name, e.g., “dplyr”.
Figure 18.3 shows an extract from a sample project lock.file where you can see the elements for a few packages.
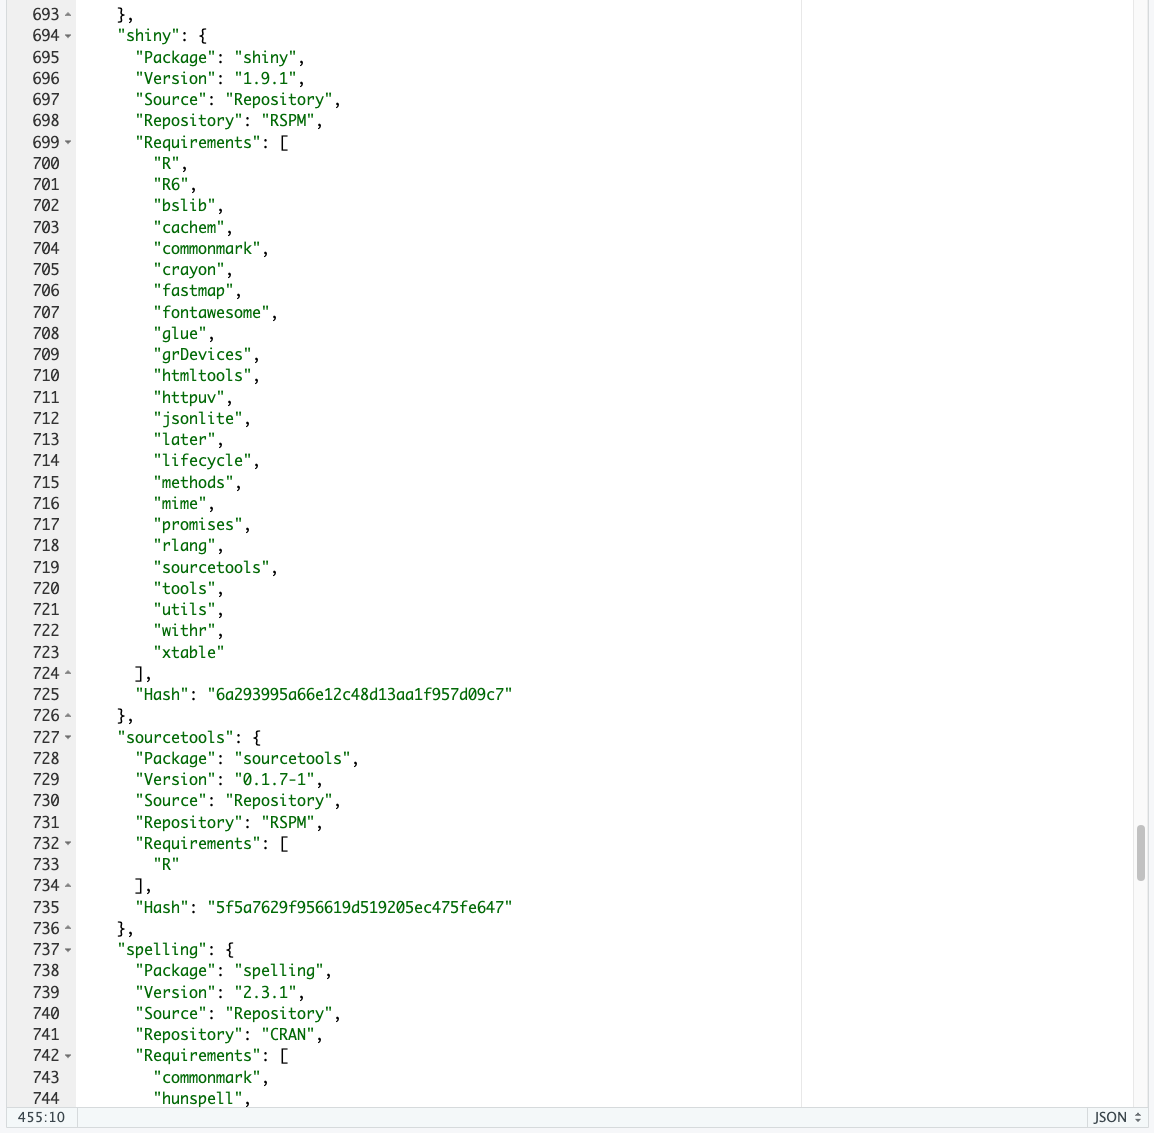
You can expect to see far more packages in the renv.lock than you have loaded and attached in your R Shiny app due to the presence of the Base R add-on and recommended packages as well as all the dependencies.
- As an example, Figure 18.3 shows the {shiny} package version 11.1 has Depends, Imports and Suggests sections with 22 “Imports”, many of which has minimum version requirement””
- “utils”, “grDevices”, “httpuv (>= 1.5.2)”, “mime (>= 0.3)”, “jsonlite (>= 0.9.16)”, “xtable”, “fontawesome (>= 0.4.0)”, “htmltools (>= 0.5.4)”,
- “R6 (>= 2.0)”, “sourcetools”, “later (>= 1.0.0)”, “promises (>= 1.3.2)”, “tools”, “cli”, “rlang (>= 0.4.10)”, “fastmap (>= 1.1.1)”, “withr”,
- “commonmark (>= 1.7)”, “glue (>= 1.3.2)”, “bslib (>= 0.6.0)”, “cachem (>= 1.1.0)”, and “lifecycle (>= 0.2.0)”.
You can now continue to work on your app and update the packages or install new packages as necessary (with renv::install()).
To maintain your library, consider the following actions.
- Run the
renv::status()function regularly to see if you should update the snapshot of your packages. If so, runrenv::snapshot(). - Use
renv::update()to quickly update all the packages in your project library to newer versions (if they exist). - If you update the {renv} package, use
renv::record("renv@new_version_number")to record the update. - Use
renv::dependencies()to return a data frame with the path/names of files in your project that userequire()orlibrary()and the packages required by each file.
If you want to update the version of R used by your project, you can do that as usual and then use renv::update() to quickly update all the packages in your project library to the new version.
By design, if you update your version of R in other projects or overall, the projects with private libraries managed by {renv} are not automatically updated.
You can choose to update the {renv} projects, test your code still works, and then choose to use snapshot() to update your project renv.lock file with the new versions.
Once you have your project library updated, be sure to add, commit, and push to GitHub as usual.
The information in the renv.lock file and the renv directory can now be used with restore() to reproduce the latest project environment at any time.
18.3.5 {renv}, Version Control, and the project .gitignore File
{renv} is designed to work efficiently with Git by avoiding the need to push large package libraries to your repository.
When you initialize {renv}, it automatically creates a .gitignore file under the /renv directory to exclude the package libraries while keeping the essential files.
the /renv/.gitignore file contents may include:
- This ensures necessary files get committed to Git:
renv.lock✅ (small JSON file with package versions)renv/activate.R✅ (small activation script)renv/settings.dcf✅ (project settings)
- And the package files get ignored:
renv/library/❌ (large package installations)renv/staging/❌ (temporary files)
This means your Git repository stays lightweight while maintaining full reproducibility. When someone clones your project, they can simply run renv::restore() to rebuild the library locally.
18.4 Using {renv} Also Simplifies R Version Updates
When you update to a major version of R e.g., from R 4.3 to R 4.4, {renv} makes package updating significantly easier compared to traditional R package management.
18.4.1 The Traditional R Package Update Problem
When you update R without {renv}:
- All packages disappear since R installs to a new library path, e.g., from
/R/4.3/libraryto/R/4.4/library. - You have to manually re-install every package necessary for the project which can take a while.
- Older projects may not work with newer package versions if they have breaking changes.
18.4.2 How {renv} Solves This
With {renv} the process becomes much more manageable with these key improvements:
18.4.2.1 1. Automatic Package Discovery
After updating R, simply run:
{renv} already knows exactly which packages you need because they’re recorded in the renv.lock file.
18.4.2.2 2. Intelligent Version Resolution
- {renv} finds the best compatible versions for the new R version
- It maintains package compatibility relationships automatically.
18.4.2.3 3. Project Isolation Continues
- Each project maintains its own environment
- Project A: Still uses packages compatible with its needs
- Project B: Can update to newer packages independently
18.4.2.4 4. Controlled Updates
- You choose when to update each project.
- Other projects remain unchanged until you decide to update them.
18.4.2.5 5. Easy Rollback
If something breaks after the R update, go back to previous state
18.4.3 Recommended Workflow
After a major R release that you want to use:
- Update R.
- Open each project individually.
- Check status:
renv::status(). - Update packages:
renv::update(). - Test your app/analysis.
- Lock changes:
renv::snapshot(). - Commit to Git.
This ensures you never lose track of your package environment and can confidently update R knowing your projects will continue to work.
By design, if you update your version of R overall or in other projects, any projects with their own private libraries managed by {renv} are not automatically updated.
You can choose to update the {renv} projects, test your code still works, and then choose to use renv::snapshot() to update your project renv.lock file with the new versions.
Using {renv} to manage one or more projects allows you to update R knowing your projects will continue to work or can be easily restored if they don’t.
18.4.4 Best Practices for Using {renv}
- Always use the console for
{renv}commands. - Run
renv::status()regularly to stay informed. - Commit and push changes to GitHub after updates.
- Test your app after major package updates.
- Keep projects clean by removing unused packages and code.
- Document dependencies in your README or comments.
The goal of
{renv}is reproducibility. Anyone should be able to clone your project and recreate your exact R environment usingrenv::restore().
18.5 Using Hooks to Assess Code
A hook in the software engineering world is a general term for a software script that listens for interactions between software components or processes and if triggered, interrupts that process to perform some action.
In the CI/CD pipeline, the term “hook” usually refers to code that runs at different steps in the development-to-deploy process that performs automated checks before allowing the original process, e.g., a Git commit, or Git push, to proceed.
18.5.1 Git Hooks
Section 2.4 discussed how to use Git for version control of documents and code.
Section 9.1 discussed how to use Git branches to mitigate risk to the production or main branch when developing or revising code.
Git also has capabilities to help with assessing code.
Git Hooks are shell scripts a user can configure to run based on “trigger” events during a Git workflow.
- During installation, Git installs 14 sample hook scripts in the normally-hidden
.git/hooksdirectory (so you have to show hidden files to see it). - Users can configure these scripts and rename them to remove the
.sampleoff the end to have them work. - Users can also write new hook scripts or customize ones from other sources and put them in in the
/git/hooksdirectory. - The sample scripts cover actions at multiple steps in the Git workflow.
As an example, the “pre-commit” script triggers when you start a commit action.
- It can runs a number of checks to assess if the code meets specific standards.
- It can be configured to check if files are named correctly, the code is syntactically correct, the code has no open
browser()statements, the code conforms to a style guide, and the files have no spelling errors. - If the code fails any of the checks, the script can be configured to issue a warning or terminate the commit and restore the repository to the original configuration before the commit was attempted.
A challenge with the default hook scripts in Git is they have to be manually created and shared across projects. They also require expertise in writing shell scripts.
Since pre-commit hooks are so common, a team developed an open source set of code called “The pre-commit framework” to ease the development, sharing and management of hook files for pre-commit actions.
18.5.2 The Pre-Commit Framework
The pre-commit framework is designed to ease the use of pre-commit (and other) hooks across projects and teams.
- The pre-commit framework works for many programming languages including R and Python.
- With R, it is designed to work with repos that have an
renv.lockfile.
- With R, it is designed to work with repos that have an
- The pre-commit framework also works across platforms, e.g., Windows, Mac, and Linux.
The framework allows a user to select from many pre-written hooks (regardless of their language). This enables users to focus on using hooks, not writing them.
- The framework uses a YAML file to configure the hooks for a project environment so it can use multiple hooks at one time without having to edit them into one script.
- The YAML file can be version controlled and used over and over across projects and deployed across teams.
18.5.2.1 Install the Pre-commit Framework
Use the appropriate following command in the terminal to install the pre-commit framework on your computer.
pip3 install pre-commit --user(macOS, Linux and Windows) outside a conda or virtual environment.brew install pre-commit(macOS).- If you use homebrew, you may need to add the following to the .Rprofile file in the repo
options(precommit.executable = "/opt/homebrew/bin/pre-commit")so R can find it in the path. - This will create a
pre-commitscript in your.git/hooksdirectory.
You can now install and use the framework with any Git-managed repository on your computer.
R users can use the {precommit} R package to simplify configuring and using the pre-commit framework capabilities.
18.6 The {precommit} R Package
This section assumes:
- The user has created an R Shiny app in its own RStudio project that is also a Git repository.
- The user has established a remote repository for the shiny app project on GitHub.
- The user is managing the environment for the shiny app using {renv} in a local repository.
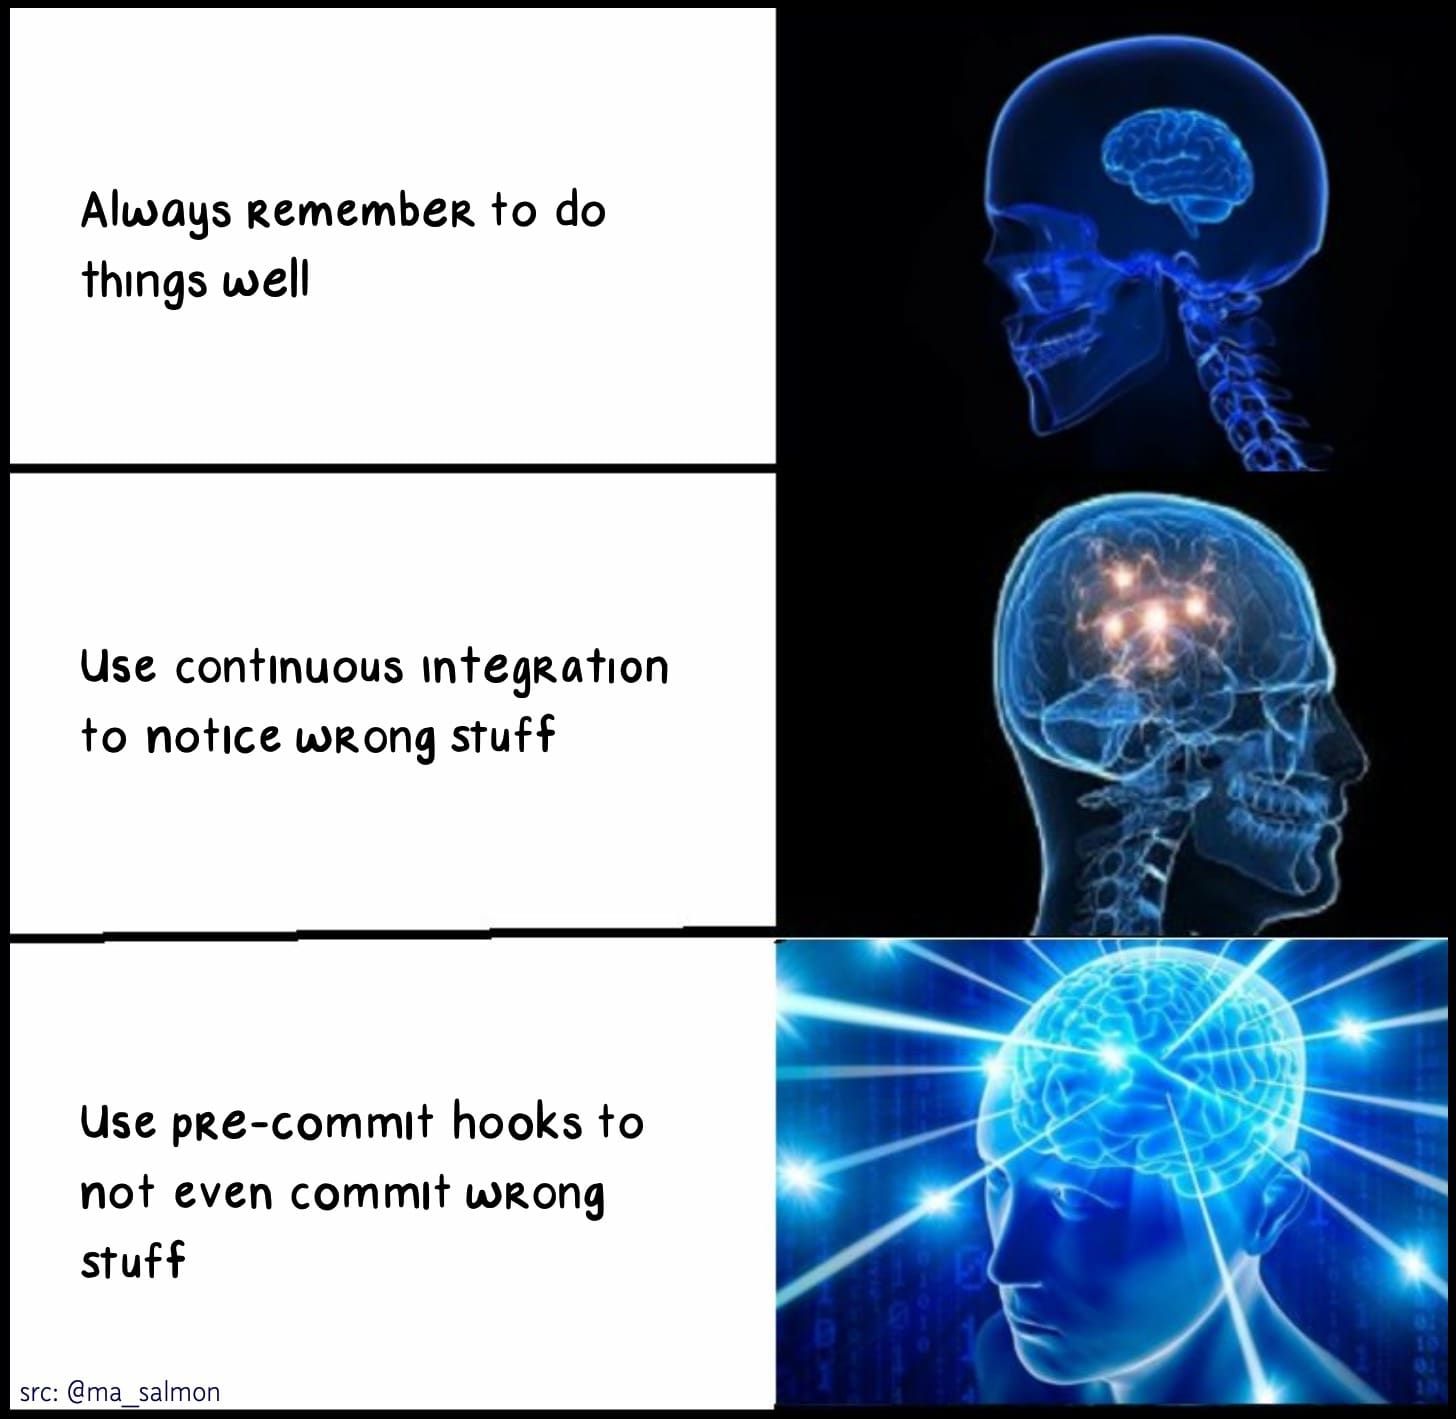
The {precommit} package makes using the the pre-commit framework much easier to help you produce more consistent, reliable, and reproducible code even when, as R user Maëlle Salmon (Maelle Salmon n.d.) suggests in her picture to the right, there is no expectation of deploying the solution.
- With {precommit} you can run hooks locally or in the cloud as part of a continuous development pipeline.
- The {precommit} package requires the pre-commit framework software to be installed. Section 18.5.2.1
The package enables R programmers to use the pre-commit framework in a way that is customized for R and adds features such as auto updates of hooks from other repos.
18.6.1 Installing the {precommit} Package in a Project’s {renv} Library
- Open the RStudio project of interest and ensure the console working directory is the top level of the repo.
- Use the console to install the {rstudioapi} package,
renv::install("rstudioapi), so {precommit} can use it. - Enter
renv::install("precommit")in the console to add {precommit} to the library for the project.
- This will install the package in the appropriate project {renv} location.
- Use
renv::status()andrenv::snapshot()to ensure the library and thelock.fileare consistent.
18.6.2 Using the {precommit} Package for a Project
To use {precommit} in a project repository you must initialize it.
Use the console to enter precommit::use_precommit().
- You should get a message “Sign in with GitHub to authenticate https://pre-commit.ci and then come back to complete the set-up process.”
- It should open a browser window to pre-commit.ci to ask if you want to use the framework on GitHub.
- If so, it will ask you to log in to GitHUb to authorize it.
- You may need to select your organization and then the GitHub repo for your app project.
- See pre-commit.ci Documentation for more information on the GitHub aspects.
The precommit::use_precommit() process creates a hidden file in the project root directory called .pre-commit-config.yaml and it opens the file for review and editing.
- You may need to refresh your Files pane in RStudio and show hidden files to see it.
The .pre-commit-config.yaml file contains a default set of hooks based on whether the repository is designed to build an R package or not.
- If you have an existing version of
.pre-commit-config.yamlyou want to use, you can replace the default with it.- Configuration managing the “
.pre-commit-config.yamlin its own repository is good practice when you want use it as a template for other repositories.
- Configuration managing the “
18.6.3 The .pre-commit-config.yaml File
Once the .pre-commit-config.yaml file is created, Git will run all the hooks in the file for each commit process initiated in either the terminal pane or the RStudio Git pane.
- If a hook fails, it may terminate the commit process or it may issue a warning and allow the commit to proceed to completion.
- You edit the
.pre-commit-config.yamlfile to delete, add, or adjust the hooks to be used during the commit process.
There are many possible hooks for R, Python, or other languages.
- {precommit} provides others in addition to the default - see Available Hooks.
- The pre-commit framework has hooks that are language specific as well as language agnostic and identifies possible repos - see Suported hooks.
- You can even create your own - see Creating new hooks.
Hooks operate on the files that have been staged for a commit.
Hooks can have different outcomes.
- Some hooks just read the files.
- Some hooks edit or adjust the files to correct errors, e.g., styler or roxygenize.
- If it does change the file, the hook will fail, but given the file is now correct, just stage the changes and try to commit again.
- Some hooks will fail without changing the files you want to commit, e.g., the lintr hook
- You need to make manual changes for the hook to pass on the next attempt.
- Other hooks will create or edit new files with information, e.g., spell-check.
- Some hooks just issue warnings or you can configure to only issue warnings instead of fail, e.g., lintr.
Finally, many hooks are designed to be used when building R packages. They expect to see files or directories that may not exist in a non-package repo. You can adjust them or not use them.
You do not have to wait for a commit to run a hook - see pre-commit Usage.
To test a hook, use the terminal to run one of the following:
- To check all files, use
pre-commit run --all-files. You can add the argument--verboseto see more output,pre-commit run --all-files --verbose - To run individual hooks use
pre-commit run <hook_id>.
This can be useful for checking your files and correcting them prior to running a commit.
You do not have to run all the hooks with every commit.
- To never run them, delete them from the file or put a comment
#in front of theidto preserve the indentation. - Use the pre-commit
SKIPcommand in the terminal and identify a vector of hookids to skip, e.g.,SKIP=flake8 git commit -m "foo". - You can avoid running all the pre-commit hooks by using the argument
--no-verifyin your push command, e.g.,git commit --no-verify -m "Your commit message". - You can delete or rename the
.pre-commit-config.yamlfile to stop running all checks.
18.6.4 Interpreting a .pre-commit-config.yaml File
The default file for a non-package repository contains 11 hooks as seen in Listing 18.1.
- Note: you do not use the code chunk syntax ```
{yaml}in the actual file, just plain text below it.
The file uses the following attributes to clearly specify the hooks:
- repo: the url for one or more hooks to follow
- version: the version of the hooks
- hooks: the list of specific hooks by
id: name and their modifiers, e.g.,argsand /orexcludestatements to except types of files. There are other possible modifiers as well in the pre-commit framework.- Each id is a separate hook that will run.
- See Available Hooks for details on the hooks or check the source code at https://github.com/lorenzwalthert/precommit.
- You can see the GitHub repos where you can see details/source code for hooks.
The hooks are ordered such that hooks that write to files are before hooks that just read the files, e.g, style-files should be before lintr.
```{yaml}
# All available hooks: https://pre-commit.com/hooks.html
# R specific hooks: https://github.com/lorenzwalthert/precommit
repos:
-   repo: https://github.com/lorenzwalthert/precommit                     # <1.>
    rev: v0.4.3.9017.                                                     # <2.>
    hooks:
    -   id: style-files                                                   # <3.>
        args: [--style_pkg=styler, --style_fun=tidyverse_style]           # <4.>
    -   id: spell-check                                                   # <5.>
        exclude: >                                                        # <6.>
          (?x)^(                                                          # <7.>
          .*\.[rR]|
          .*\.feather|
          .*\.jpeg|
          .*\.pdf|
          .*\.png|
          .*\.py|
          .*\.RData|
          .*\.rds|
          .*\.Rds|
          .*\.Rproj|
          .*\.sh|
          (.*/|)\.gitignore|                                              # <8.>
          (.*/|)\.gitlab-ci\.yml|
          (.*/|)\.lintr|
          (.*/|)\.pre-commit-.*|
          (.*/|)\.Rbuildignore|
          (.*/|)\.Renviron|
          (.*/|)\.Rprofile|
          (.*/|)\.travis\.yml|
          (.*/|)appveyor\.yml|
          (.*/|)NAMESPACE|
          (.*/|)renv/settings\.dcf|
          (.*/|)renv\.lock|
          (.*/|)WORDLIST|
          \.github/workflows/.*|
          data/.*|
          )$.
    -   id: lintr                                                         # <9.>
    -   id: readme-rmd-rendered                                          # <10.>
    -   id: parsable-R                                                   # <11.>
    -   id: no-browser-statement                                         # <12.>
    -   id: no-debug-statement                                           # <13.>
-   repo: https://github.com/pre-commit/pre-commit-hooks                 # <14.>
    rev: v6.0.0                                                          # <15.>
    hooks:
    -   id: check-added-large-files                                      # <16.>
        args: ['--maxkb=200']
    -   id: end-of-file-fixer                                            # <17.>
        exclude: '\.Rd'
-   repo: https://github.com/pre-commit-ci/pre-commit-ci-config          # <18.>
    rev: v1.6.1
    hooks:
    # Only required when https://pre-commit.ci is used for config validation
    -   id: check-pre-commit-ci-config
-   repo: local                                                          # <19.>
    hooks:
    -   id: forbid-to-commit                                             # <20.>
        name: Don't commit common R artifacts
        entry: Cannot commit .Rhistory, .RData, .Rds or .rds.
        language: fail
        files: '\.(Rhistory|RData|Rds|rds)$'                             # <21.>
        # `exclude: <regex>` to allow committing specific files          # <22.>

ci:
    autoupdate_schedule: monthly                                         # <23.>

```- The repo URL for the next set of hooks that follow. This repo is curated by the {precommit} package developer/
- The version of the repo hooks.
- ID for the style-files hook to check code style.
- Arguments for style-files to use the {styler} package and tidyverse style format.
- ID for the spell-check hook to check the spelling of text in files. The default is to use the {spelling} package.
- The excludes statement. This uses a single REGEX statement to describe which files and paths should not be spell-checked.
- The beginning of the REGEX to turn off Case sensitivity so the remainder is case insensitive. Note the regex does not need to escape the
\in front fo the.to indicate the actual period in front of the file extension. - A sample REGEX to indicate with
(.*/|)that any set of characters followed by a ‘/’ to indicate a directory path (must be forward slash not\here) with the empty alternative on the right of the|so the file may be at the root level or below a directory. - ID for the lintr hook to assess for code compliance with best practices. The default is to use the {lintr} package.
- ID for readme-rmd-rendered to ensure README.Rmd hasn’t been edited more recently than README.md.
- ID for the parsable-R hook to checks if the .R and .Rmd files are “valid” R code by checking running
parse(). - ID for the no-browser-statement to check there are no active calls to
browser()in the code. - ID for the no-debug hook to ensure there are no active calls to
debug()in the code. - The repo for the hooks that follow from the pre-commit framework repository.
- The version of the repository
- The ID for the check-added-large-files to prevent the commit of files larger than the following argument.
- The id for the end-of-file-fixer hook to ensure files end in a newline and only a newline.
- The repo for a hook if you want to use the pre-commit.ci capabilities.
- The statement that the repo is “local” and which means the hooks are defined within the file.
- The ID for the forbid-to-commit hook, defined in the following lines, to ensure none of the files with the listed extensions are included in the commit.
- The list of file extensions not permitted by default.
- The exclude statement to all for a regex that excludes selected files from the check so they can be included in a commit.
- This is a feature of {precommit}to schedule monthly automatic updates of hooks in the file that may have changed. You can change the period for the automatic updates.
There is a lot of information in the configuration file. However, depending upon your use case, you may not want to use the defaults.
18.6.5 Configuring the Hooks in a .pre-commit-config.yaml File
Not every hook using the defaults that match one’s use case. There are multiple options to configure some hooks, especially those that use packages such as {styler}, {spelling}, and {lintr}.
18.6.5.1 style-files
You can choose a different style guide that is appropriate to another language.
You can turn off the default behavior of modifying your file with the argument --dry=fail. This will cause it to fail instead and terminate the commit. You then must manually adjust your files to fix the errors and try to commit again.
18.6.5.2 spell-check
This hook uses the {spelling} package to identify any words in the non-excluded files it does not recognize. It shows the words by file and line number.
- It is designed to work with package repositories that have a
instdirectory. It will create aWORDLISTfile in theinstdirectory with any words it does not recognize. - You can edit the
WORDLISTfile to delete any words you believe are incorrect and manually update your files to fix the misspellings (suggest using the RStudioEdit/Find in files /to find and replace all). - To turn off the automatic addition of words use the argument
--read-only.
18.6.5.3 lintr
This hook uses the {lintr} package (see ? linters) to scan code for issues in style or coding constructs that may detract from the sustainability or efficiency of the code. These are commonly called [lint](https://en.wikipedia.org/wiki/Lint_(software%29).
- To change from failing when detecting lint to just identifying the lint with a warning, use the argument
--warn_only. - The 25 default linters are designed to follow the Tidyverse style guide. To see the names of the 25 default linters, use
names(linters_with_defaults())and for more information on them see the help with?default_lintrs. - There are over 90 possible linters - see Using all available linters.
- Many linters have arguments you can use to modify their actions.
- Given the large numbers of linters, there are functions that group linters based on possible uses or “tags” that will include all the linters with the tag in the function.
- Tags include “best practices”, “common mistakes”, “efficiency,” “readability”, “style” and several others. A linter can have more than one tag.
- To see a data frame of available linters and their tags use
lintr::available_linters().- As an example, here are the names of the linters tagged as defaults.
 [1] "assignment_linter"                "brace_linter"
 [3] "commas_linter"                    "commented_code_linter"
 [5] "equals_na_linter"                 "function_left_parentheses_linter"
 [7] "indentation_linter"               "infix_spaces_linter"
 [9] "line_length_linter"               "object_length_linter"
[11] "object_name_linter"               "object_usage_linter"
[13] "paren_body_linter"                "pipe_continuation_linter"
[15] "quotes_linter"                    "return_linter"
[17] "semicolon_linter"                 "seq_linter"
[19] "spaces_inside_linter"             "spaces_left_parentheses_linter"
[21] "T_and_F_symbol_linter"            "trailing_blank_lines_linter"
[23] "trailing_whitespace_linter"       "vector_logic_linter"
[25] "whitespace_linter"
You can create a .lintr file in the root directory to configure which linters you want to use or not use and which arguments to use - see Configuring linters.
The lintr hook will look for this file automatically so it does not have to be an argument. If it does not exist, it just uses the
linters_with_default().Listing 18.2 shows one possible
.lintrfile.- The files are written in Debian Control File format - see
?read.dcf. - This is a simple format for storing database information as plain text.
- The “record” is identified by
linters:and the “fields” are the various linters with their “values” being their arguments. - The
NULLargument disables or turns off the lintr. - Note: Do not use the code chunk syntax ```
{dcf}in the actual file, just plain text below it.
- The files are written in Debian Control File format - see
.lintr file.
- Make a new list of linters based on {lintr}’s default linters (with the following exceptions …).
- Turn this off to allow the use of
->which is common in interactive code chunks. - Turn this off to allow the use of non ROxygen comments in code to help sustainability.
- Turn this off to avoid conflicts between {styler} and {lintr} indentation rules.
- For non-package projects, turn this off to avoid issues with tidy evaluation rules for identifying objects.
- Turn this off to avoid warnings about end of line bank spaces. These are not an issue in R and can be common when using keyboard shortcuts for pipes or styling code to break after commas etc..
- Add this linter to check for any absolute paths in the code which would prevent using the code on other machines.
18.6.6 Updating the .pre-commit-config.yaml File
After choosing the appropriate configuration options, edit the default .pre-commit-config.yaml as appropriate.
Listing 18.3 shows changes made for an example project.
```{yaml}
# All available hooks: https://pre-commit.com/hooks.html
# R specific hooks: https://github.com/lorenzwalthert/precommit
repos:
-   repo: https://github.com/lorenzwalthert/precommit
    rev: v0.4.3.9001
    hooks:
    -   id: style-files
        args: [--style_pkg=styler, --style_fun=tidyverse_style]
    -   id: spell-check
        exclude: >
...                                                         #<1.>
          )$
    -   id: lintr
        args: [--warn_only]                                 #<2.>
        verbose: true
...
-   repo: local
    hooks:
    -   id: forbid-to-commit
        name: Don't commit common R artifacts
        entry: Cannot commit .Rhistory, .RData, .Rds or .rds.
        language: fail
        files: '\.(Rhistory|csv|RData|Rds|rds)$'
        exclude: '(?i)\.Rdata$' # <regex> to allow commit of specific files <3.>
ci:
    autoupdate_schedule: monthly
```- Deleted lines to shorten the file for display - no changes from the default file.
- Add the argument to convert lintr to warning instead of fail.
- Add regex to the
excludestatement to allow the.RDatafiles that are required for this app to run to be committed. You could also just deleteRDatafrom the previousfiles:statement regex.
18.6.7 Using the .pre-commit-config.yaml File
Once the .pre-commit-config.yaml file exists, it will run automatically whenever you start a commit.
However, it is possible to control when it is run and what hooks are run using the methods described in Section 18.6.3.
It is also recommended to manually run one or more hooks to check for errors before trying your commit.
- To check all files use the terminal to run
pre-commit run --all-files --verbose. - To run individual hooks use
pre-commit run <hook_id>. - You can style individual files using {styler} by running the function or using the RStudio addin that should appear after you installed the package.
- You can spell-check individual files using {speller} or the RStudio
Edit/Check spelling, F7. - You can lint individual files using {lintr} or the RStudio addin that should appear after you installed the package.
Once everything is complete and correct, you should get a result that looks like Figure 18.4.
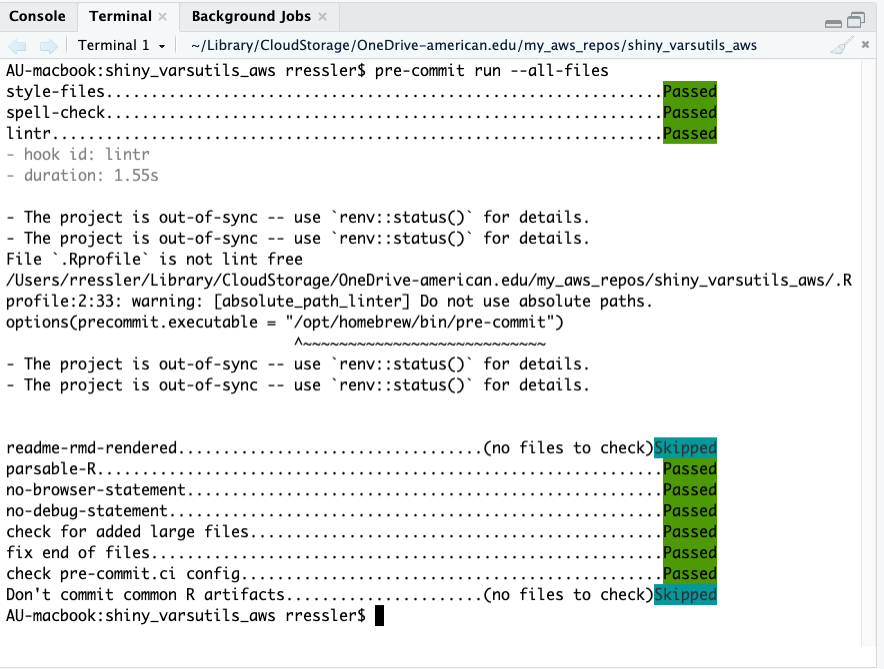
Figure 18.4 shows several results.
- Most hooks passed which is what you want.
- Some hooks were skipped as there were no files in the commit that were relevant to the hook.
- There are warnings under lintr about the project being out of sync. This due to the way {precommit} configures its own version of the environment to run the hooks (which is not the same as your project library). They can be safely ignored.
- If you did not add a
.lintrfile to the directory, you also see the following warning
[object_usage_linter] no visible global function definition for 'renderPlot'
  output$distPlot <- renderPlot({
^~~~~~~~~~- This error is fundamentally about how R’s lazy evaluation, non-standard evaluation (NSE), and package attachment work, which affects many modern R packages including the tidyverse and Shiny. The core issue is the
object_usage_linterperforms static code analysis (it reads your code without executing it) and tries to determine if functions are properly defined/imported. However, R’s dynamic nature creates several scenarios where this fails such here where it does not recognizerenderPlot()is part of the Shiny package. It can be ignored. - If you choose, a quick fix for one or two functions is to use the
::operator. Putshiny::in front ofrenderPlot()to make the connection explicit, save the file, and the warning will go away. - A broader fix is to create the
.lintrfile as in Section 18.6.5.3 and set theobject_usage_linter = NULL.
18.6.8 What if {Precommit} Returns an Error?
The {precommit} package navigates a complex set of relationships among RStudio, the {renv} package, the pre-commit framework, and even your operating system as well as the repos where the hooks are stored.
Issues can arise as each of these elements updates their approaches.
- As an example, you may get the error:
Error in loadNamespace(x) : there is no package called ‘precommit’.- This means the hook script cannot find the package in the environment {precommit} created for running the hooks. It is not about your project environment.
The {precommit} GitHub repo uses the Wiki feature to list common issues not addressed in the FAQ
- The Wiki item What happens under the hood when I install the hooks? gives a brief explanation of how {precommit} creates a copy of itself in the user’s cache (for macs, under
~/.cache/pre-commit/, for windows,C:\Users\<YourUsername>\.cache\pre-commit) and uses that to create its own {renv} environment for running the hooks.- As a result, the warnings about the environment being out of sync are about the {precommit}-created environment and not your project library. You can ignore those warnings.
- The Wiki item Packages are not found after R upgrade describes what to do if you get an error that a package needed for a hook was not found, even though it is in your project
lock.file. - This could be due to the pre-commit cache not being updated with new packages.
- This could include the {precommit} package itself as it uses its own functions in running several hooks to set up the list of relevant input files and arguments.
- The instructions say to delete the cache of pre-commit and recreate it using the following commands in the terminal pane.
pre-commit cleanto delete the pre-commit cache.pre-commit install --install-hooksto re-create the pre-commit cache and install all hooks listed in the.pre-commit-config.yamlfile.
- Once your pre-commit cache is properly re-installed, the hooks should run properly.
If not, review the FAQ and Wiki and if you still have questions, review the issues in {precommit} GitHub Issues. If there is nothing relevant, submit a new issue. Be sure to address the elements listed in the new issue template.
18.6.9 Recap of using the Pre-commit Framework
Once your {renv} status is up to date, install the necessary software and configure the hooks as desired.
- Install pre-commit framework on your system (Section 18.5.2.1) and add pre-commit executable to R path (if using Homebrew).
- Install {precommit} R package. (Section 18.6.1)
- Initialize pre-commit in your project with
precommit::use_precommit(). (Section 18.6.2) - Review the
.pre-commit-config.yamlfile. (Section 18.6.5) - Configure specific tools (optional), e.g., create
.lintrfile for custom linting rules (Section 18.6.5.3) - Update the
precommit::use_precommit()file. (Section 18.6.6) - Test hooks before committing using the terminal with
pre-commit run --all-files --verbose. - Adjust Code or hook configurations to resolve hook failures. (Section 18.6.8)
Once all is working you can now commit with automated checks to help you produce more consistent, reliable, and reproducible code
18.6.10 Summary
Hooks, especially pre-commit hooks, are a valuable capability for automatically assessing your files to improve your efficiency at producing reproducible and sustainable code.
Using the pre-commit framework and the {precommit} package allows you to reuse a wide variety of hooks that have been written by others to improve your code whether as part of a development pipeline, or just as a best practice for developing sustainable solutions.
18.7 Using GitHub Actions to Assess Code
Earlier chapters discussed approaches and benefits of using Git and GitHub for developing sustainable solutions.
- Section 2.6 discussed using GitHub as a cloud-based repository for Git repositories.
- Section 2.7 discussed using GitHub as a means for sharing repositories with others.
- Section 9.1 discussed using Git Branches and GitHub workflows for collaboration on developing solutions.
Section 18.5 discussed how developers can use Git Hooks and the pre-commit framework to incorporate automated mechanisms to assess their code for best practices in style, syntax, coding constructs, spelling, and many other aspects of sustainable development as well as readiness for deployment.
Organizations can distribute standardized .pre-commit-config.yaml files and .lintr files to create a common approach to using hooks across a team of developers and mitigate the risk of “non-standard” solutions being pushed to repositories.
Git and the pre-commit framework can also apply hooks on code that has been pushed to a cloud repository such as GitHub (or similar systems - see Top 10 GitHub Alternatives …).
Organizations that have to integrate code from multiple developers usually want to incorporate automated assessments into their CI/CD pipeline at the cloud repository level, e.g., on GitHub, where all the code comes together.
GitHub has developed its own capabilities to support a wide variety of tasks to include incorporating automation into CI/CD pipelines.
This capability is the GitHub Actions engine.
GitHub and the many other developers of the software used in a CI/CD pipeline are constantly updating their versions. While most changes may be non-breaking, be on the lookout for deprecated code and breaking changes.
Many of the version numbers in the examples that follow may be outdated when you read these notes. Always check the official documentation for the latest stable versions before implementing workflows in production.
Key areas that change frequently:
- Action versions (e.g.,
actions/checkout@v4is nowactions/checkout@v5) - Runner images (e.g., ubuntu-latest now points to Ubuntu 24.04)
- Third-party actions like super-linter
18.7.1 GitHub Actions Overview
GitHub Actions is a continuous integration and continuous delivery (CI/CD) platform that allows you to automate your build, test, and deployment pipeline. You can create workflows that build and test every pull request to your repository, or deploy merged pull requests to production. GitHub (2024b)
A GitHub Action is “a custom application for the GitHub Actions platform that performs a complex but frequently repeated task.”
- A GitHub action can perform many different tasks beyond the CI/CD pipeline as well.
The GitHub Action “custom application” is defined in a YAML text file (e.g., my_workflow.yml) you save in the .github/workflows directory under a project/repository.
The my_workflow.yml file uses syntax defined by the GitHub Actions engine to define a “Workflow” which is an automated series of “Jobs”, each of which may have multiple “Steps.”
- A project can have multiple workflow files defined for different tasks.
- Each step runs a script you define or an existing “Action” as you choose.
- All steps in a job must be capable of operating on the same virtual machine - known as the “runner”
- GitHub provides Linux, Windows, and macOS virtual machines as “runners” to run your workflows (or you can establish them yourself in your own infrastructure).
Each workflow can be initiated by an “Event”, e.g., a Git Push or a Pull, or may be initiated manually, on a schedule, or by other triggers you define - see Events that trigger workflows.
Figure 18.5 shows how these terms connect in a GitHub Action workflow.
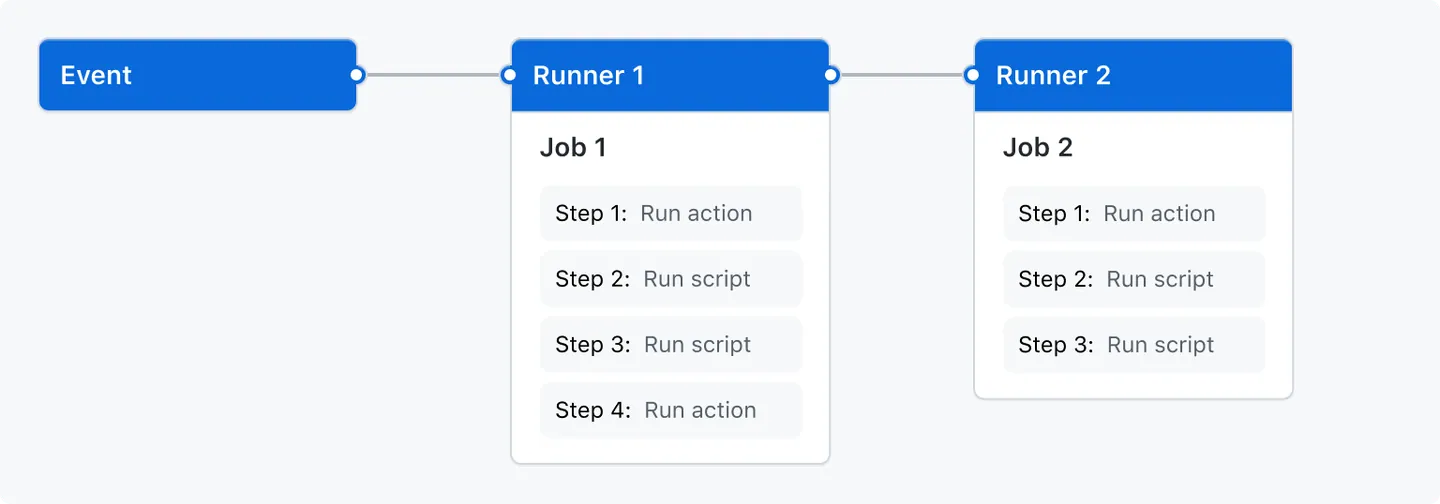
GitHub (2024b)
- Figure 18.5 shows a workflow with two jobs.
- By default the jobs run in parallel.
- If one job depends on the successful completion of another job, you can use a
needs: thisjobstatement to requirethisjobto complete before the other job can start.
GitHub provides many workflow templates you can reuse instead of starting from scratch.
18.7.1.1 Costs for GitHub Actions
There may be a cost for using GitHub Actions - see About billing for GitHub Actions
- GitHub Actions is free for standard GitHub-hosted runners in public repositories.
- For private repositories, each GitHub account receives a certain amount of free minutes and storage for use with GitHub-hosted runners, depending on the account’s plan.
- GitHub Free provides 500MB storage and 2,000 minutes per month.
- Minutes reset monthly while storage does not.
- Jobs that run on Windows and macOS runners that GitHub hosts consume minutes at 2 and 10 times the rate that jobs on Linux runners consume.
- For repositories that may require extensive GitHub Actions minutes or storage, consider making them public.
- For repositories that require actions that are OS-dependent, consider if using emulation will allow them to run on a linux runner.
18.7.2 Creating and Running a GHA Workflow
The goal is to create a sample GHA workflow in a repo that will execute on a push.
- See Creating your first workflow to do it on GitHub.
18.7.2.1 Creating your First Workflow Locally
Navigate to the repo of interest.
- if there is no
.githubdirectory, create a new directory called.githuband add a sub-directory calledworkflows. - Navigate to
/.github/workflows. - Create a new file called
github-actions-demo.yml - Copy the following YAML code into the file and save it.
name: GitHub Actions Demo
run-name: ${{ github.actor }} is testing out GitHub Actions 🚀
on: [push]
jobs:
  Explore-GitHub-Actions:
    runs-on: ubuntu-latest
    steps:
      - run: echo "🎉 The job was automatically triggered by a ${{ github.event_name }} event."
      - run: echo "🐧 This job is now running on a ${{ runner.os }} server hosted by GitHub!"
      - run: echo "🔎 The name of your branch is ${{ github.ref }} and your repository is ${{ github.repository }}."
      - name: Check out repository code
        uses: actions/checkout@v5
      - run: echo "💡 The ${{ github.repository }} repository has been cloned to the runner."
      - run: echo "🖥️ The workflow is now ready to test your code on the runner."
      - name: List files in the repository
        run: |
          ls ${{ github.workspace }}
- run: echo "🍏 This job's status is ${{ job.status }}."- Stage (add), commit, and push it to GitHub.
The git push “triggers” the GitHub action.
18.7.2.2 View the workflow results.
- Go to the GitHub main page of the repo where you created the workflow file and pushed.
- Click on
Actions. - Find the
GitHub Actions Demoon the left side and click on it.
- You can now see the workflow in the main pane. Click on it.
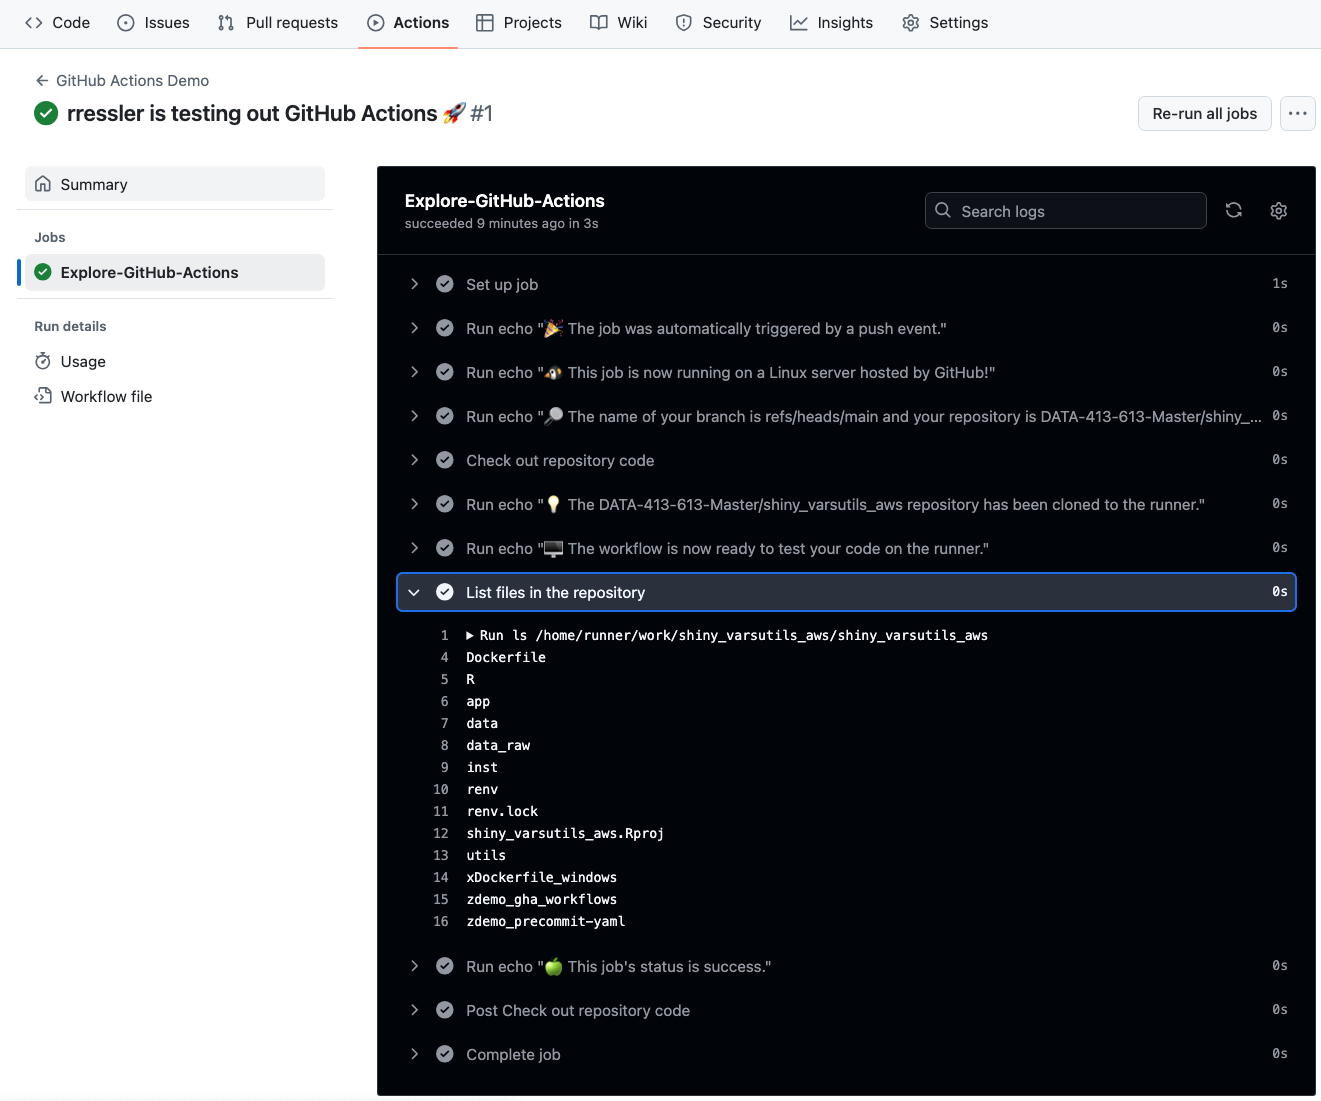
- You can see the status of the workflow run. Click on
Explore GitHub Actionsin either the main panel or the left panel. - You now see the job and the status of each “step” that was run in the job.
- Click on the
List files in the repositorystep and you should see something that looks like Figure 18.6.
18.7.2.3 GitHub Action Workflow YAML
The workflow file in Listing 18.4 includes the minimum elements of a GitHub Action workflow.
- The
name:of the Workflow. - The trigger event as defined by
on:. You can have more than one event, e,g, push or pull. - The
jobs:statement.
- This can include the
job.idof the job. - The
runs-onstatement can be used to define the type of virtual machine on which to run the job.
- The
steps:statement signals the start of the individual steps in the job.
- Each step can have multiple arguments or statements to execute.
- This is a very common step that uses a GitHub-provided action called
checkout@v5(in GitHub’sactionrepository) to check out your code so it can be used by the rest of the job - see the README.md foractions/checkout.
```{yaml}
name: GitHub Actions Demo                                           #<1.>
run-name: ${{ github.actor }} is testing out GitHub Actions
on: [push]                                                          #<2.>
jobs:                                                               #<3.>
  Explore-GitHub-Actions:                                           #<3.a.>
    runs-on: ubuntu-latest                                          #<3.b.>
    steps:                                                          #<4.>
      - run: echo "🎉 The job was automatically triggered by a ${{ github.event_name }} event."
      - run: echo "🐧 This job is now running on a ${{ runner.os }} server hosted by GitHub!"
      - run: echo "🔎 The name of your branch is ${{ github.ref }} and your repository is ${{ github.repository }}."
      - name: Check out repository code                             #<5.>
        uses: actions/checkout@v5                                   #<5.>
      - run: echo "💡 The ${{ github.repository }} repository has been cloned to the runner."
      - run: echo "🖥️ The workflow is now ready to test your code on the runner."
      - name: List files in the repository
        run: |
          ls ${{ github.workspace }}
      - run: echo "🍏 This job's status is ${{ job.status }}."
```
Other common elements include:
uses:identifies a reusable workflow to be executed.with:identifies inputs passed to the workflow.permisions:identifies GitHub secrets to pass to the job to authorize access to resources - see Storing secrets.runs:identifies command line programs to execute using the runners shell environment.
There are many others and each may have additional arguments - see About YAML syntax for workflows.
18.7.2.4 Using GitHub Action Workflow Templates
You could write all your own GitHub Action workflows.
However, GitHub, and others, already offer pre-built workflow templates you can use and revise for your specific use case.
GitHub provides ready-to-use workflow templates for CI and CD as well as automation tasks (administrative) and code scanning for security issues.
- Continuous Integration (CI):
- There are workflows to verify your solution works as expected.
- The job steps build the solution from the code in your repository and run you tests you define.
- Your tests can include code linters, new function tests, regression tests, security checks, and other custom checks.
- Depending upon the results, you can automatically move to a deploy workflow (CD) or require a pull request for a human to review and decide whether to merge the code.
- Deployment (CD).
- When a solution is ready to deploy (could be triggered by a merge event), workflows can handle engaging with the deployment location, e.g, AWS, Azure, or Google Cloud, to manage the deployment.
- This could include ensuring only one deployment at a time as well as handling security requirements such as “secrets.”
18.7.2.5 GitHub’s Starter Actions
GitHub develops and manages its own starter set of workflows and actions.
To see the full list of GitHub-created Actions go to the actions/starter-workflows repository and look under the category (ci, deployments, automation, or code-scanning).
- Start with the README.md
- Under
cithere are.ymlfiles for installing many different languages, including R,r.yml. That can be useful primarily in other workflows where you need to install R to perform a job. - Under
deploymentsthere are cloud vendor/(language)-specific.ymlfiles for deploying to their system, includingaws.yml. This may include specific instructions for how to use the template.
18.7.3 R-Infrastructure (r-lib) Actions in GitHub
The R Infrastructure (r-lib) organization on GitHub provides infrastructure usable by the R community to support the development and distribution of R packages and other types of code, e.g., GitHub Actions for R, to improve the development of R-based solutions.
- The R-Infrastructure GitHub site is separate and distinct from Posit, but the site receives funding from Posit.
- It was founded by Hadley Wickham in 2015 to transition Tidyverse and associated code from a personal organization to a broader community organization which now includes people from Posit.
- The site is a mirror for the Posit-run GitHub organization for the Tidyverse which manages the official versions of the 45 packages designated as Tidyverse packages.
- However, r-lib has over 150 repositories. These include the mirrors of the Tidyverse packages as well as packages to help make R packages and other solutions easier to create and sustain.
- These include: {devtools}, {usethis}, {roxygen2}, {httr2}, and {testthat}.
The R Infrastructure site also has a repository for GitHub Actions for the R language.
- This repository includes actions to support package development or other projects and complete example workflows.
- One of the package-development workflow examples can be copied into into your project with
usethis::use_github_action().- Use
usethis::use_github_action(example_name)to use a specific workflow.
- Use
If you are building a package, consider using these GHA workflows as part of your CI/CD process.
18.7.3.1 GitHub Marketplace Actions
GitHub also offers a Marketplace where users can share Actions or workflows (or sell/buy apps).
Figure 18.7 shows the GitHub Marketplace where you can click on Actions, and choose specific categories to browse.
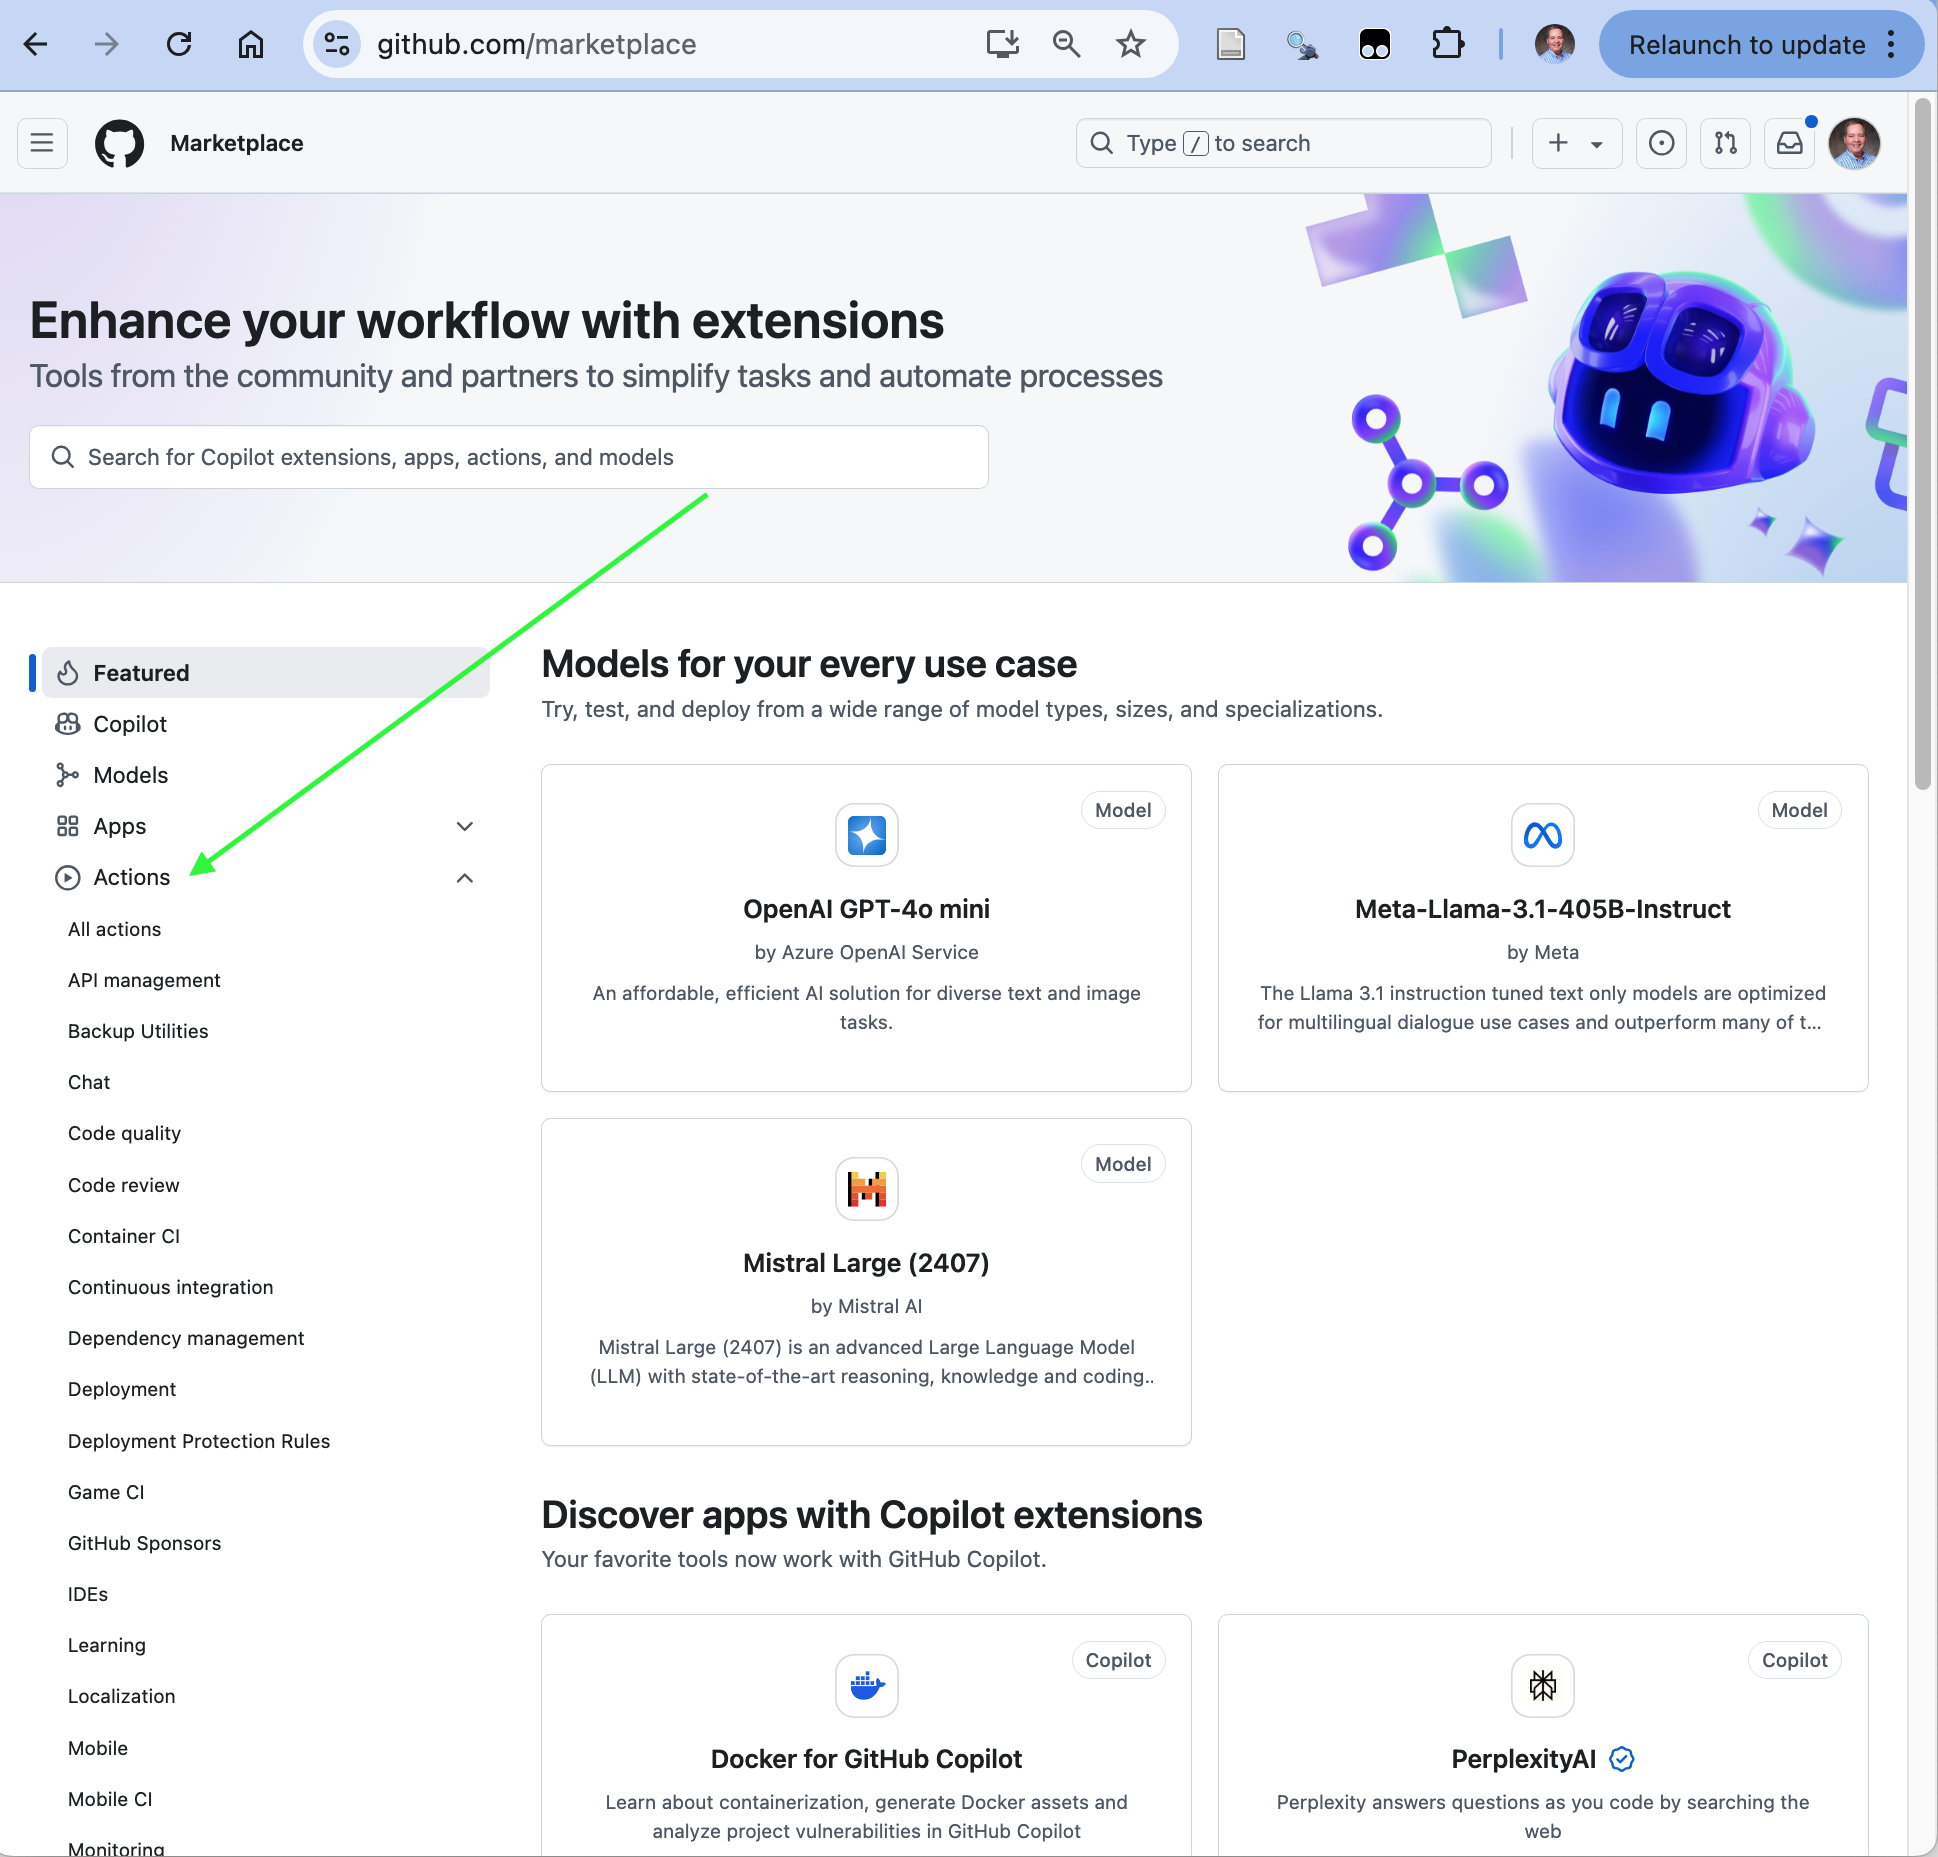
- As an example, under “Code quality” you can find the very popular super-linter action which you can use across multiple languages. For R it uses {lintr}.
GitHub Actions and Workflows can have security vulnerabilities, whether intentional or not, especially when an action involves access to passwords, GitHub secrets, or other credentials.
- GitHub provides a security certification for its created workflows and GitHub may have certified a workflow shared by one of its business partners.
- However, there are additional templates that have not been certified and may contain malicious code.
- For additional information on securing your templates you obtained from other sources consider the following:
- [Security hardening for GitHub Actions](https://docs.github.com/en/actions/security-for-github-actions/security-guides/security-hardening-for-github-actions
- Using GitHub’s security features to secure your use of GitHub Actions
- 7 GitHub Actions Security Best Practices with Checklist (Kurmi 2024)
18.7.4 Use GitHub Actions to Lint files.
Section 18.6.5.3 discussed how to lint the files in a project as part of pre-commit hook to ensure files that were pushed to GitHub did not have any lint.
This is a good practice for individual developers, however, organizations often establish their own standards for linters and want to ensure all merged code is lint free prior to it progressing in a CI/CD pipeline.
- Files could be edited on GitHub in a way that introduces lint.
- Lint may be generated into a branch as a result of merging a file that was not linted or used non-standard lintr configurations.
This section assumes the following:
- The user has created an R Shiny app in its own RStudio project that is also a Git repository
- The user has established a remote repository for the shiny app project on GitHub.
- The user has established a pre-commit hook for the project (optional).
If there is an existing pre-commit-config.yaml file, it can stay.
- For demonstration, add some lint to the
app.Rfile, e.g., deleting a newline/carriage return so a line is greater than 80 characters, e.g., line 45, and save it. - Comment out the three lines for the lintr in the
.pre-commit-config.yamlfile while preserving the indentation and save it. - That will make it clear the warnings are coming from the GitHub action.
18.7.4.1 Using the R Infrastructure Example Workflow.
The first example will use the R Infrastructure example workflow for linting R code files.
18.7.4.1.1 Create the GitHub Action
Go to the project and enter usethis::use_github_action("lint-project") in the console.
- You may have to install {usethis} by entering
renv::install"usethisin the console.
You should see results similar to Listing 18.5.
```{r}
> usethis::use_github_action("lint-project")
✔ Setting active project to "/Users/rressler/Courses/DATA-413-613/demo_deploy_app".
✔ Adding "^\\.github$" to .Rbuildignore.
✔ Adding "*.html" to .github/.gitignore.
✔ Saving "r-lib/actions/examples/lint-project.yaml@v2" to .github/workflows/lint-project.yaml.
☐ Learn more at <https://github.com/r-lib/actions/blob/v2/examples/README.md>.
```
Listing 18.6 shows the .github/workflows/lint-project.yaml that was created.
usethis::use_github_actions("lint-project")
```{YAML}
# Workflow derived from https://github.com/r-lib/actions/tree/v2/examples
# Need help debugging build failures? Start at https://github.com/r-lib/actions#where-to-find-help
on:                                                                #< 1.>
  push:
    branches: [main, master]
  pull_request:

name: lint-project.yaml

permissions: read-all                                             #< 2.>

jobs:
  lint-project:
    runs-on: ubuntu-latest
    env:                                                          #< 3.>
      GITHUB_PAT: ${{ secrets.GITHUB_TOKEN }}

    steps:
      - uses: actions/checkout@v5                                 #< 4.>

      - uses: r-lib/actions/setup-r@v2                            #< 5.>
        with:
          use-public-rspm: true

      - name: Install lintr                                       #< 6.>
        run: install.packages("lintr")
        shell: Rscript {0}

      - name: Lint root directory                                #< 7.>
        run: lintr::lint_dir()                                   #< 8.>
        shell: Rscript {0}                                       #< 9.>
        env:                                                    #< 10.>
          LINTR_ERROR_ON_LINT: true                             #< 11.>
```
The
onstep sets the triggers for the workflow. There are two triggers here, push and pull, and each focuses only on the main or master branch.The permissions line establishes the permissions to be associated with the GitHub Token that is created for the repository during the GitHub action. These are based on the overall settings for the repo that you establish using Settings, outside of the GHA workflow.
- Permissions are generally “Read”, “Write”, or “None” and can be customized across multiple aspects of the life cycle of a repository.
- Permissions set at the top of a workflow file flow down to all Jobs in the workflow file unless a job overrides a permission.
- To see the default permissions, see Permissions for the GITHUB_TOKEN.
- The
runs-online establishes the type of runner for the workflow, here Ubuntu a type of open-source and widely-distributed Linux Operating system.
- The
env:statement identifies a name for the GitHub_Token generated for the Workflow.- GitHub automatically generates a new, unique GitHub Token Secret for the workflow.
- It is granted the permissions identified by default and in the permissions line.
- It is used for authentication within the workflow for actions that need permission to read, or write to files in the repo.
- It is not related to your password or Personal Access Token (if you have one).
- You can also use GitHub Secrets within workflows for authenticating actions with agents outside the workflow, e.g., with Amazon Web Services.
Now that the runner has been defined and the permissions are checked, the
actions/checkout@v5clones the repository code into the runner environment.Next, the
r-lib/actions/setup-r@v2step uses thesetup-r@v2action from R Infrastructure to download and install the code for Base R and add-on packages into the Runner environment.
- R Infrastructure manages its actions to stay up to date with the latest versions of Base R and associated packages.
- In this case it will install the newest version of R. This can be configured to run what ever version you need.
- The
with: use-public-rspm: truesays to use the RStudio Package Manager (now Posit Public Package Manager) as the default for packages as it has already-compiled versions of the packages so they are faster to download.
The step named
Install lintrruns the one-line R scriptinstall.packages("lintr")in theshelldefined as the previously-installed R environment.The step named
Lint root directoryruns the one-line R scriptlintr::lint_dir()in theshelldefined as the previously installed R environment. It also sets an environment variable for {lintr} ofLINTR_ERROR_ON_LINT: trueto ensure errors are reported.
- Although the title is
Lint root directory,lint_dir()will go through the root and all directories below the root to find R code files to process.
18.7.4.1.2 Results of the R Infrastructure lint-project
The lint-project.yaml should be configuration managed as part of your project repo.
If you have not yet added some lint to your app.R file, do so now, e.g., make a line over 80 characters, and save it.
- Add/Stage both files and commit.
- You should see the pre-commit hook running and make the commit with a comment.
- Go to GitHub Actions for the Repo and you should see a new GitHub Action with a name the same as the commit comment.
- You can open it up to see the details and watch the Action as it progresses if it has not finished.
- When completed the details should look something like Figure 18.8.
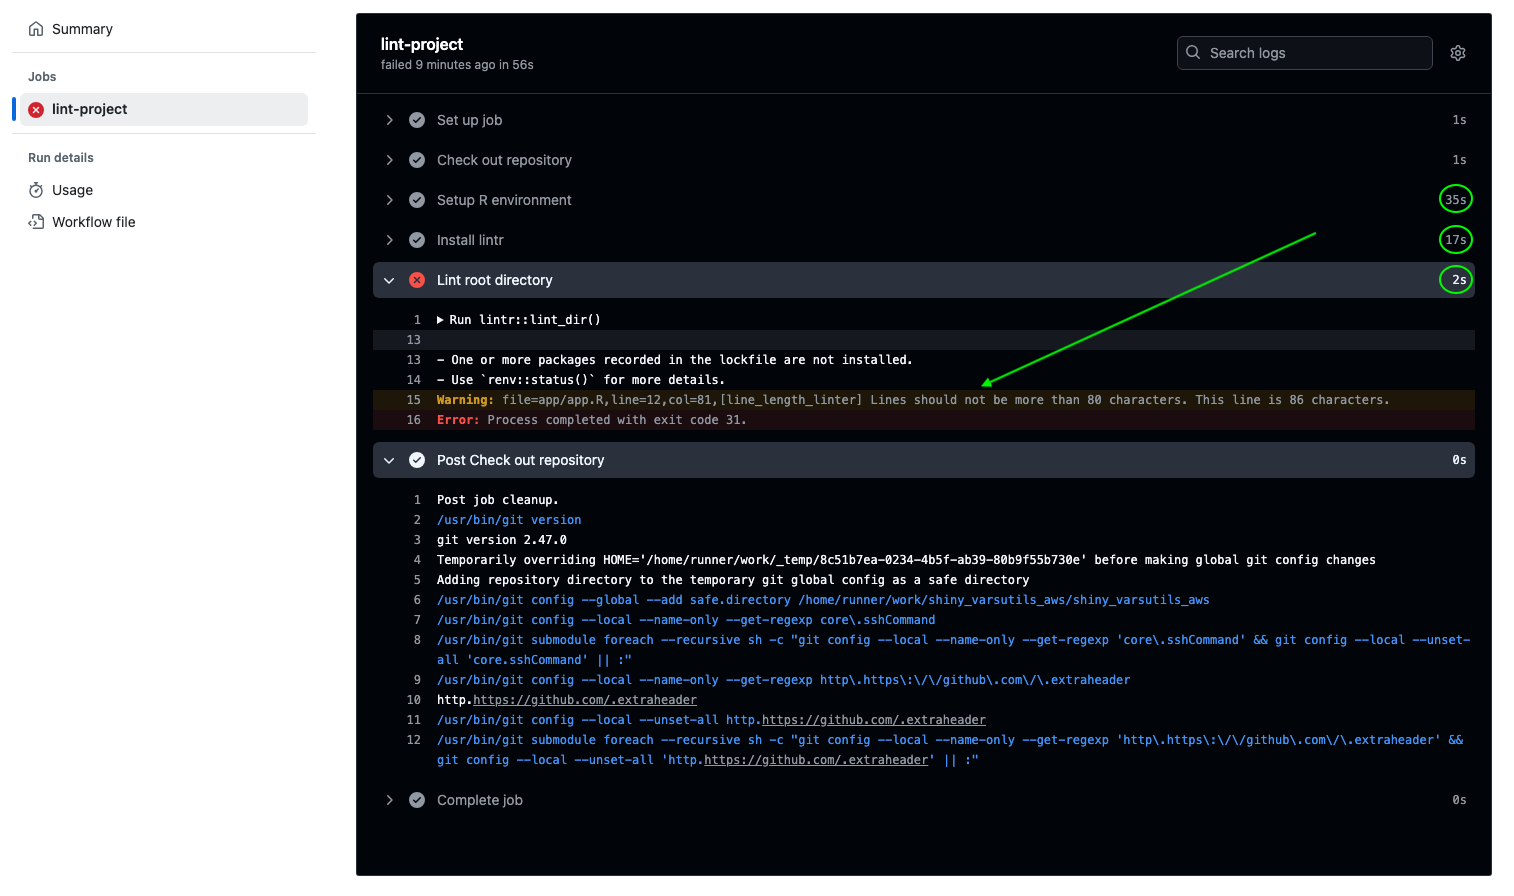
Figure 18.8 shows how long each step in the process took. The times may vary each time it runs.
Setup R environmenttook the longest at 41 seconds.Install lintrtook 9 seconds. Looking at the details of the action on GitHub shows the break out of each step.- The step first downloaded and installed {renv}.
- Then it downloaded {lintr} plus 15 packages where {lintr} took a dependency which took 3.4 seconds.
- Then it installed the 15 total packages in 4 seconds.
Lint root directoryonly took 1 second.
There are two results from Lint root directory of interest.
- The message that not all packages in the lock.file are installed can be ignored.
- The
Warningidentifies the file and location of a violation, the linter that was violated ,and a short explanation of the violation.- This should be the lint that you created in the
app.Rfile.
- This should be the lint that you created in the
- The
Erroris the final result of runninglint_dirwhich is exit code 31.- Any exit code other than 0 is considered a failure of the action.
When an error occurs in a job two things happen:
- The GHA engine will detect the failure and skip later steps till it gets to the
Post Check out repositoryto restore the repository and complete the job so you can fix what was causing the error. - The GHA engine will use its own action to generate an email to the repository owner that looks like@fig-gha-failed-email.
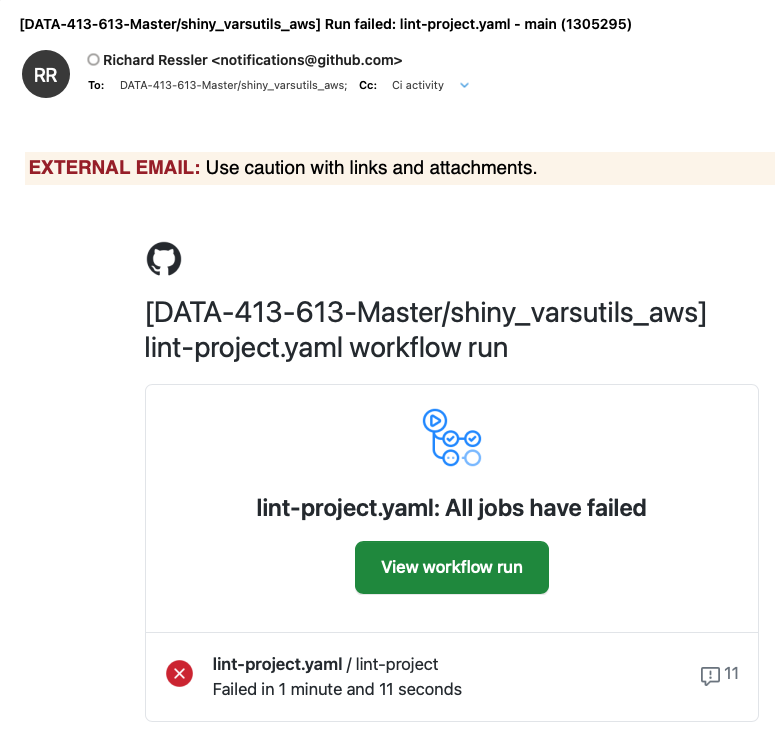
Once a workflow has finished, you can view the summary of the workflow at any time under the Actions tab in the GitHub repo. Look for the commit name.
18.7.4.1.3 Running Without a .linter File
You may have noticed that the only lint that appeared was the fresh lint you created.
- That is because the GHA lint-project invokes the same {lintr} package as the pre-commit hook and it looks for the
.lintrfile by default.
If you did not have a .lintr file as created in Section 18.6.5.3, Listing 18.2, you would probably see more lint in regular code.
18.7.4.2 Linters for Other Programming Languages
Linters are common across the software development community.
- The {linter} package in the pre-commit hook and in the GHA by R Infrastructure is specific to R code.
There are language-specific linters for most common programming languages and many have several - see Awesome Linters for just some of them (but it does not include {lintr} for R). - As an example, Python has multiple linters to include Pylint - see Get to Know Python Code Linters: A Guide to Pylint, Flake8, and More
Most linters can run using a command line interface (CLI) (once installed) or be added to a CI/CD pipeline such as a GitHub Action workflow.
Linters can be configured using a configuration file in the project directory.
- The default configuration sets choices for the many tests and options.
- The configuration file only includes the choices that are different than the default.
- As an example, Pylint can use either
.inior.tomlconfiguration files - see Pylint Configuration.
The SQLFluff Linter for SQL has multiple examples of GitHub Action workflows
- To install Sqlfluff for local use, see Installing sqlfluff.
Several of the examples use older versions, so Listing 18.7 shows updated versions.
```{yaml}
---
name: Lint

on:
  push: null

jobs:
  build:
    name: Lint
    runs-on: ubuntu-latest

    steps:
      - name: Checkout code
        uses: actions/checkout@v5

      - name: Install python                                 #< 1.>
        uses: "actions/setup-python@v5"

      - name: Install SQLFluff                               #< 2.>
        run: "pip install sqlfluff==3.2.5"

      - name: Lint models                                    #< 3.>
        run: "sqlfluff lint sql"

```- Install python to run sqlfluff.
- Install sqlfluff.
- Use sqlfluff to lint all files that end in .sql in the directory called
sql.
Copy and paste Listing 18.7 to a text file called sqlfluff.yml in your .github/workflows to begin linting your sql code in a sql directory.
Sqlfluff no longer uses ANSI as the default dialect of sql since the standard is rarely implemented as is.
You must specify the dialect to be used as the starting point for linting your code - see Dialects Reference for the current available dialects
When using the CLI, you can specify the dialect with an argument e.g., sqlfluff lint myfile --dialect=duckdb.
There are many possible arguments to configure Sqlfluff. Thus it is best to use a configuration file.
Create a text file called .sqlfluff and put it in the root directory of the project.
- This file should have the dialect at the top and then can have separate sections for the “rules” to configure - see Rule Configuration for many options.
Listing 18.8 shows an small example of a sqlfluff file that sets the dialect as duckdb and configures two rules.
While it uses YAML format, you cannot have comments on the same line as a statement to be interpreted. The line will fail.
- As an example, using
dialect = duckdb # my commentwill fail with anunknown dialecterror.
Put comments before or after the lines of interest.
Figure 18.10 shows the results of running the GHA workflow on a sql folder where one of the files has code which violates the rules - either default or in the configuration file.
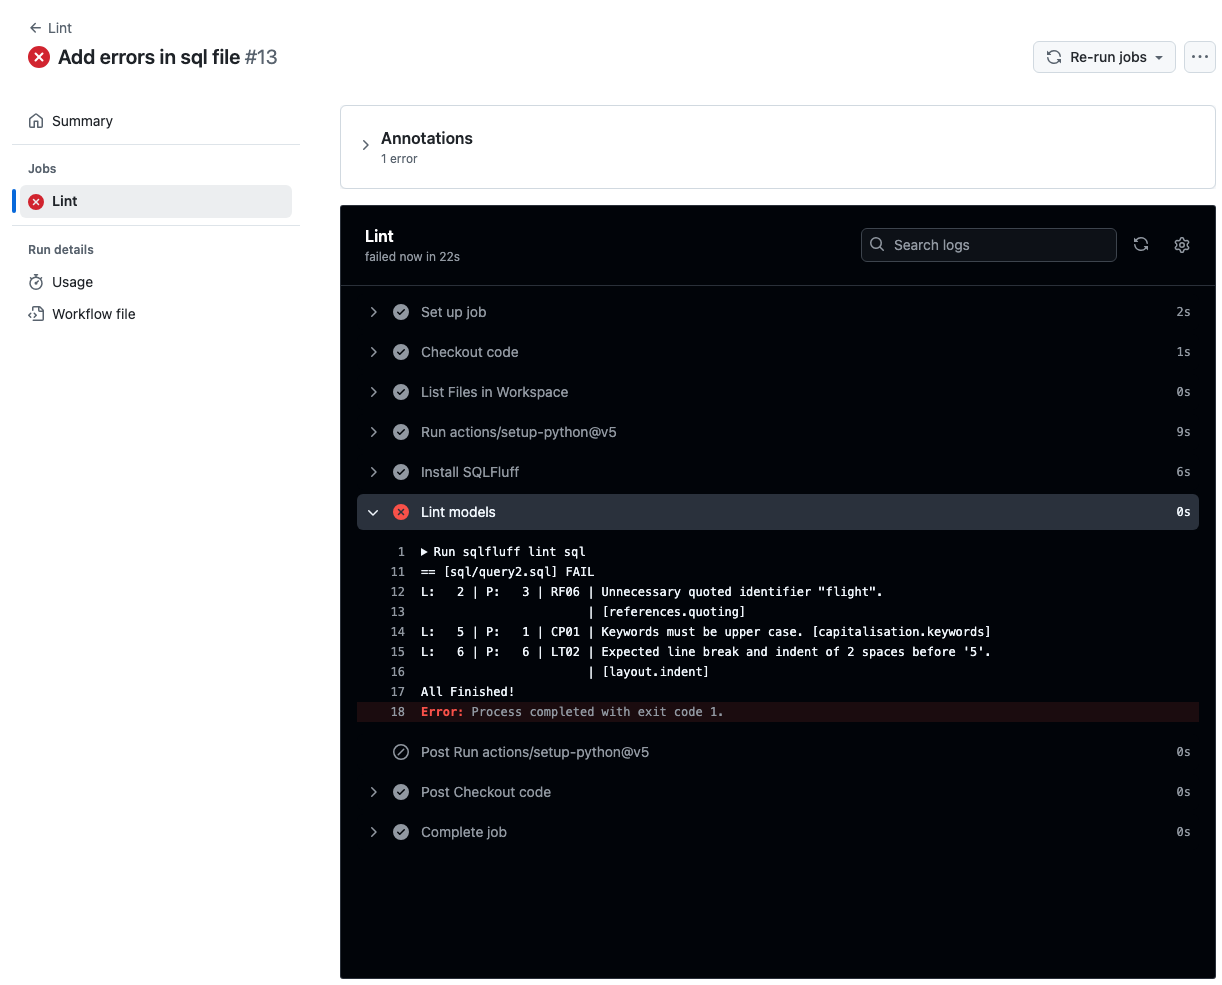
Once the errors are cleaned up, the GHA workflow should look similar to Figure 18.11.
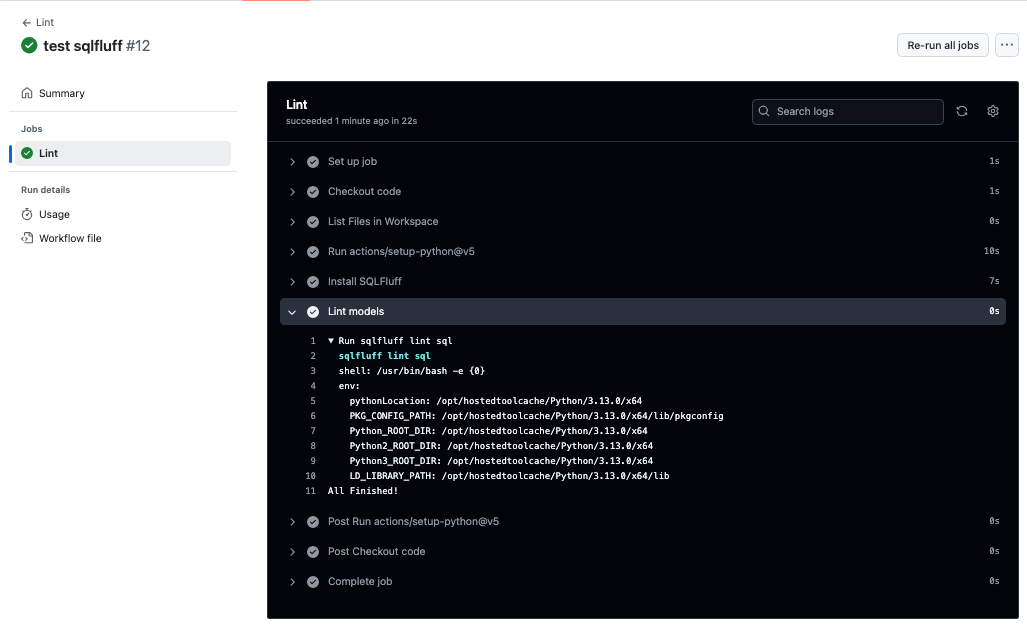
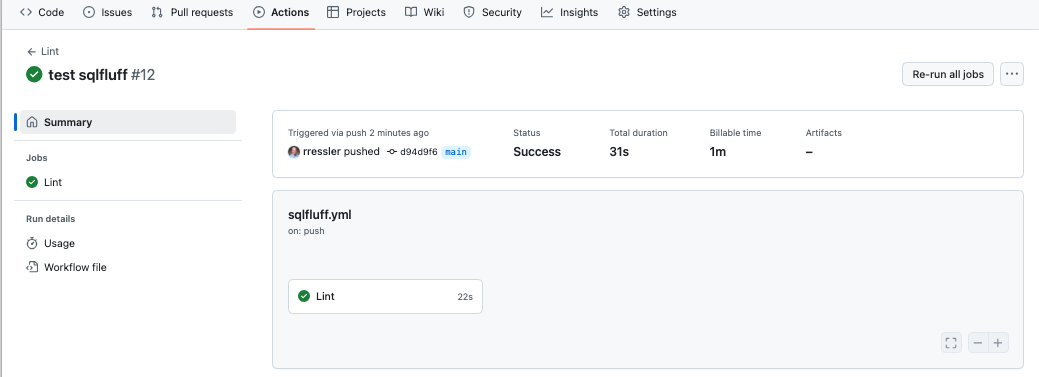
Language-specific linters are useful for linting a variety of languages.
- You can configure each linter for your specific situation.
However, once you have them configured, having to create actions for every language used in a solution, one can use open-source tools that manage many different linters for you.
18.7.4.3 Using Super-Linter to Lint Multiple Coding Languages
Two popular tools for linting multiple languages are Super-Linter and Mega Linter.
- Both can be found on GitHub and in the GitHub Marketplace.
- Both use {lintr} for R code.
- Both are free.
- Both can be run in many environments besides GitHub.
- Both are Docker Containers which simplifies their installation - see ?sec-docker-container.
- Both can be run locally as well if you have Docker installed and running.
- Both GitHub
READMEfiles tell how to use them. Mega-Linter has a website as well.
These tools are not linters in and of themselves. They provide a docker container with the code for running many different linters without you having to worry about downloading the code and keeping it up to date.
- They can run the individual linters in parallel and cache the environment for sharing across jobs.
You can continue to download and install multiple linters.
- The individual linters can be much faster to run locally as you are not downloading all of the linters in the container.
- This allows you to debug and troubleshoot your configurations much faster.
Once you have all your configurations for each linter in place, the multi-lintr tools provide a nice way to run multiple linters and get a single consolidated results as part of a CI/CD pipeline.
18.7.4.3.1 Using Super-linter to Assess Multiple Languages
Super-Linter is visible in the GitHub Marketplace and if you click on the green button Use latest version, a pop-up window will show a code snippet you can copy into an existing workflow as in Figure 18.12.
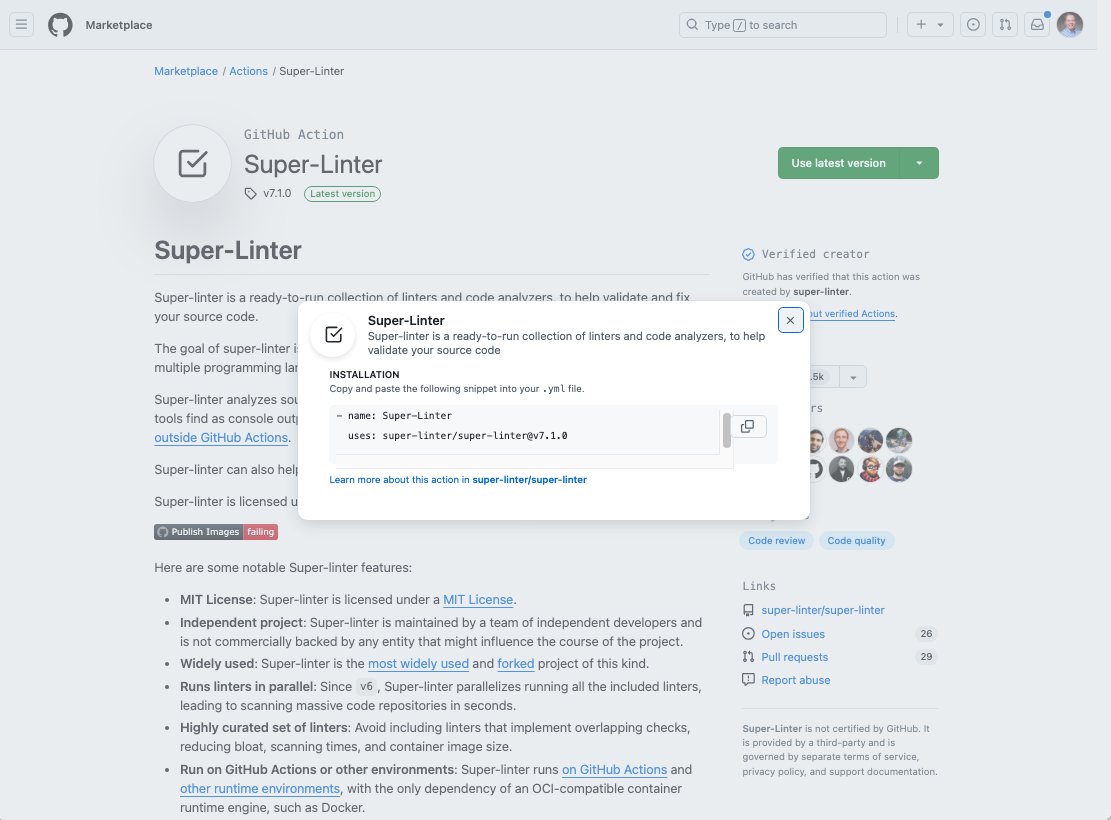
While that snippet is a start, the Super-linter Readme has much more information on how to use Super-linter to include a sample workflow file.
Copy the sample workflow file from Get started in the Readme and paste into your .github/workflows directory with the name super-lint.yml.
- It should look like Listing 18.9.
```{YAML}
---
name: Lint

on: # yamllint disable-line rule:truthy
  push: null
  pull_request: null

permissions: {}

jobs:
  build:
    name: Lint
    runs-on: ubuntu-latest

    permissions:                                                         #< 1.>
      contents: read
      packages: read
      # To report GitHub Actions status checks
      statuses: write

    steps:
      - name: Checkout code                                              #< 2.>
        uses: actions/checkout@v5
        with:
          # super-linter needs the full git history to get the
          # list of files that changed across commits
          fetch-depth: 0

      - name: Super-linter                                               #< 3.>
        uses: super-linter/super-linter@v8.2.1 # x-release-please-version
        env:
          # To report GitHub Actions status checks
          GITHUB_TOKEN: ${{ secrets.GITHUB_TOKEN }}

```- Permissions are broken out separately by area.
- The Checkout step adds
fetch-depth:0to enable the linters to see the entire git history, not just the last commit, to see changes over time. - The
Super-linterstep uses the snippet to invoke the complete super-linter using the latest version.
- The good news: this file will run all supported linters on every file it can match.
- The bad news: it may lint files from the Docker Container and
renvthat are not part of the repo.- This can result in warnings and errors that are beyond your control, and/or exceed the GitHub limits for a workflow.
The better news: one can Configure Super-linter using multiple environment variables.
- You can choose which linters to run and on which files to run them.
Listing 18.10 shows an adjusted workflow to run select linters on select files.
- This workflow was designed for a project that for demonstration purposes has samples of R, Python, SQL, and YAML code, a custom CSS file, and it allows for HTML code being present in non-
.htmlfiles.
```{YAML}
---
name: Lint

on:
  push: null
  pull_request: null

permissions: { }                                                        #< 1.>

jobs:
  build:
    name: Lint
    runs-on: ubuntu-latest
    #env:
    #  ACTIONS_RUNNER_DEBUG: true     # Enables detailed runner logging #< 2.>
    #  ACTIONS_STEP_DEBUG: true       # Enables step-specific debug logging

    permissions:
      contents: read
      packages: read
      # To report GitHub Actions status checks
      statuses: write

    steps:
      - name: Checkout code
        uses: actions/checkout@v5
        with:
          # super-linter needs the full git history to get the
          # list of files that changed across commits
          fetch-depth: 0

      - name: Super-linter
        uses: super-linter/super-linter/slim@v7.1.0 #                    #< 3.>
        env:
          # To report GitHub Actions status checks
          GITHUB_TOKEN: ${{ secrets.GITHUB_TOKEN }}
          VALIDATE_ALL_CODEBASE: true # false only parses commited files.#< 4.>
          DEFAULT_BRANCH: main
          FILTER_REGEX_EXCLUDE: '.*renv/.*|.*\.html$|z.*/'               #< 5.>
          VALIDATE_CSS: true                                             #< 6.>
          VALIDATE_HTML: true                                            #< 7.>
          VALIDATE_PYTHON_PYLINT: true                                   #< 8.>
          VALIDATE_R: true                                               #< 9.>
          VALIDATE_SQLFLUFF: true                                       #< 10.>
          VALIDATE_YAML: true                                           #< 11.>
```- Put space in between braces to pass YAML linter.
- Identifies possible environment variables to turn on verbose output for debugging
- Switch to the “slim” version of super-linter as the additional languages are not needed and this makes the container smaller and a little faster to load.
- The default is true to scan all code in the repository for possible validation. Setting to false makes it faster as it only checks the files on the last commit.
- Use REGEX to exclude specific directories or file types or files. Note no need to escape the escape.
- Turn on validation of CSS code with the default linter Stylelint Linter for CSS.
- Turn on validation of HTML code with the default linter HTMLHint Linter for HTML.
- Turn on validation of Python code with Pylint Linter for Python.
- Turn on validation of R code with the default {lintr} package for R .
- Turn on validation of SQL code with the default SQLFluff Linter for SQL.
- Turn on validation of SQL code with the default yamllint Linter for YAML.
When turned on, each linter will operate as usual, to include looking for its configuration file.
Figure 18.13 shows the summary of results from running Super-linter as a GitHub Action workflow on a project with code in multiple languages where there is error in multiple languages.
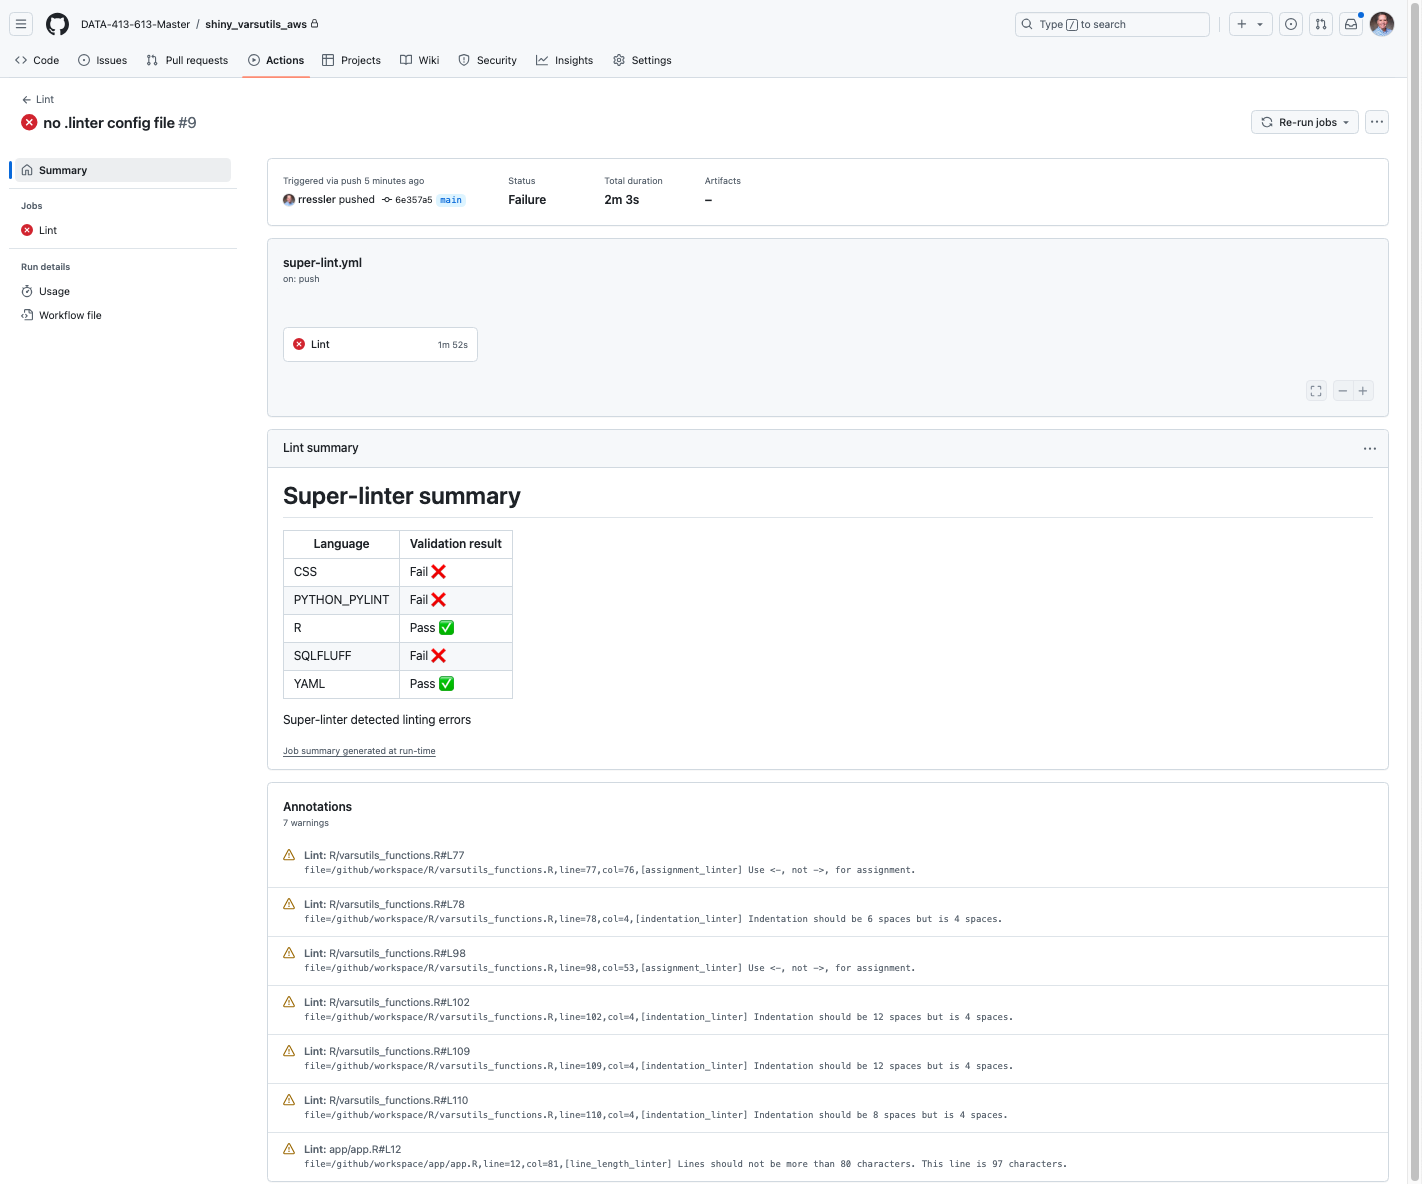
There are several items to note in Figure 18.13.
- The total duration was 2 minutes and 3 second compared to 31 second for the standalone sqlfluff seen in Figure 18.11 (b).
- There is a result for each language that was activated and found files to validate.
- This shows R passed the linting. That does not mean there were no violations, but that they were identified as warnings, not a failure.
- GitHub limits the number of annotations that can be shown but you can see 7 warnings in the R code and no reason why CSS, PYTHON_PYLINT, or SQLFLUFF failed.
We can go to the detailed results to look for more information.
Figure 18.14 shows a portion of the detailed results focused on the Super-linter step.
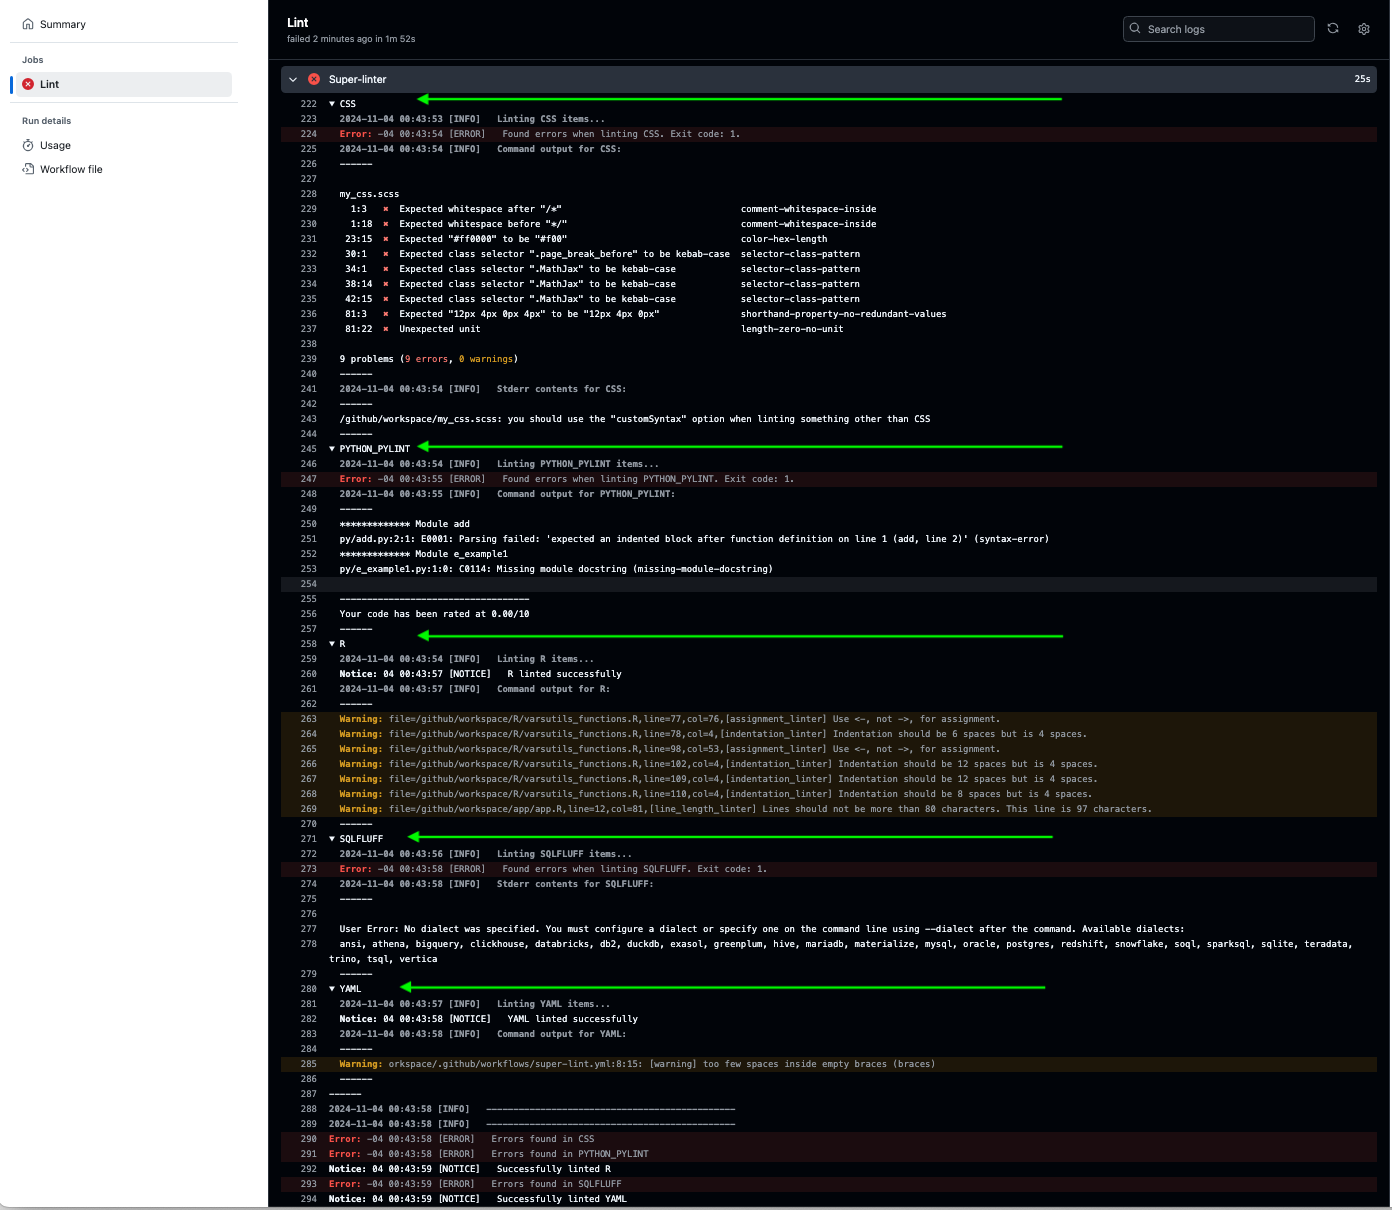
Several items to note:
- The green arrows show the start of the linter for each language.
- CSS identified 9 errors and identified them by file name, line number and column number and the rule that was violated.
- PYTHON_PYLING found two errors and identified them by file name, line number and column number and the rule that was violated.
- R found the 7 warnings in the summary and identified them by file name, line number and column number and the rule that was violated.
- SQLFLUFF identified one User Error that
No dialect was specified. It cannot tell you that this was due to a comment in the dialect= line in thesqlflufffile. - YAML found 1 warning, the file that ran this did not fix the error in the
permisions: {}as identified in Listing 18.10. - The end of the Superlinter step shows the results as three failures due to errors and two were successful.
Given the roadmap laid out in Figure 18.14, one can then go about troubleshooting and fixing the errors.
- This can be done using individual linters if it takes time
- Be sure to inactivate the Super-linter workflow by moving it out of the
.github/workflowsdirectory or adding.demoon the end of the name.
- Be sure to inactivate the Super-linter workflow by moving it out of the
- If the fixes are straightforward, then make them, save, add/stage, commit, and push to run the Super-linter workflow again.
Once all fixes are made you should get results similar to Figure 18.15.
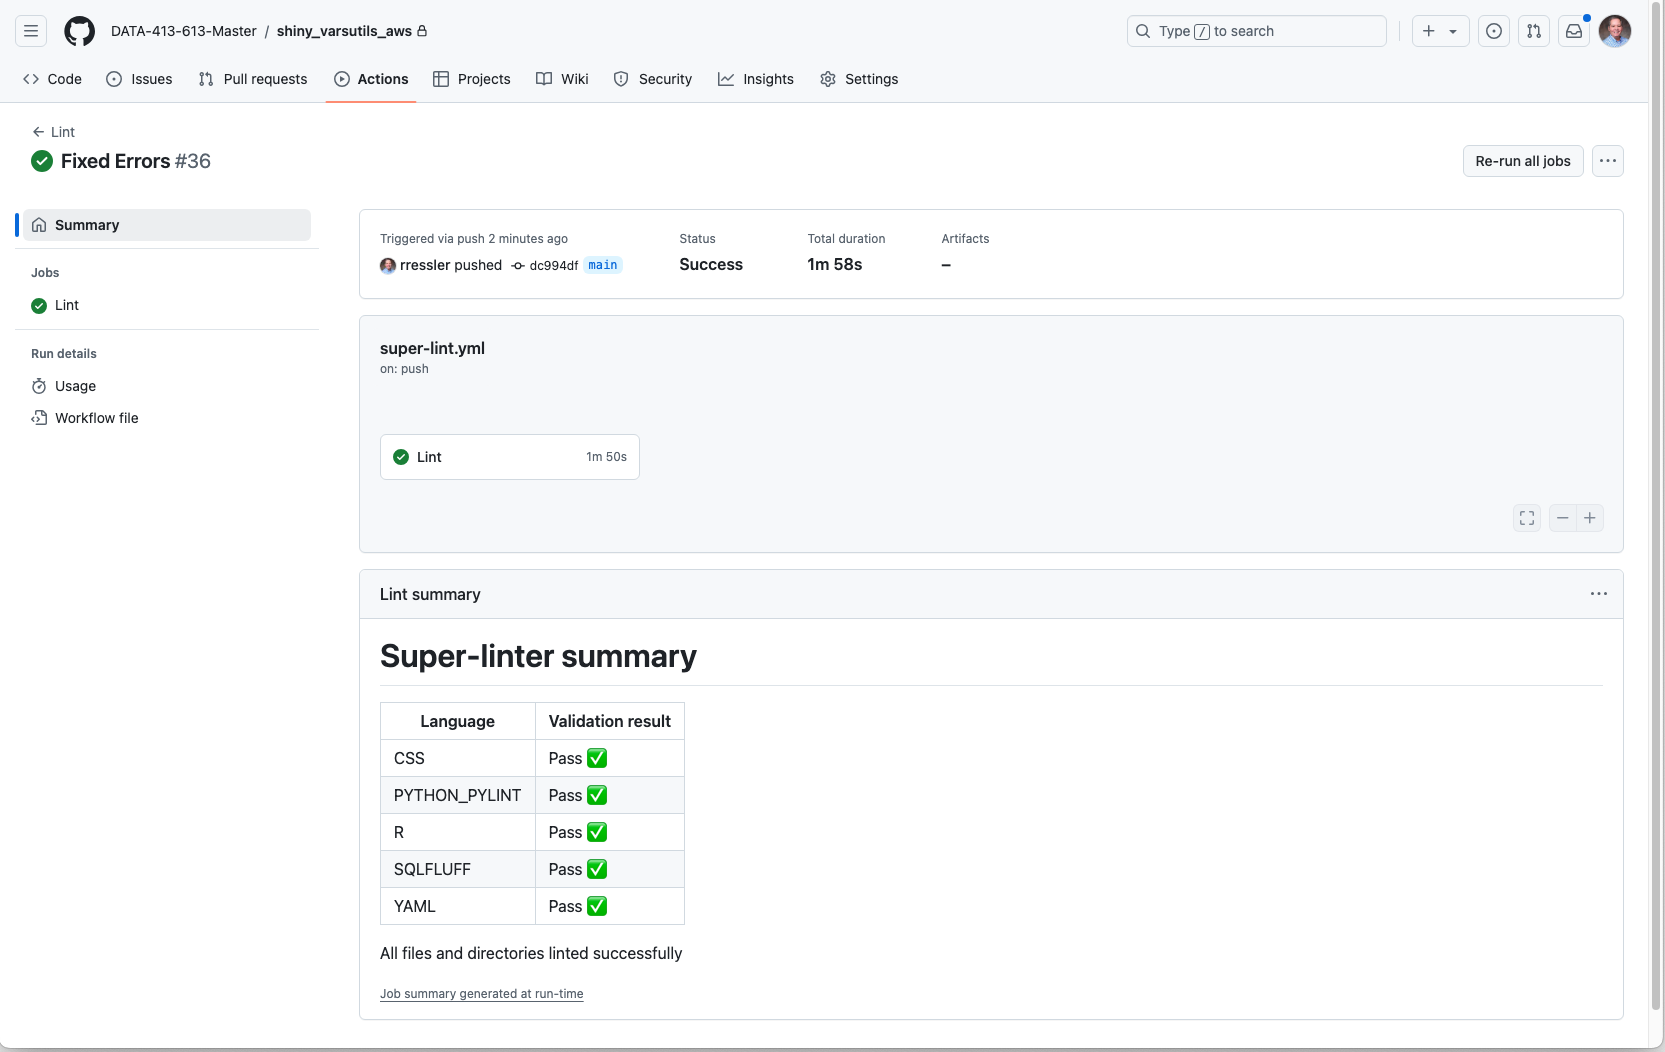
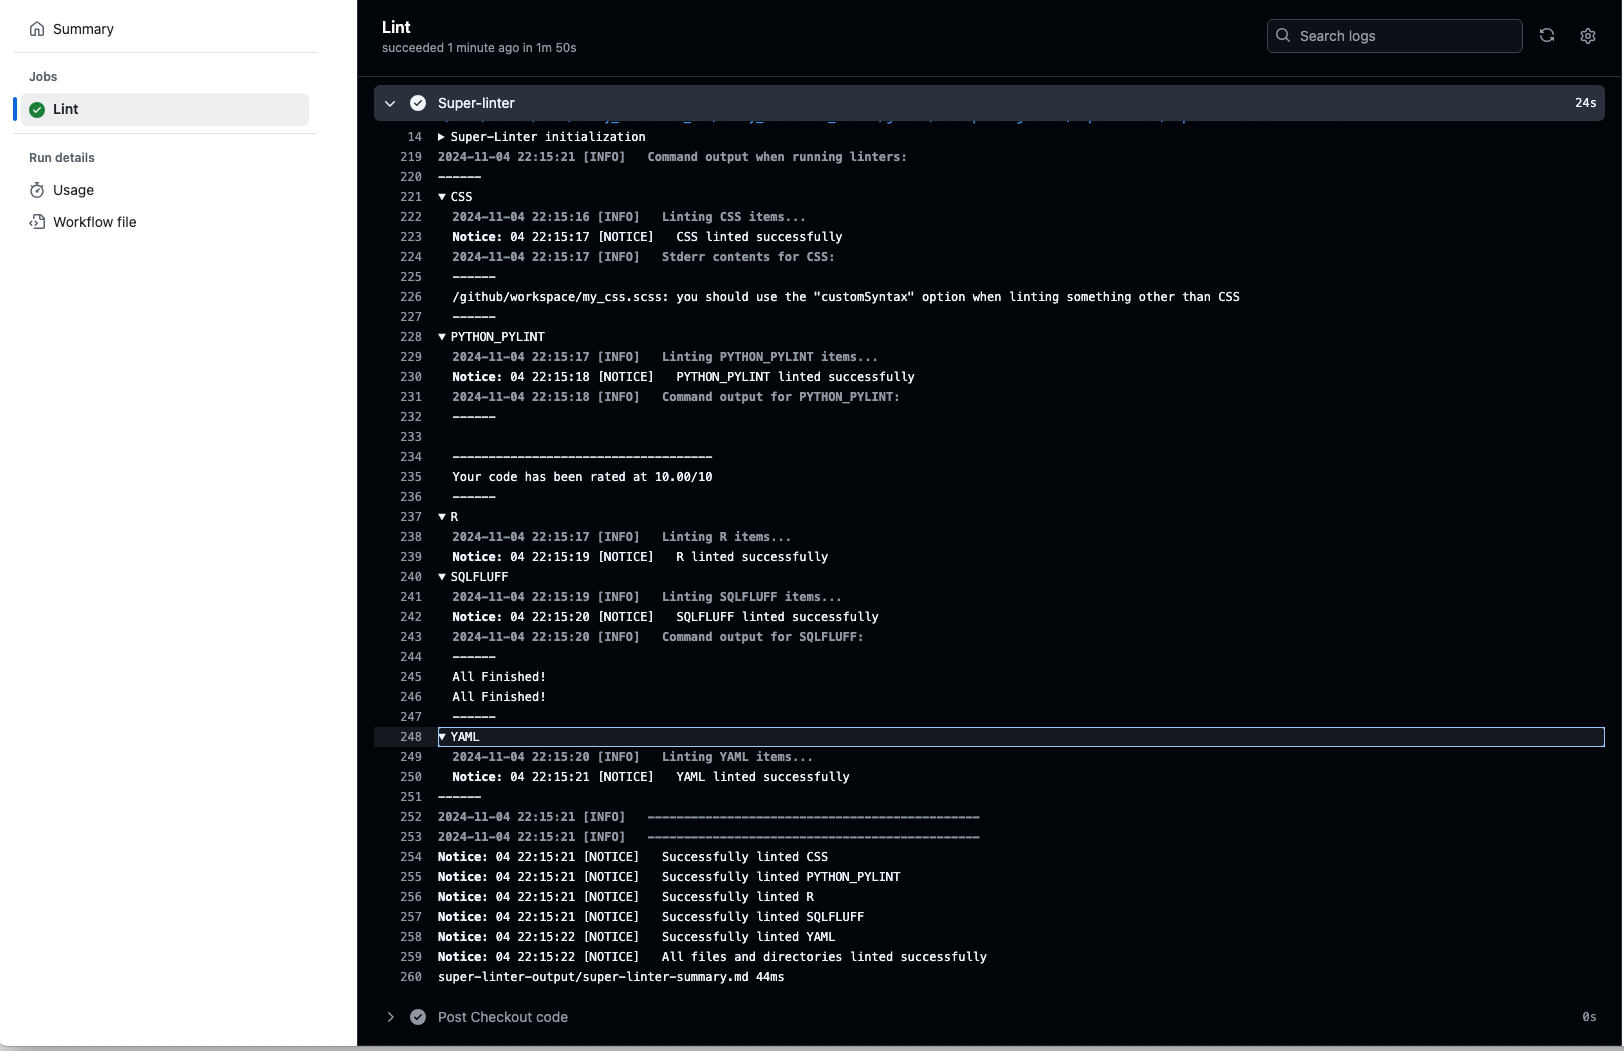
Using linters is a best practice for writing sustainable code for your solution.
- For individual work, they help you write code that follows standards established to improve readability and efficiency of code while also helping in debugging syntax errors.
- For group work, shared linter configurations help ensure all code is written in a consistent manner to support readability and understanding across the group.
For decades, programming language specifications had emphasized the benefits of writing “clean code” that is easy to read.
The goal is to save time in writing new code. As Robert Martin stated in his book Clean Code (Martin 2008),
“Indeed, the ratio of time spent reading versus writing is well over 10 to 1. We are constantly reading old code as part of the effort to write new code. …[Therefore,] making it easy to read makes it easier to write.”
18.8 Using Container Images and Containers for Reproducibility in Deployment
18.8.1 Container Images
The Open Container Initiative helps define open standards for building and using container images and containers.
A container image is a static blueprint or template (the recipe) used to create an executable container.
- The container image contains all the files, dependencies, libraries, and configurations needed to run an application, typically including a minimal operating system layer.
Key characteristics of container images:
- Layered structure: Container images are composed of layers where each layer adds specific dependencies, configurations, or code.
- The layers are stacked on top of each other, with the operating system at the bottom, to enable the creation of a “full-stack” application environment from the server to the user interface.
- Immutable: An image cannot be changed or edited. If something needs to be updated, the container image must be completely rebuilt from the updated files.
- Reusable and shareable: Images can be pushed to and pulled from registries (like Docker Hub or AWS ECR (Elastic Container Registry)), allowing consistent use across systems.
- Build once, Create many: One image can generate multiple containers.
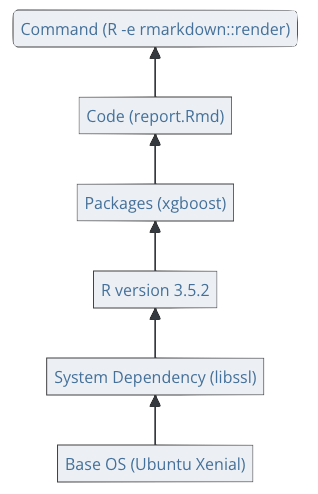
Figure 18.16 shows the possible layers in a full-stack container image, starting with the operating system at the bottom, followed by system libraries, the Base R runtime and associated packages, project-specific packages and their dependencies, and finally the project files from the repository, including the code that implements the user interface and application logic.
Container images can serve as base images for building new images with additional layers:
- Many organizations, such as the Rocker Project, provide base images containing only the foundational layers—OS, system libraries, and the R runtime—as shown in Figure 18.16. These layers are common to many R applications.
- Developers can use these base images, e.g., from the Rocker Project, Docker Hub, AWS ECR, or other registries, as a starting point and then add their application-specific layers on top to create a customized full-stack container image.
- Using base images speeds up image creation, download, and deployment, since you don’t need to rebuild or transfer the entire software stack from scratch.
There are many different pre-built images with a variety of layers to provide for flexibility in creating new images for one’s application.
- An image is not built to replace the operating system. It uses a minimal version of the operating system to interact with the operating system kernel on the machine where the image has been deployed, e.g., on your local machine or on a server in the cloud.
- This ability to use the server’s operating system kernel (to connect software to hardware and manage all the basic processes) is what makes containers much smaller (“lighter”) than creating a Virtual Machines where you must provision the entire operating system as well.
- However, it means your container must run on a host whose OS kernel is compatible with the OS used in the image.
18.8.2 Containers
A container is a stand-alone, executable environment that includes the code, dependencies, and configuration necessary to run a specific application or process.
Key characteristics of containers:
- Self-contained: Includes all necessary software (except the host operating system), so it does not depend on external installations.
- Isolated and independent: Runs in its own environment without affecting other containers or the host system.
- Portable: Can run consistently across different machines as long as a container runtime (e.g., Docker) is available.
- Instance-based: Created from a container image and may include additional runtime configuration, such as environment variables, exposed ports, or mounted volumes.
18.8.3 Creating a Container from a Container Image
Once a container image has been created and stored (e.g., locally or in a cloud container registry), creating a running container involves several common steps. The example below uses Docker, but the process is similar for other container runtimes.
- You request to run an image, e.g., using a terminal command like
docker run my_image_name. - The container runtime (e.g., Docker) checks if the image is available locally and, if not, pulls it from a container registry (e.g., Docker Hub or AWS ECR).
- The runtime unpacks the image layers (OS, libraries, application code) and stacks them to form the container’s filesystem.
- A writable container layer is added on top of the read-only image layers.
- Any changes made by the running container (logs, temporary files, edits) are stored here.
- The underlying image remains unchanged.
- Any changes made by the running container (logs, temporary files, edits) are stored here.
- The runtime applies runtime configuration provided by the user, such as environment variables, port mappings, volume mounts, and network settings.
- The runtime then starts the container’s main process, executing the command defined in the image (typically a startup script or application entry point) in an isolated filesystem and environment provided by the container runtime.
- Docker is a well-known capability for creating containers and images, but other options exist - see Docker vs. Podman vs. Singularity: Which Containerization Platform is Best for R Shiny?.
18.9 Using the Docker Platform
Docker is a company that provides software, processes, services, and container repositories for creating and working with containers.
Some key ideas from What is Docker:
- Docker is an open platform for developing, shipping, and running applications using containers.
- Docker provides tooling and a platform to manage the life cycle of containers.
- Docker containers can run on a developer’s local laptop, on physical or virtual machines in a data center, on cloud providers, or in a mixture of environments.
- Docker uses a client-server architecture so you can issue commands on the client end and the Docker daemon running on its own server but “listening” in the background that implements the commands.
- Docker Desktop is an application (for Windows, Mac, or Linux) to build and share containerized applications.
- You can use it to start the Docker daemon on your computer.
- Docker Hub is a public registry that anyone can use to make their containers available to others. Docker looks for images on Docker Hub by default.
See Posit’s Environment Management with Docker for additional information.
Docker can create single platform or multi-platform images.
- Single-platform images work on the single operating system/architecture for which they were built.
- Multi-platform images are structured differently so docker can select the correct container for the targeted machine’s OS based on the “manifest list” created in the build - see Multi-platform builds for details.
- One cannot test all the platforms on a single system as each must be tested on a system with the appropriate operating system. However, Docker includes built-in emulators so you can run an Ubuntu architecture container on a Mac or Windows machine.
18.9.1 Installing the Docker Desktop
Go to https://www.docker.com/products/docker-desktop/ and select “Download Docker Desktop”.
- Select the version for your operating system and install it using the defaults.
Create a Docker account for individual usage for free.
- This will allow you to upload your containers to DockerHub for reuse by you and others.
Installing the Docker Desktop installs all the components necessary to run Docker on your local machine, including:
- Docker Desktop: A client side user interface to manage images, containers, and settings.
- Docker Daemon: The background service that manages Docker containers and images.
- Docker CLI: The command-line interface to be used in a terminal window.
When you start the Desktop, it starts the daemon in the background to handle tasks such as building, running, and stopping containers.
- The Desktop and the CLI communicate with the daemon to execute commands like
docker run,docker build, anddocker ps.
- In the standard local install, the Docker daemon is only accessible when Docker Desktop is running.
- If you close Docker Desktop, you may not be able to use Docker commands in the terminal.
You should now be ready to build your own container.
18.9.2 Finding an Image
You can start building your container with an empty container, but usually one starts with a container image that has been built to a certain level of the stack that has the capabilities needed for your application.
The Rocker Project generates multiple images for using R.
- These are continually updated to the latest version of R and associated packages.
- There is an image for just Base R r-base.
As an example, enter docker run -ti --rm r-base in your terminal.
- Docker will download the container (the first time) and run R inside your Terminal window.
- This is a completely independent version of R from your computer’s normal installation.
- You will have to install every package you want to use - and it will take a while.
- To quit, enter
q()and don’t save your workspace for now.
Rocker Project’s rocker-versioned2 repository has multiple images tied to the latest version of R.
These are compiled on Ubuntu so have broad applicability.
The rocker/r-ver is the alternative to
r-base.Run
docker run -ti --rm rocker/r-verin the terminal to download and start this container.- Once it is running, enter
library()to see the packages that are loaded. - enter
q()to quit.
- Once it is running, enter
Most of the images are single-platforms versions but you can get versions specific for Mac Silicon at the Base R level.
- Rocker Tidyverse rocker/tidyverse
- Rocker R Shiny rocker/shiny-verse
- Mac Silicon image for R arm64v8/r-base/
- You must pay attention to the choice of operating systems throughout a build and deploy process.
- R uses many packages and libraries which are “pre-compiled” into binary code targeted for an operating system.
- Not every package has a downloaded binary version capable of operating on every operating system.
- Check the package documentation to see the supported systems, e.g., see CRAN reference for {ggplot} Downloads:.
- When that happens to build the image requires compiling the package from source code and having the libraries to do so.
For most applications, suggest using the Ubuntu version and if you are running on a Mac or Windows, use Docker Desktop to provide the emulators for them.
- If you start with a Mac Silicon version, you will have to install all the libraries needed to compile the packages from sources and then wait Docker to compile them. That can take a looonnngggg time compared to 30 seconds to download an Ubuntu image.
We will use the Rocker R Shiny rocker/shiny-verse image as a starting image as it has everything we might need for a Shiny App.
- We will then add the unique needs of our project to create a full-stack image for our app’s container.
18.9.3 Create the Dockerfile
To make the container build process repeatable, you create a text file with the name Dockerfile.
- The
Dockerfiledescribes how to create or build the container. It is essential for creating a container image. - There are many commands to provide flexibility in creating an image - see the Dockerfile Reference.
Listing 18.11 shows a minimal docker file to create an image for a shiny app that has the app.R file at the top level of the project.
- It uses {renv} to manage all the packages and dependencies for the project. This is optional but helpful for reproducibility to avoid manually listing the packages and versions.
```{block}
# Use the rocker/shinyverse container with the Ubuntu AMD64 architecture
FROM rocker/shiny-verse:latest

# Set working directory for the container
WORKDIR /srv/shiny-server

# Add in any other folders you need to run the code
# Copy shiny app into your container
COPY app.R /srv/shiny-server/app
# Copy data, and R (or other) folders into your container as needed
# Uncomment the lines below if your app has the matching directories
# COPY data /srv/shiny-server/data
# COPY R /srv/shiny-server/R

# Install the renv package
RUN R -e "install.packages('renv', repos = 'https://cloud.r-project.org/', verbose = TRUE)"

# Copy renv.lock (ensure it exists)
COPY renv.lock /srv/shiny-server

# Restore renv environment to install all the packages and dependencies
# into the container
RUN R -e "renv::restore()"

# Expose port for Shiny app
EXPOSE 3838

# Create the command to run the Shiny app based on where you put the app.R file.
CMD ["R", "-e", "shiny::runApp('/srv/shiny-server/', port = 3838, host = '0.0.0.0')"]
```
Listing 18.12 shows a docker file for an image that will run on a Mac silicon machine without an emulator.
```{yaml}
# If you want to start from an image use FROM image name
# This is just for Apple Silicon machines
# docker build --check # run the docker file withouot building to see if the docker file has any issues
# docker pull arm64v8/r-base:latest # confirm build exists
# docker build -t shiny_varsutils_aws . # do the build
# docker run -d -p 3838:3838 shiny_varsutils_aws # run the build to see if it starts
# Go the browser and use http://localhost:3838 # go to the browser to see if you can see it
#
FROM rocker/r-ver:latest

# Set working directory for the container you are creating
WORKDIR /srv/shiny-server

# Install development tools and required system libraries to build from source files
RUN apt-get update && apt-get install -y \
    build-essential \
    libcurl4-openssl-dev \
    libxml2-dev \
    libssl-dev \
    zlib1g-dev \
    && rm -rf /var/lib/apt/lists/*

# Add in any other folders you need to run the code
# Copy shiny app, data, and R folders into your container as needed
COPY app.R /srv/shiny-server/
#COPY data /srv/shiny-server/data
#COPY R /srv/shiny-server/R

# Install the renv package
RUN R -e "install.packages('renv', repos = 'https://cloud.r-project.org/', verbose = TRUE)"

# Copy renv.lock (ensure it exists)
COPY renv.lock /srv/shiny-server

# Restore renv environment to install all the packages and dependencies
# into the container
RUN R -e "renv::restore()"

# Expose port for Shiny app
EXPOSE 3838

# Create the command to run the Shiny app based on where you put the app.R file.
# For Apple silicon, ensure to specify the port and the local host if you want to observe.
CMD ["R", "-e", "shiny::runApp('/srv/shiny-server/app', port = 3838, host = '0.0.0.0')"]

```
18.9.4 Build the Container on the Local Machine
Once you have a docker file, make sure Docker Desktop is running.
Go to the terminal and make sure the working directory is the root of the project repository.
Enter docker buildx build --platform=linux/amd64 -t image-shiny-old-faithful . .
- The
image-shiny-old-faithfulis the (arbitrary) name you want to give to your image. - The period on the end represents the path to the project from the working directory.
Figure 18.17 shows the complete build starting with a shiny-verse image (that was already downloaded and cached) for the shiny app using the Dockerfile in Listing 18.11.
- Note the elapsed time was very short.
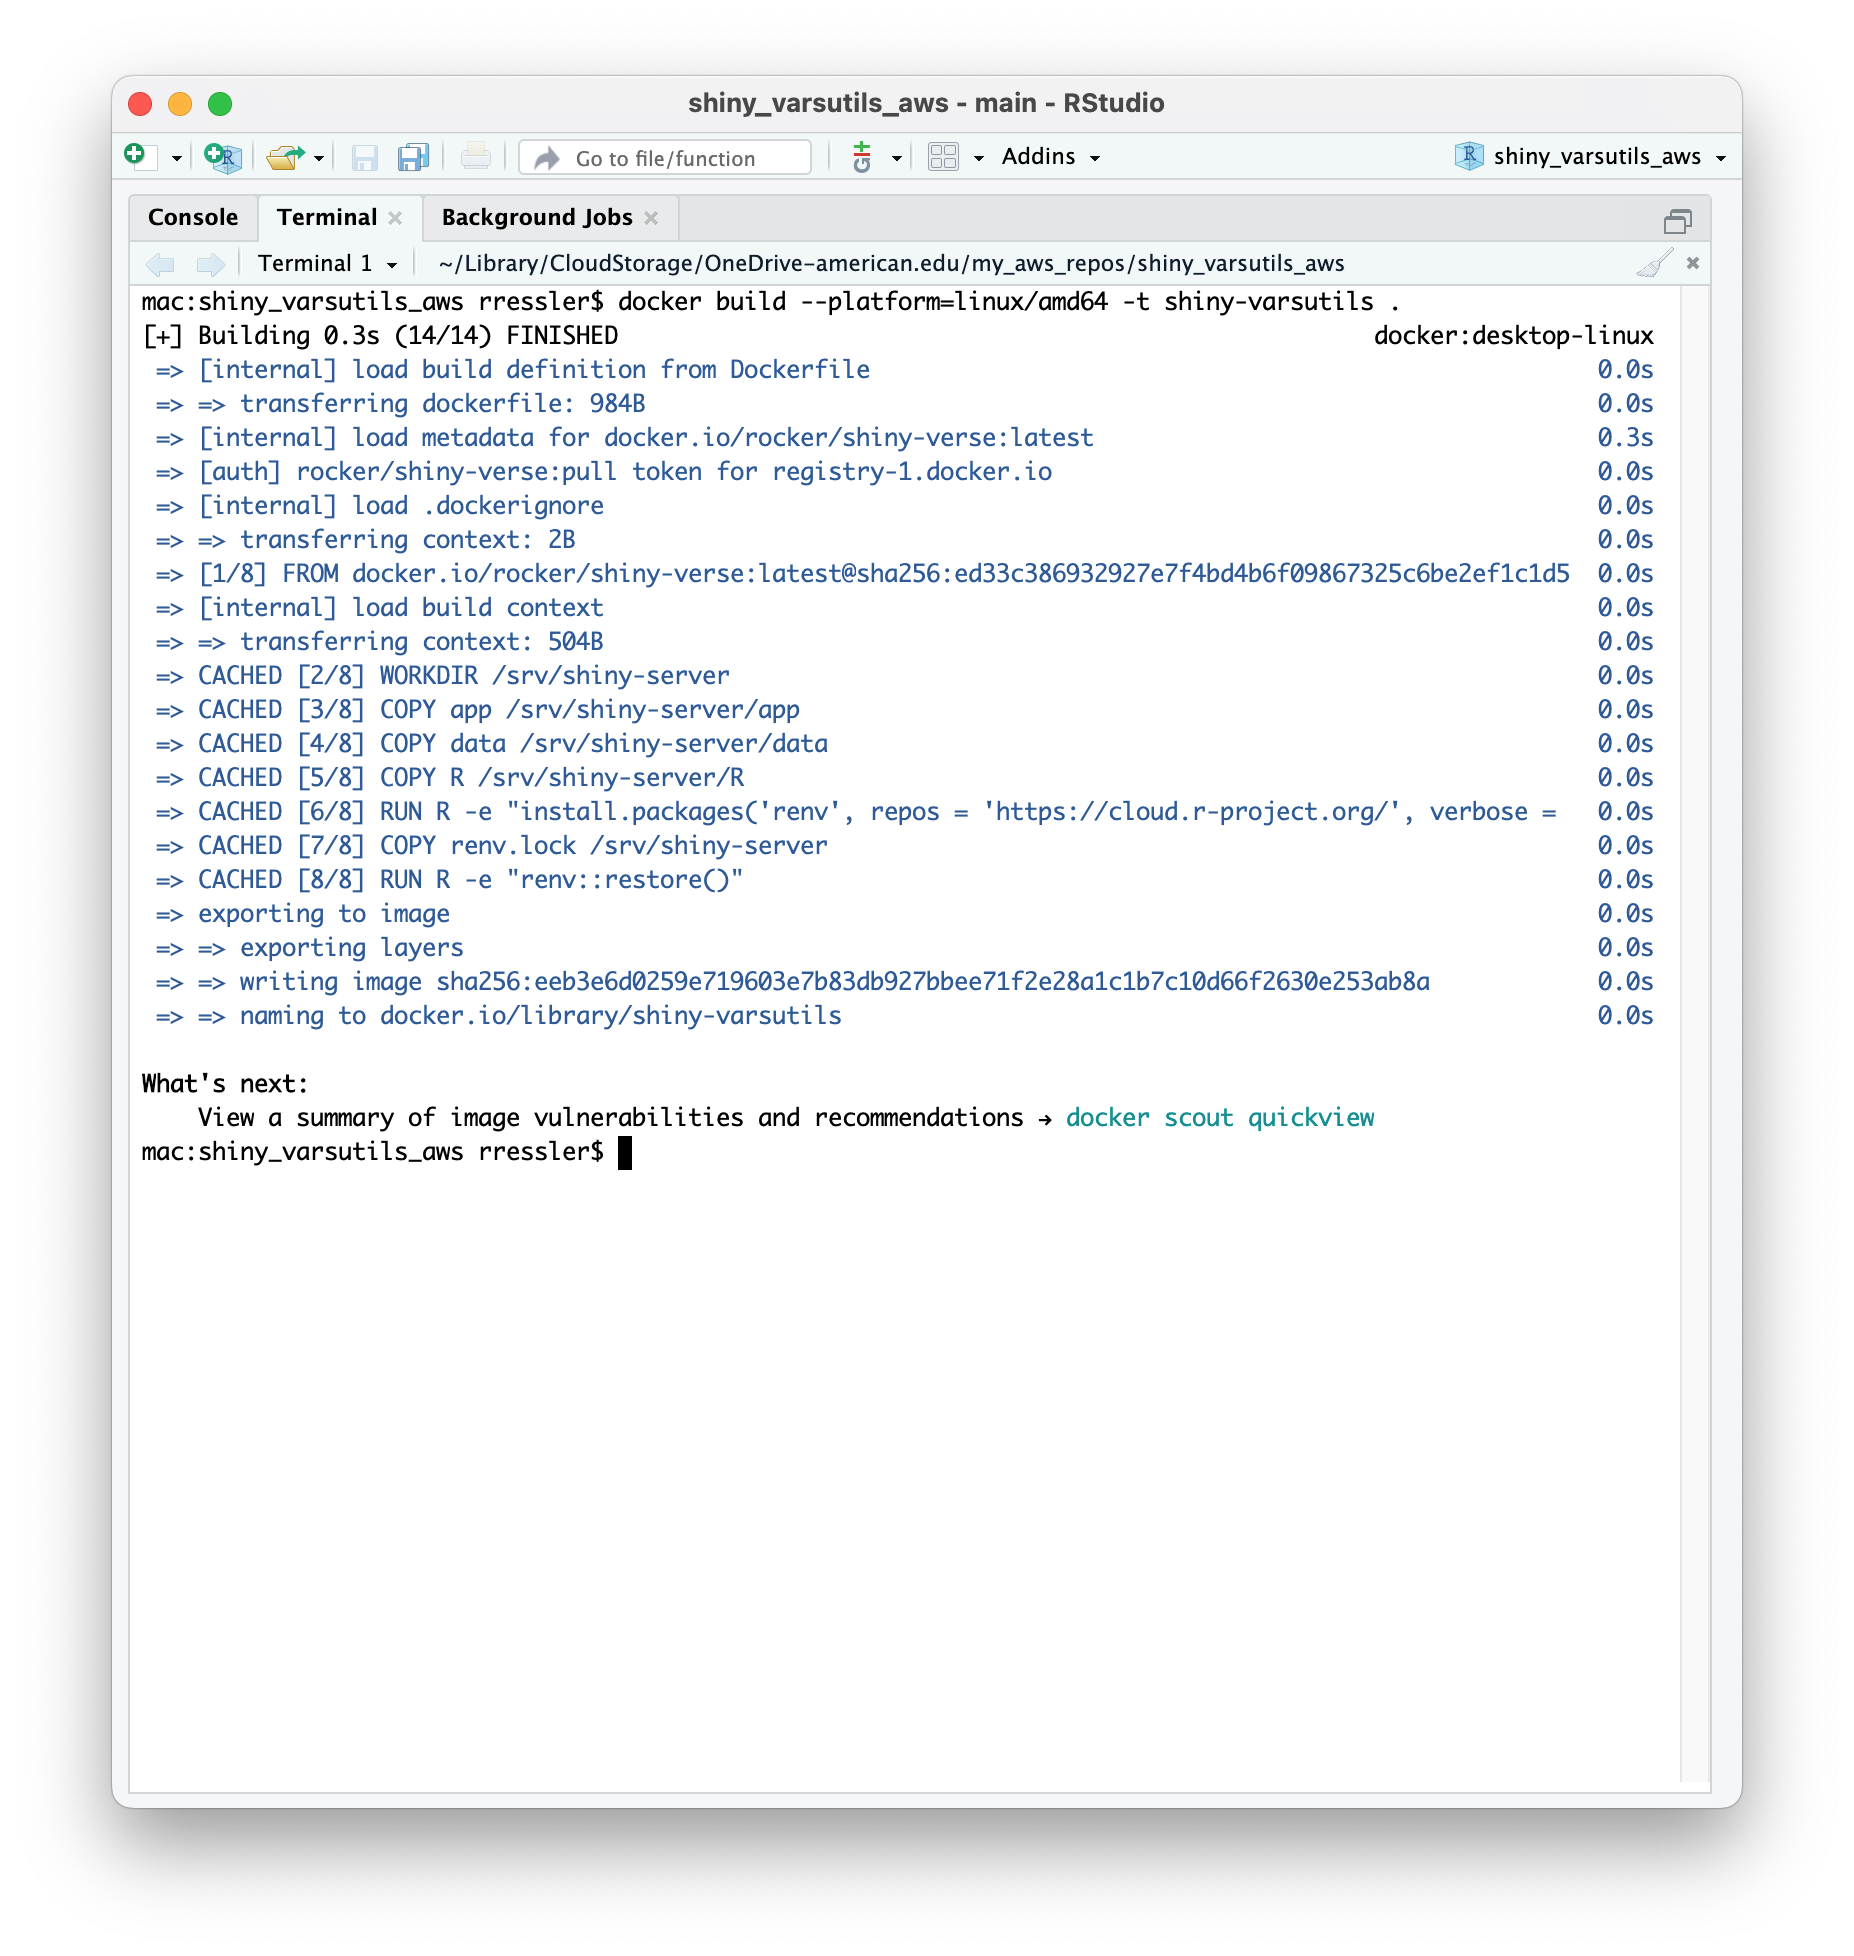
The following is specific to a Mac Silicon Docker file for a different app.
- In the terminal:
docker build --platform linux/arm64 -t shiny_vars_utils_aws . - The platform specific flag may cause the build to run “quietly”, i.e., with no output to the terminal to show about progress.
- To display build progress you can override the Quiet mode with the
--progress=plainargument.docker build --platform linux/arm64 -t shiny_varsutils_aws --progress=plain .
Figure 18.18 provides a view of the start and finish of a build starting with a base R image for a silicon mac using the docker file in Listing 18.12.
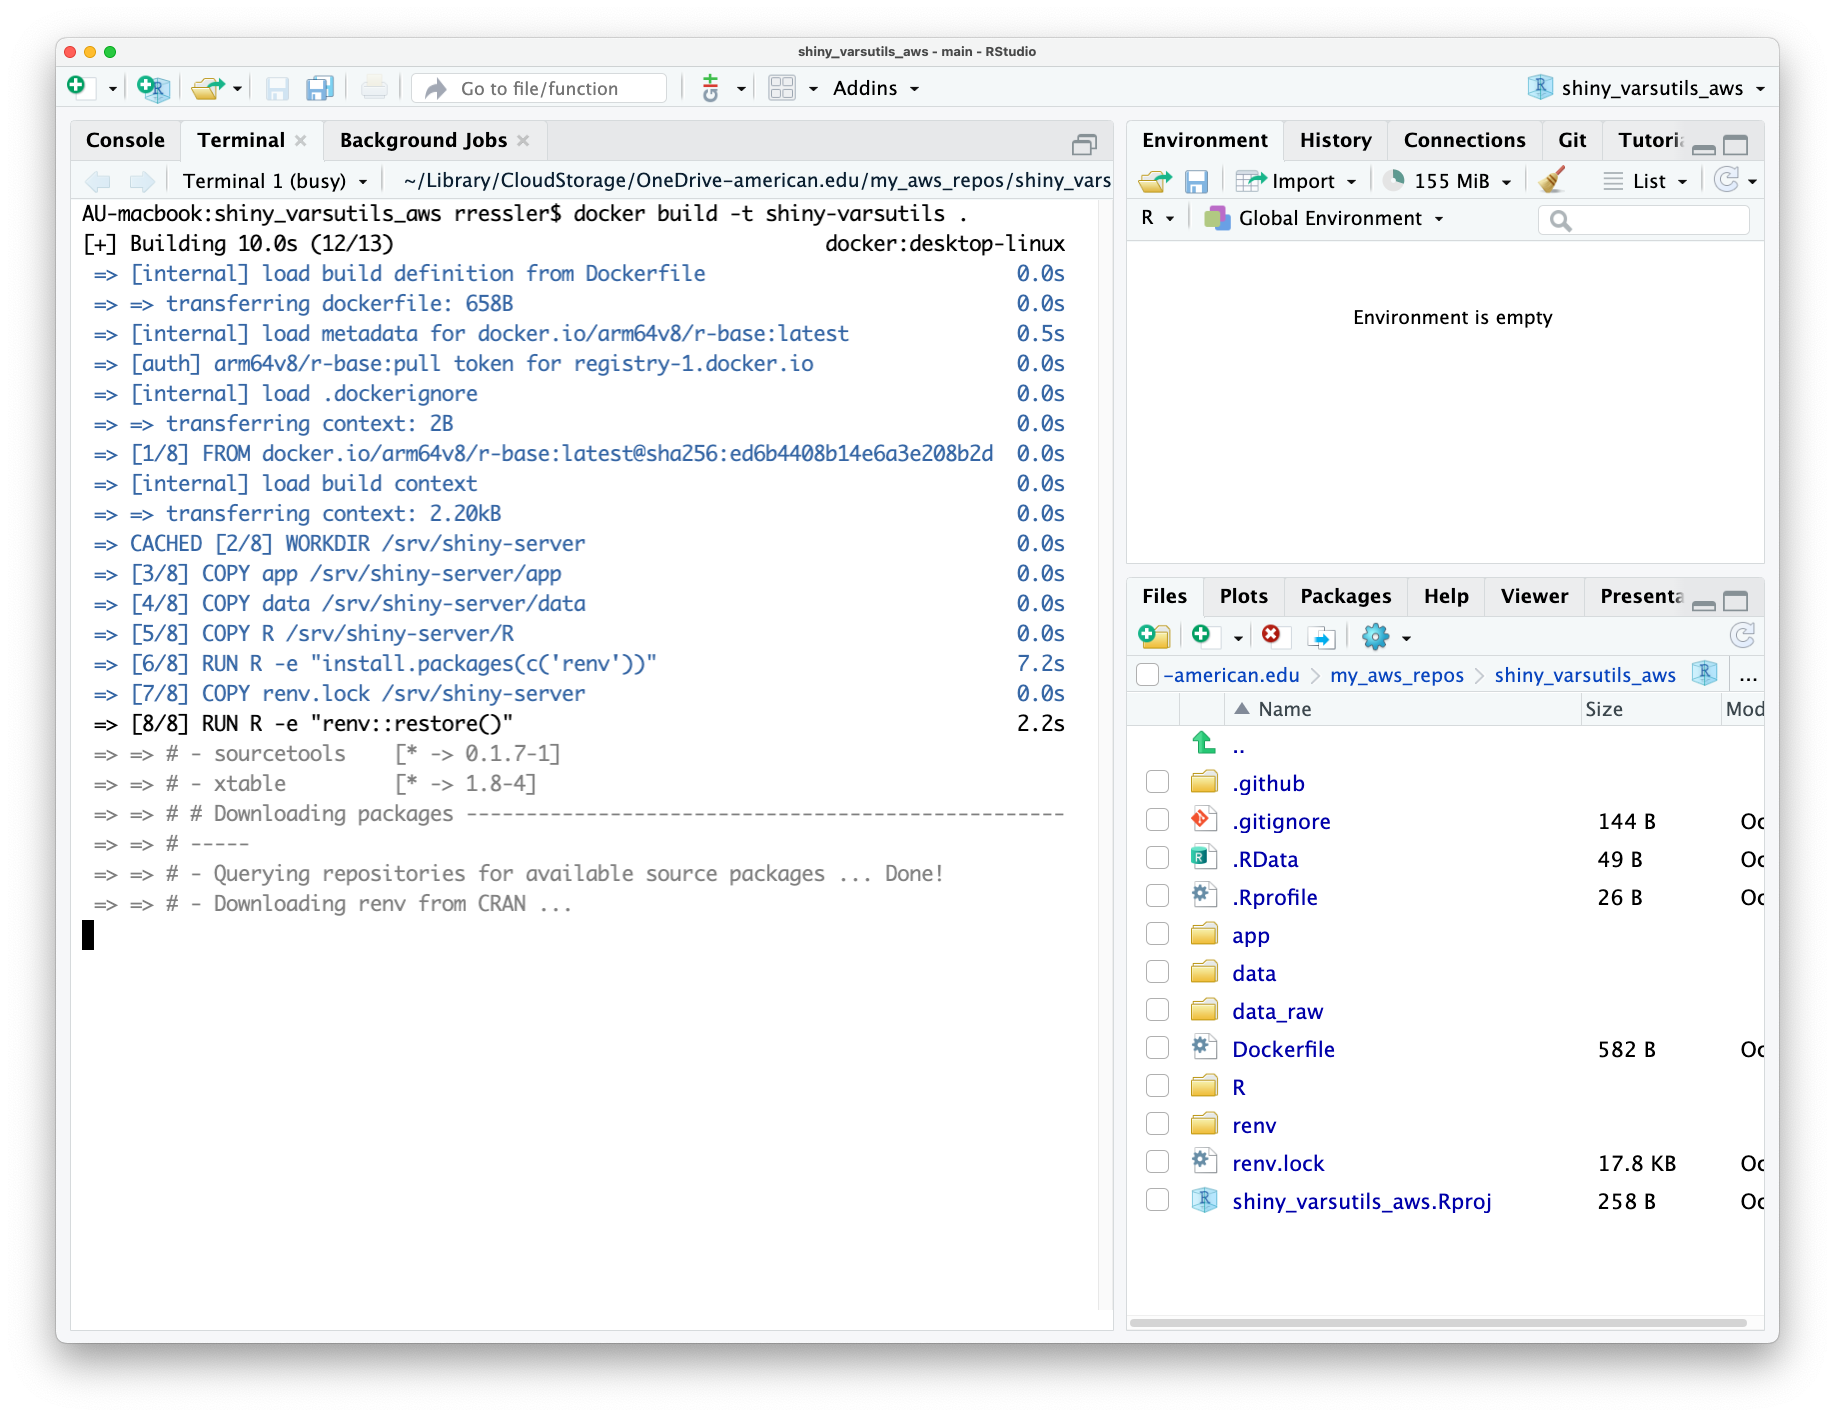
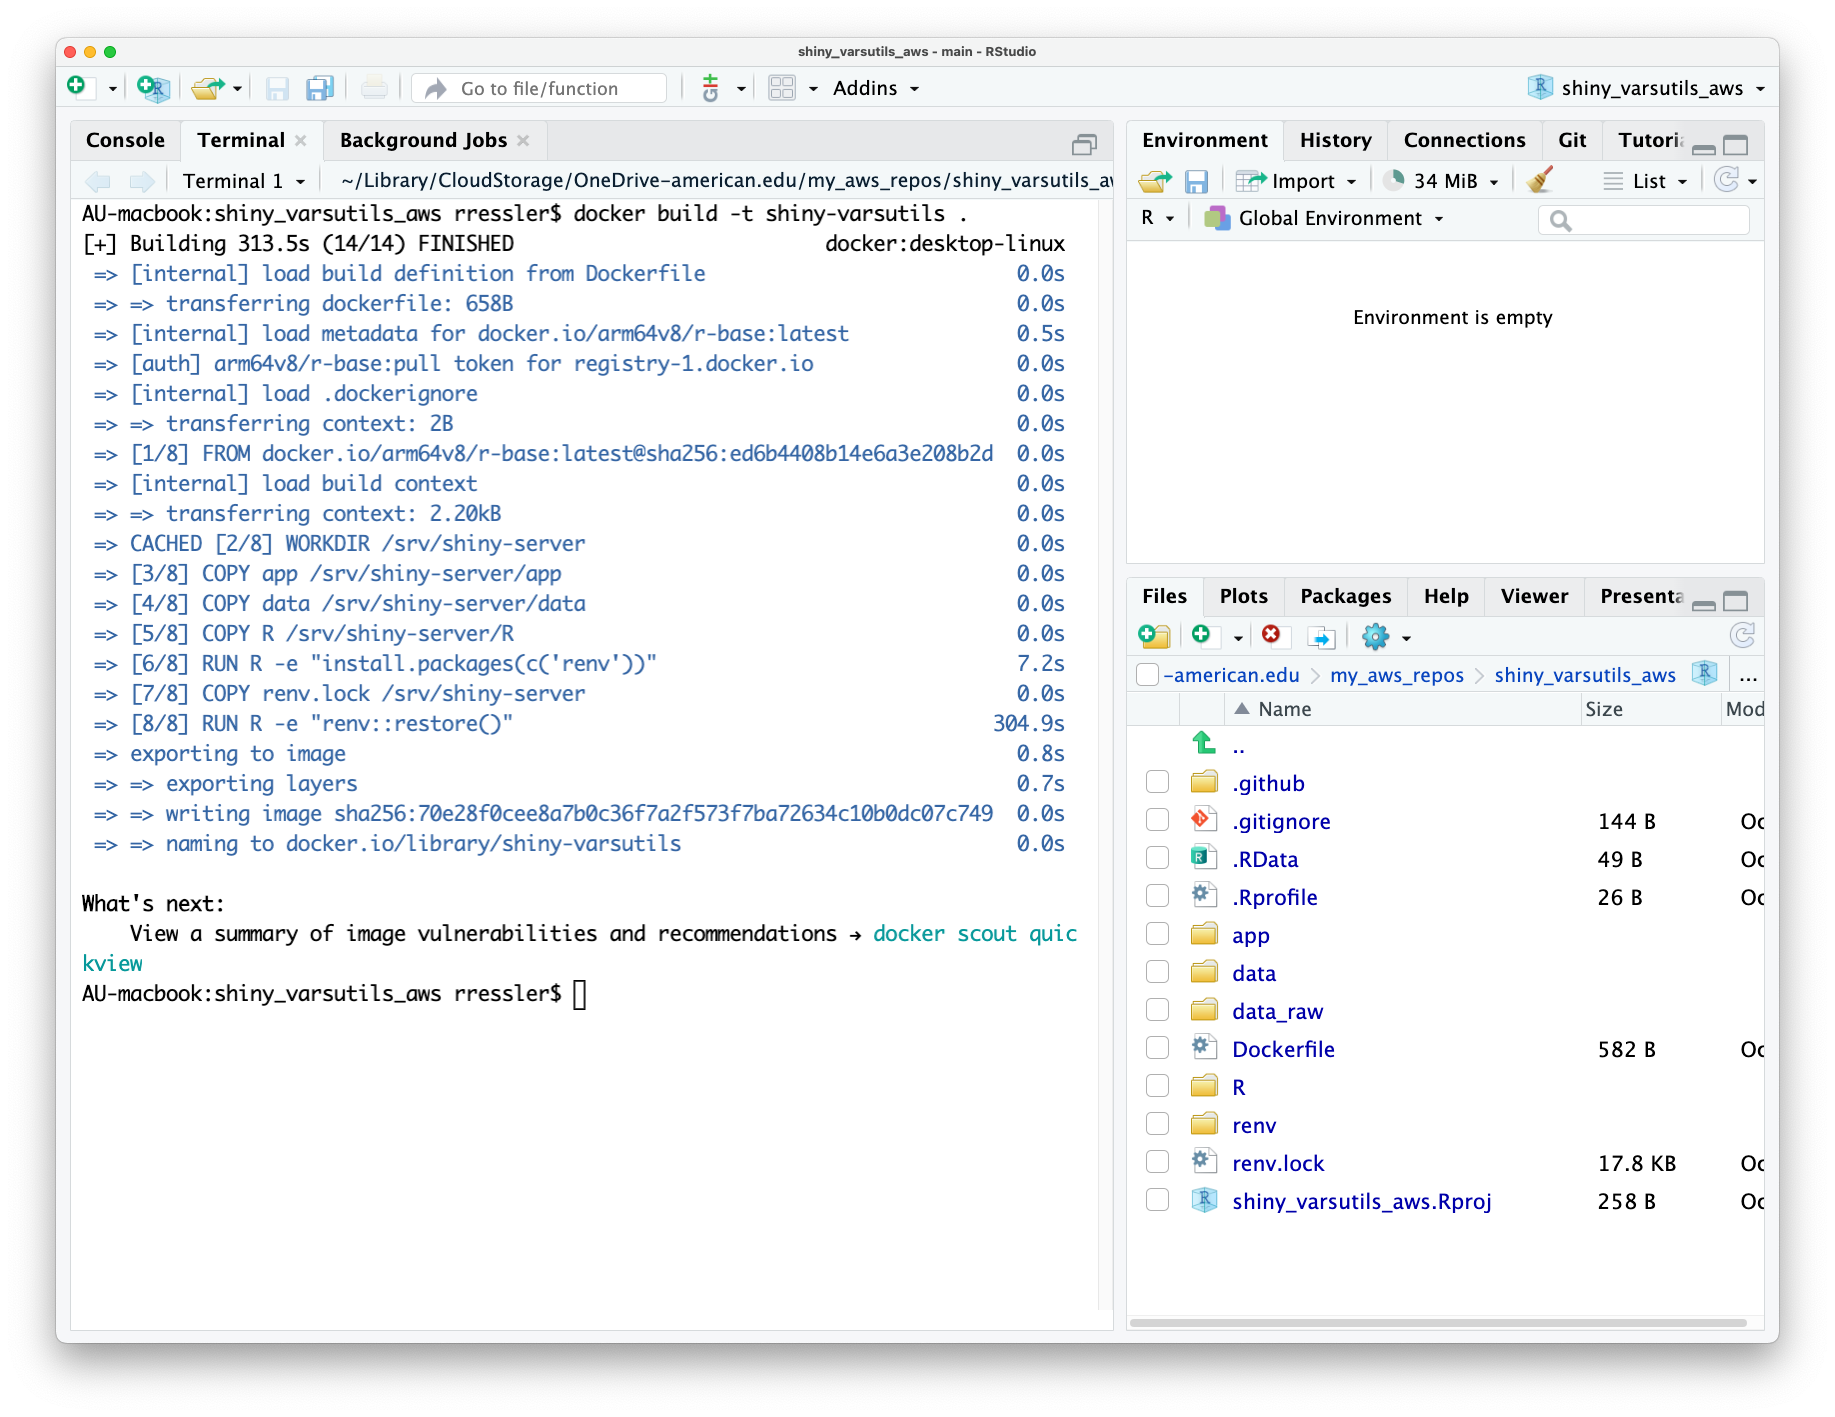
- If there is an error it will stop and provide you information about the line that caused the error.
- To check the build logs, use
docker logs -f
18.9.5 Run the Container.
Once you have a successful build, you can test it by running the new container.
Docker Desktop has built-in emulator for Mac and Windows to run Ubuntu containers.
Go to the terminal and enter docker run --platform linux/amd64 -p 3838:3838 image-shiny-old-faithful.
- This tells docker you know you are running on a platform different that your own operating system.
- It also says to use port 3838 to expose the container to users.
- You should get a result like Figure 18.19 that ends with
Listening on http://0.0.0.0:3838
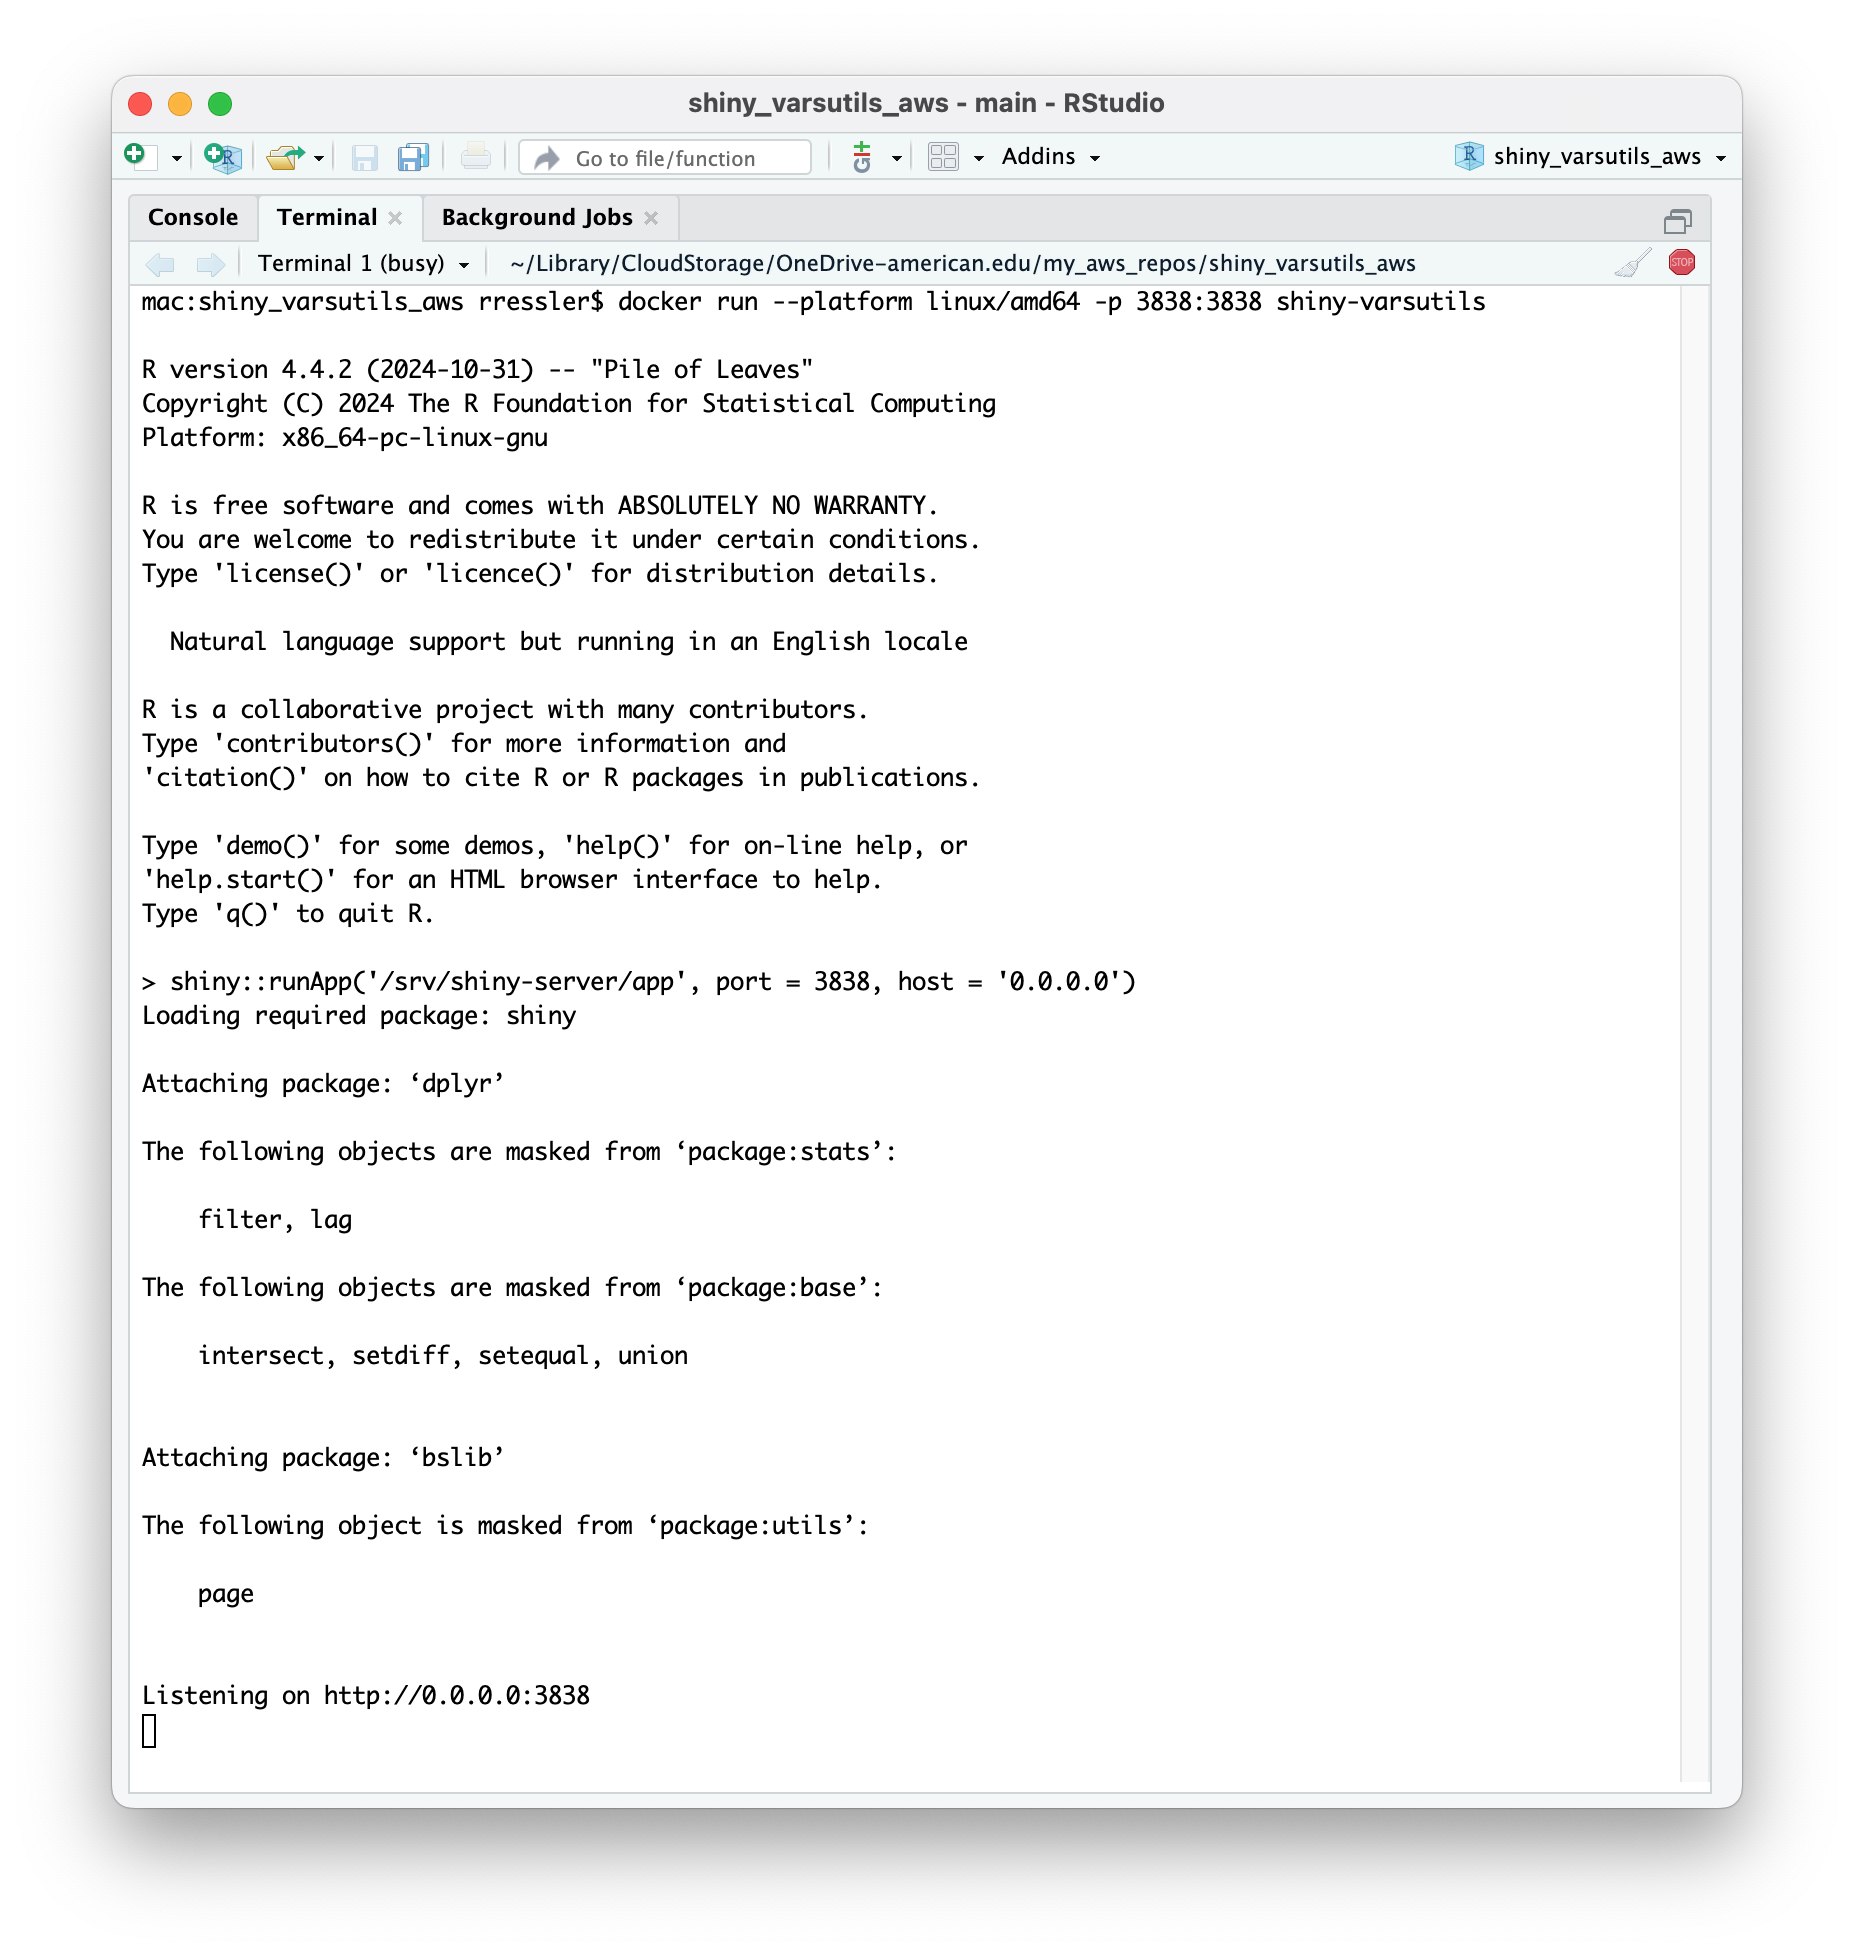
Click on the link to see the app running in your browser or open a browser and enter
http://localhost:3838and you should see your running app.You can observe the output in your terminal window as opposed to the console.
To terminate the app go to your terminal and use
CTRCL C.
Assuming it all works, your app is ready to share with others or deploy.
It is cached on your computer - use
docker image lsto see all the images on your computer - including the one Docker downloaded for you.If you have a free Docker Account you can put it into their public registry - see docker image push.
18.11 Amazon Web Services and Docker Containers (INCOMPLETE)
This section assumes the following:
- The user has created an R Shiny app that works and is stored in its own RStudio project.
- The user is managing the environment for the shiny app using {renv} in a local repository.
- The user has established a remote repository for the shiny app on GitHub.
- The user has created and tested a Docker container using a dockerfile which is saved in the repo with the working shiny app.
18.11.1 Get an Amazon Web Services Account
To create a new AWS account, go to https://aws.amazon.com and choose Create an AWS Account.
This provides you a “Root” account. Consider this as the owner of the account for managing the account to include enabling additional users.
18.11.2 Work with the Identify and Access Management (IAM) service
- AWS recommends using the IAM Identity Center for managing an organization.
- The IAM Identify Center provides flexibility and scale to organizations who need to manage many users and want to integrate with their existing identify management systems, e.g., Active Directory or have multiple external linkages to manage.
- We only need one group and two users so we will use the IAM service instead to manage individual accounts.
- AWS will keep suggesting to manage users using the IAM Identify Center instead of by account, but ignore that for now.
We will use the IAM service to manage groups and users accounts since we only need a few.
Log into AWS. Search for IAM and open the dashboard.
18.11.2.1 Create a new “User Group
We will assign permissions to Groups instead of individual users which makes it easier to manage them over time as users may shift group membership.
Select User Groups.
Fill in the name, e.g., “Developers”.
Attach the following permissions/policies by searching for them and checking the box to the left.
- Sometimes it is better to search on part of a name
- DataScientist (search sci)
- AmazonECS_FullAccess (search ECS)
- AmazonEC2ContainerRegistryFullAccess (search EC2)
Once all policies have been attached, select “Create user group”.
The Developers Users group should look similar to Figure 18.20
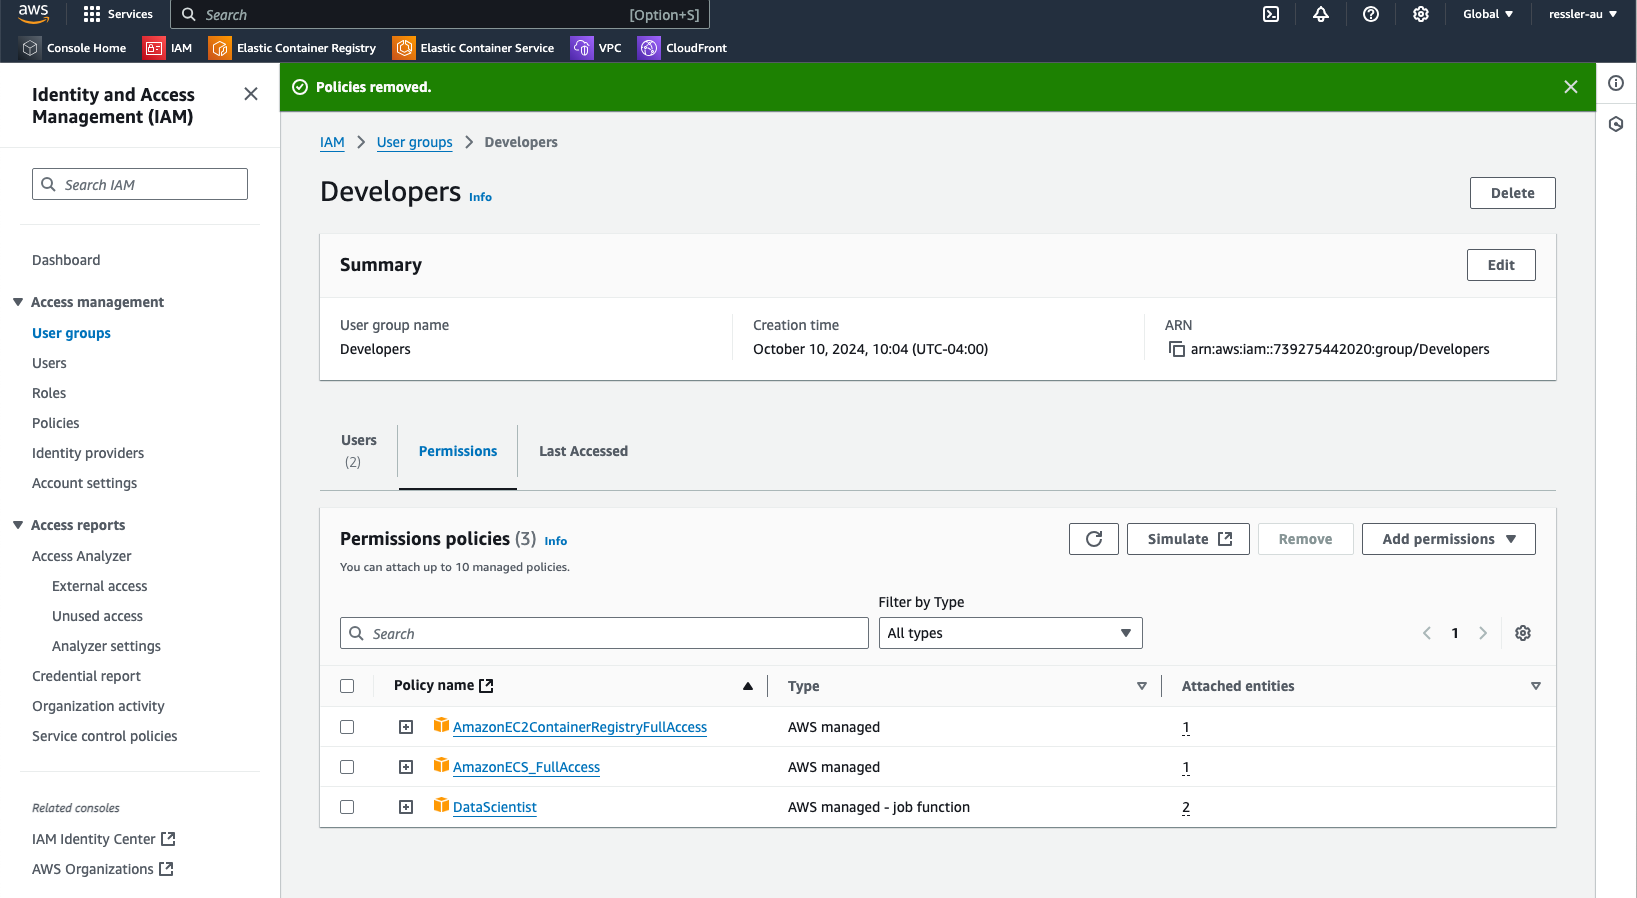
18.11.2.2 Managing mutiple user accounts
It is a best practice to only use the user account with Root access for managing the account and not doing development.
- The Root account generally creates a member account with admin access and one with developer access.
- You can have multiple accounts using the same email address but each must have a separate user name and password.
- We will create a new user for development and deployment.
You can also add additional users other than the root users to allow others to access the AWS services and take actions.
18.11.2.3 Create a new User
- Go to IAM and select Users on the left side.
- Select “Create User” on the right side
- Enter a Name for the user, e.g., your-name-dev and select next.
- Add user to a group. Select the check box next to Developers.
- Select “Next”.
- Select “Create user”
18.11.2.4 Enable Console Access for the new User
- Click on the user to review their status.
- You should see the three permissions attached via the group membership.
- Click on “Security Credentials”.
- In the “Console sign-in” portion”, click on “Enable console access” so they can use the AWS consoles such as ECR and ECS.
- Select Allow user to choose their password upon login.
- Copy the information on this screen into an email to the new user using whatever email address you have for them.
- The console sign on URL: e.g., https://your-account-name.signin.aws.amazon.com/console
- The user name you created for them: e.g., your-name-dev
- The temporary Console password: e.g, BsH)3CX]
- Select “Close”
- If you forget, go back to “Console sign-in” portion, click on “Manage console access” and select “Reset Password” to get new information to email to the user.
18.11.2.5 Add an Identity Provider for GitHub
To avoid the use of long term keys, you can establish an identity provider for GitHub and then later on a role with access to the identity provider.
- Go to IAM and click on the “Identify Providers” and “Add Provider.
- Select OpenID connect.
- Fill in the information for GitHub as in Figure 18.21 and click “Add Provider”.
- Provider URL: token.actions.githubusercontent.com
- Audience: sts.amazonaws.com
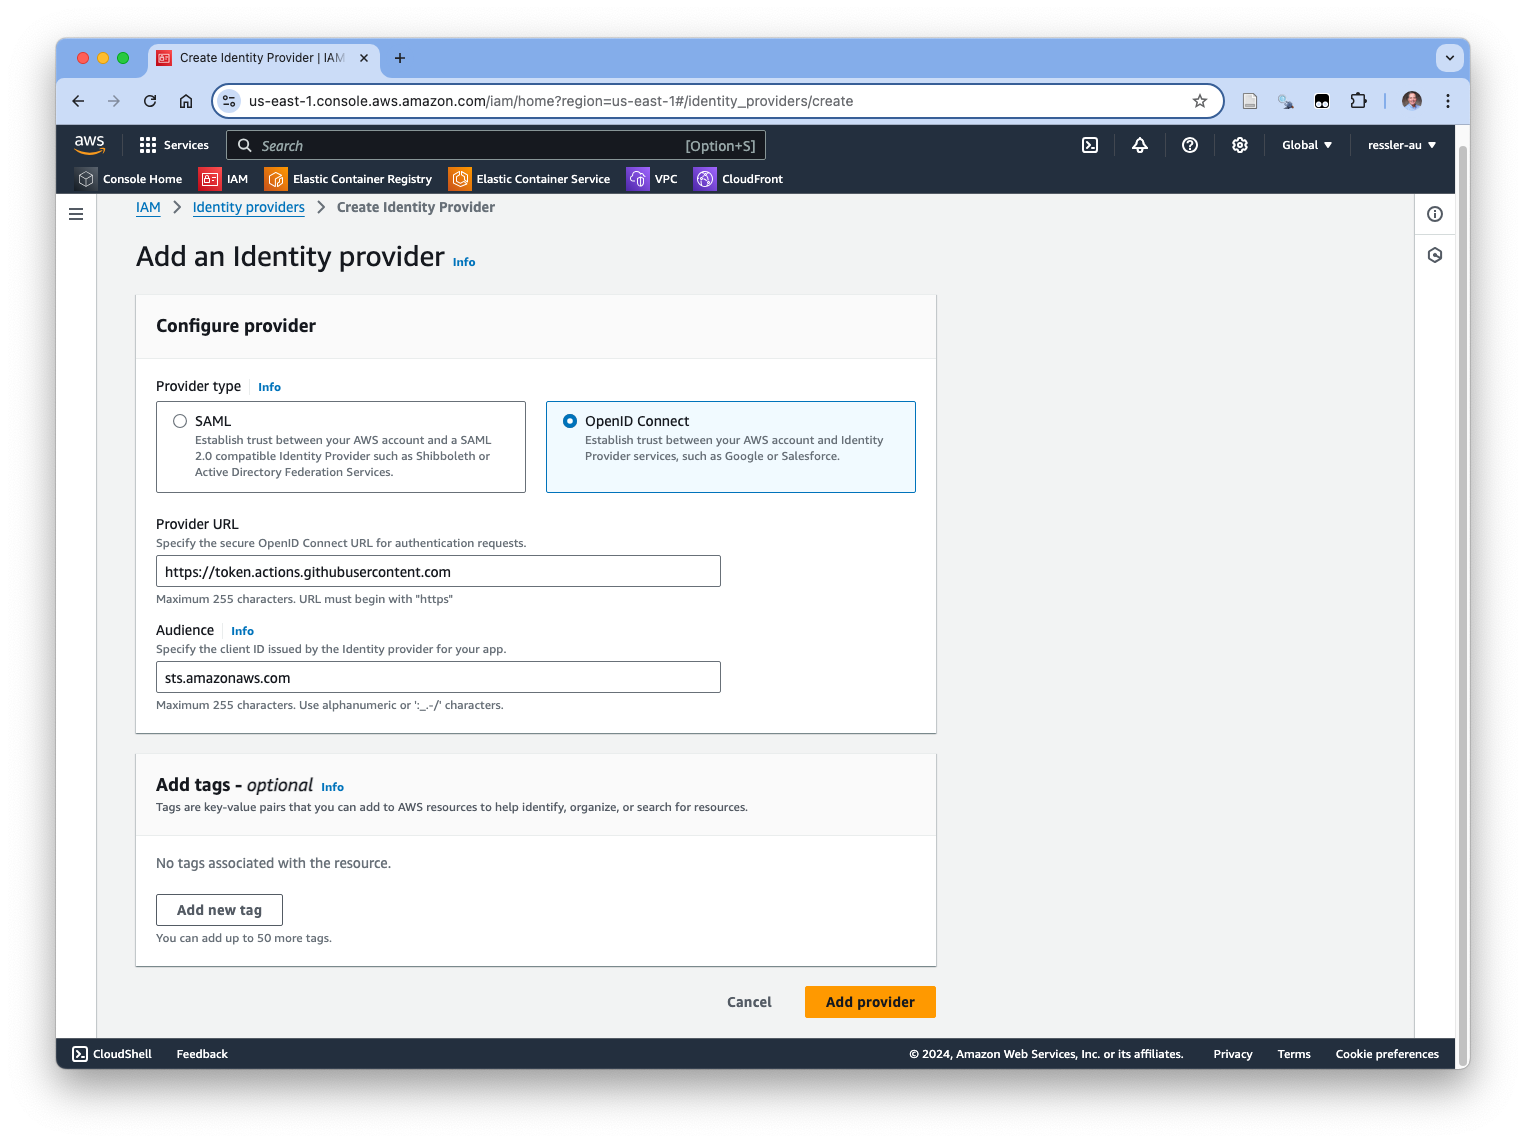
18.11.2.6 Create IAM Role for GitHub Actions
AWS roles can grant “temporary credentials” to AWS resources or users to allow one AWS service or user to interact with another AWS service securely. - They avoid the need for long term Keys for users. - See Use IAM roles to connect GitHub Actions to actions in AWS
- Go to IAM and select Roles and click on “Create Role”.
- Select “Web Identity” for the trusted entity and fill in the information for the GitHUb actions Identity provider you just created.
- Fill in the information for GitHub and for the GitHub organization where the repo is located (either the GitHub classroom or your personal organization).
- The form should look like Figure 18.22
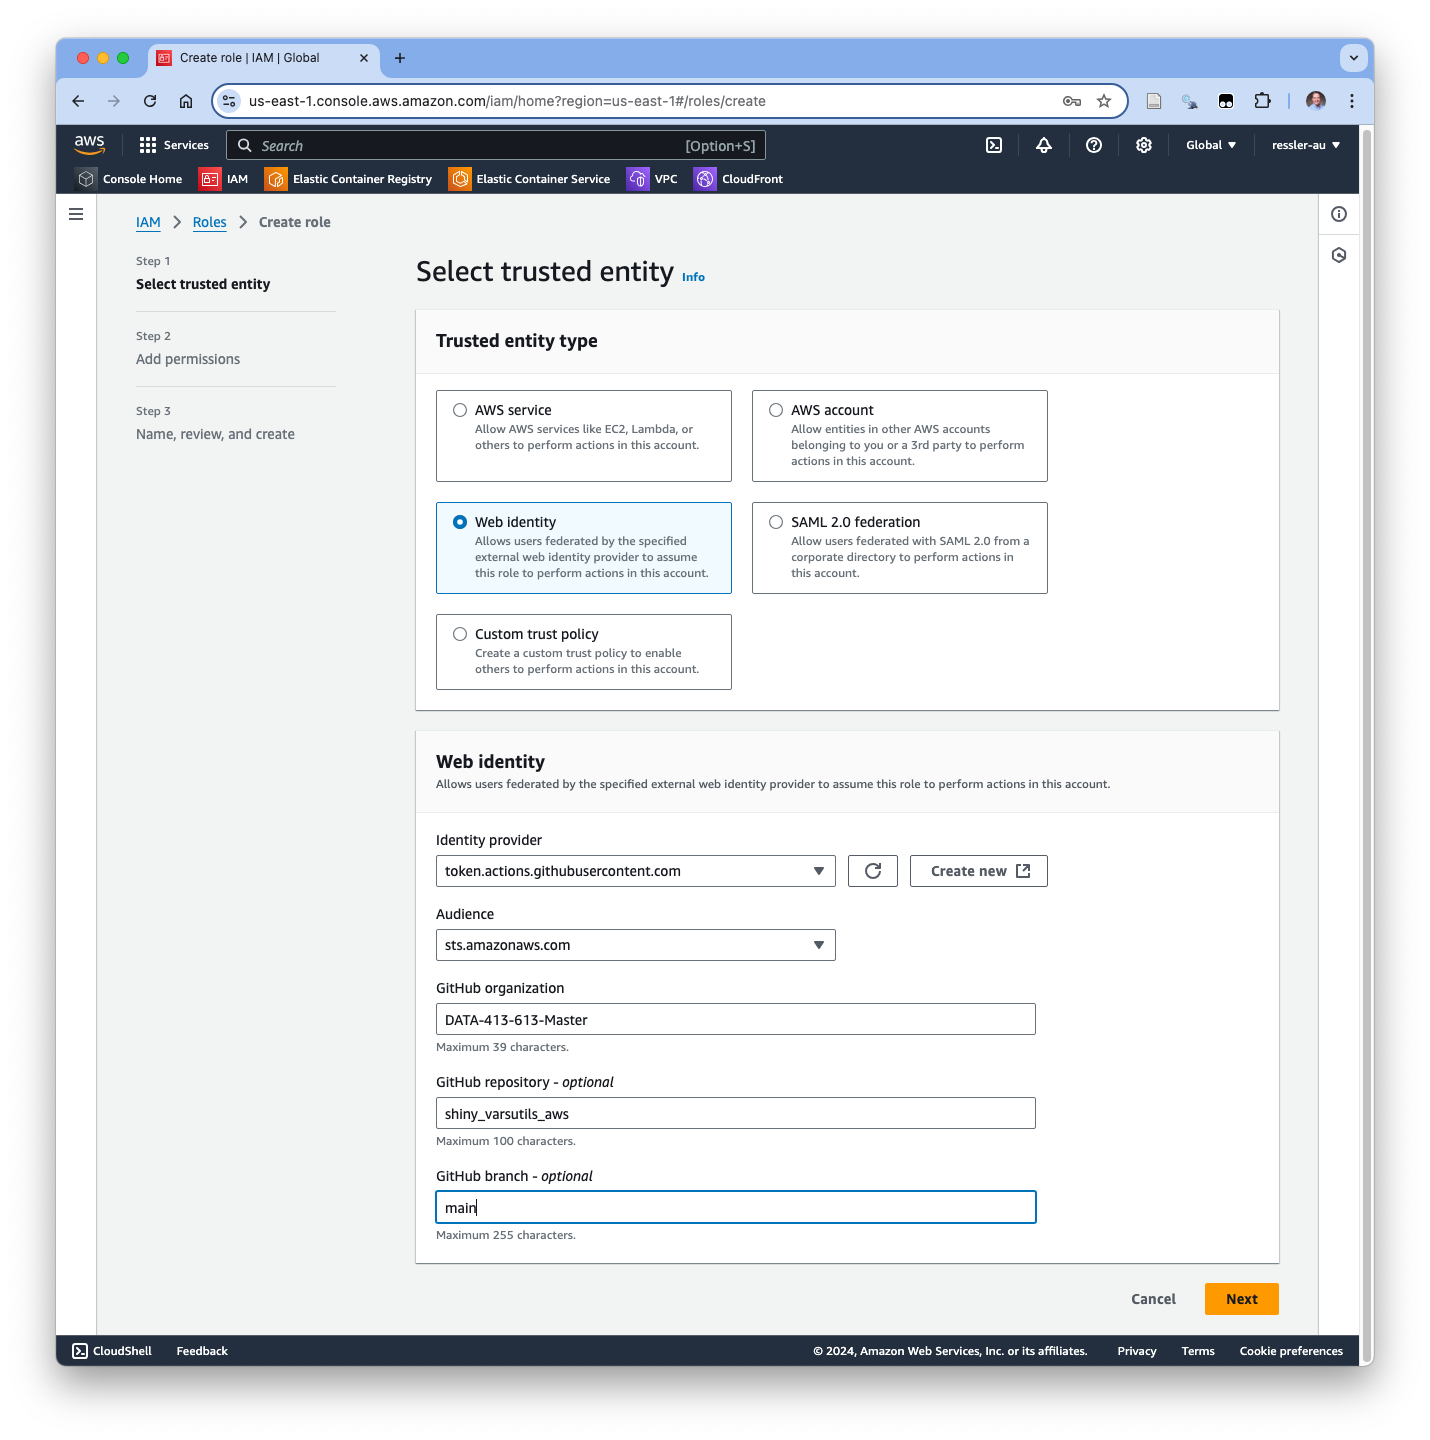
18.11.2.7 Add the Amazon Web Resource for the Role to the GitHub Repo as a Secret
- Go to IAM and to the role and click on the role name “GitHubActions-ECR-ECS-Role”.
- In the “Summary” section there is a copy icon next to the Amazon Resource Number (ARN). Click on that to copy the ARN to your clipboard.
- Go to GitHub to the repo you identified in the Role.
- Click on Settings.”
- Go to “Secrets and Variables” on the left and click on “Actions” and then “New repository secret”.
- Create a new secret called “AWS_ROLE_TO_ASSUME” and paste in the ARN as the secret.
- Your screen should now look like Figure 18.23.
18.11.3 Create an Amazon “Elastic Container Registry (ECR)” repository
18.11.4 Go to ECS
18.11.4.1 Define a Cluster in ECS
18.11.4.2 Define a Task Definition
To use an Application Load Balancer (ALB) with your AWS Fargate task, follow these general steps:
- Create a Load Balancer
- Go to the EC2 Dashboard > Load Balancers > Create Load Balancer.
- Choose Application Load Balancer.
- Chose a name e.g., “shiny-apps-cluster-alb”
- Specify the Scheme as Internet-facing as we want it to be publicly accessible.
- Select the VPC and subnets where your Fargate tasks are running.
- Go to the Amazon ECS Console in a new browser tab.
- Select your Cluster where the service is running.
- Click on the Services tab within the cluster.
- Find your service and click on it to view details.
- In the Networking section of the service details, you will see the VPC and subnets listed where the tasks are deployed.
Configure Load Balancer Settings
• Listeners: Add a listener for HTTP (port 80) or HTTPS (port 443) traffic. • Security Groups: Attach a security group that allows inbound traffic on the relevant ports (e.g., 80 for HTTP or 443 for HTTPS).
Set Up Target Groups
• Go to Target Groups in the EC2 console. • Create a new Target Group for your Fargate tasks: • Target type: Choose IP for Fargate. • Port: Specify the port on which your container listens (e.g., 3838 for a Shiny app). • Health Check Settings: Configure health check (HTTP path to check).
Register Fargate Tasks to the Target Group
• Under the Targets tab of the Target Group, register your Fargate tasks. • You can manually register tasks using their private IP addresses or set it up to automatically register tasks based on the service.
Update Fargate Service to Use Load Balancer
• Go to ECS Console > Clusters > Your Cluster > Services. • Select your service and click Update. • In the Load Balancing section, choose Application Load Balancer and select the Target Group you created. • Configure the Listener port (e.g., 80 or 443).
Deploy and Access Your App
• Once the load balancer is set up, you can access your application using the DNS name of the ALB. This DNS will remain consistent, even if the underlying IPs of your Fargate tasks change.
Optional: Enable HTTPS
• To enable HTTPS, configure a SSL certificate with AWS Certificate Manager (ACM) and link it to the ALB listener on port 443.This will allow you to have a consistent public-facing address for your application that automatically distributes traffic to your Fargate tasks. Now we have the repo on GitHub and the Role with the correct permissions on AWS.
We will use GitHub Actions to put things together.
18.12 CI/CD with GitHub Actions to Deploy Docker Containers to Amazon Web Services (INCOMPLETE)
This section assumes the following:
- The user has created an R Shiny app that works.
- The user is managing the environment for the shiny app using {renv} in a local repository.
- The user has established a remote repository for the shiny app on GitHub.
- The user has created and tested a Docker container using a dockerfile which is saved in the repo with the working shiny app.
- The user has an established AWS account with the necessary users and roles with the appropriate permissions.
- The user has manually deployed the Docker container to AWS ECR.
- The user has established a cluster with services that can successfully run the deployed container in ECS for public access.