flowchart LR %% MAIN FLOW (FORCED ORDER) A["Prompt<br>Task + Constraints"] --> B["Function<br>Prompt in code"] --> C["Workflow<br>Fixed sequence"] --> D["Agent<br>Dynamic decisions"] %% FORCE ORDER (IMPORTANT) %% A --- B --- C --- D %% Functions CAP["Functions & Tools<br>(prompts, code, APIs)"] B --> CAP CAP --> D %% CONTROL FLOW subgraph control ["Control Flow"] direction LR CF1["User-driven"] CF2["Code invoked"] CF3["Code defines process"] CF4["Model helps define process"] end A --> CF1 B --> CF2 C --> CF3 D --> CF4 %% RESULTS R1["Validated Results<br>Task Complete"] R2["Validated Results<br>Task Complete"] R3["Validated Results<br>Task Complete"] R4["Validated Results<br>Task Complete"] CF1 --> R1 CF2 --> R2 CF3 --> R3 CF4 --> R4
13 Agentic Systems
Keywords
LLM, Prompt Engineering, Agentic Systems, Augmented LLMs, Workflows, Agents, Skills
13.1 Introduction to Agentic Systems
13.1.1 Learning Outcomes
By the end of this section, you should be able to:
Prompts and Language Models
- Describe how large language models generate responses, including the role of tokenization, token limits, and how model size affects output quality and consistency
- Develop effective prompts for interactive chat, distinguishing between one-off queries and prompts designed for reuse in code
- Convert a well-designed chat prompt into a reusable, parameterized function suitable for embedding in a larger analytical system
- Design prompts that provide sufficient context for agentic systems, including role, task, constraints, and examples
Workflows and Agents with Local Models
- Explain the difference between a prompt, a workflow, and an agentic system, and identify which is appropriate for a given task
- Call a local language model from R using Ollama and treat it as a function inside a larger program
- Build a generate -> evaluate -> revise loop and explain why evaluation is a prerequisite for reliable agentic behavior
- Define deterministic and prompt-based tools and register them in a tool registry that the model can select from at runtime
- Construct a balanced agent with a layered architecture: core model interface, shared helper functions, generate/evaluate tool pairs, and an orchestration loop
- Apply context engineering principles to multi-call systems; deciding what information each model call needs and what to leave out
- Extend a balanced agent with persistent memory and a pipeline wrapper to handle multi-step tasks that depend on intermediate results
- Debug failures in prompts, code execution, and tool selection using structured debug logs
13.1.2 References
Effective context engineering for AI agents (Anthropic Engineering 2025)
A practical guide to building agents [aopenaiPracticalGuideBuilding2026]
Academic literature on LLM agents and prompt engineering
- A Systematic Survey of Prompt Engineering in Large Language Models: Techniques and Applications (Sahoo et al. 2024) covers techniques from zero-shot and few-shot prompting through chain-of-thought.
- A Survey of Context Engineering for Large Language Models (Mei et al. 2025) introduces context engineering as a formal discipline distinct from prompt engineering, covering retrieval, memory, tool integration, and multi-agent systems across 1,400 papers.
- Agentic Large Language Models, a survey (Plaat et al. 2025) covers LLMs that reason, act, and interact, organized around exactly those three capabilities, with discussion of tool use, multi-agent systems, and responsible use risks.
- Large Language Model Agent: A Survey on Methodology, Applications and Challenges (Luo et al. 2025) covers agent architectures, collaboration mechanisms, and evaluation methodologies with a unified taxonomy.
- Awesome Agent Papers (Luo 2026) The companion repository to the survey above, maintained as a curated and continuously updated reading list organized by the same taxonomy. A good starting point for going deeper on any specific topic from this chapter.
NoteA Note on the Development of This Chapter
This chapter was developed with the assistance of both ChatGPT and Claude.
- These tools were used throughout to explore ideas, generate initial code, and draft prose.
- Through extended iterative conversations the material was revised, restructured, removed, and adjusted as I tuned it to align with my pedagogical goals for this course and serve as a reference for others.
- All material was verified against primary references. The framing, sequencing, and editorial judgments are my own.
The contents of this chapter, their clarity, accuracy, and relevance, are my responsibility. Any errors are mine alone.
13.2 From Interactive Prompts to Code
This short module is about transitioning from chat-based interactions to working with LLMs in a structured, code-driven manner as is required for agentic systems.
It focuses on strengthening thinking about prompts in three areas that will be useful for using agents:
- Structured prompt design
- Iteration as a loop
- Constraint prioritization
13.2.1 A Simple Prompt Template
The following template provides a consistent way to construct high-quality prompts.
A good prompt answers five questions:
- ROLE: Who should the AI act as?
- TASK: What exactly should it do?
- CONTEXT: What information does it need?
- CONSTRAINTS: What rules must it follow?
- OUTPUT FORMAT: What should the result look like?
Example:
- Role: You are a data science tutor.
- Task: Write R code to visualize revenue over time.
- Context: I have a data frame with columns
yearandrevenue. - Constraints:
- Use ggplot2
- Assume no missing values
- Include axis labels and a title
- Output: Code only with no explanation
The ROLE component deserves particular attention because it shapes the entire character of the response — and because in more complex systems, the same model may be called multiple times playing different roles within a single workflow.
- Role prompting reliably affects output style and format across models. Its effect on accuracy is less consistent and depends on the model and task.
- The most reliable use of roles in data science workflows is not to improve correctness, but to separate concerns by using different roles to shape what the model attends to and how it presents results.
NoteCommon roles and what they signal to the model
Table 13.1 lists some common roles you can use to shape the LLM response style and structure in lieu of lengthy prose descriptions.
| Role | Primary Effect | Example use |
|---|---|---|
| Coding assistant | Terse, code-first, no explanation | Generating a function |
| Data science tutor | Explanatory, step-by-step, teaching tone | Learning a new method |
| Code reviewer | Critical framing, error-focused | Evaluating output quality |
| Planner | Breaks a task into ordered subtasks | Decomposing a complex goal |
| Evaluator / Judge | Assesses output against criteria | Checking constraint satisfaction |
| Summarizer | Condenses prior context | Compressing conversation history |
These role serve distinct purposes:
- The first three roles primarily change style and are broadly consistent across models.
- The last three, Planner, Evaluator, and Summarizer, are structural roles used to divide labor across separate model calls.
- These are where role assignment matters most in agentic systems:
- Asking the same model call to both generate and evaluate its own output in one prompt is less reliable than separating those roles into two calls.
A tightly structured prompt has the following benefits:
- Reduced ambiguity
- Improved consistency which supports reproducibility
- Easier to debug
- Provides a foundation for agentic systems
This structure mirrors how agentic systems internally organize tasks, making it easier to transition from prompting to automated workflows.
13.2.2 Iteration as a Loop
In chat-based interactions, iterating prompts can be thought of as a conversation.
- However, when working with code-driven interactions, it is more useful to think of iteration as a structured loop.
The iteration of a structured loop follows a common cycle:
- Ask
- Evaluate
- Refine
- Repeat
Example
- Ask: Write R code to plot revenue by year.
- Evaluate: Check for missing labels or no title
- Refine: Add axis labels and a descriptive title.
- Repeat: Continue refining until the output meets requirements
This loop is the foundation of more advanced systems:
- Interactive Prompting leads to a human-driven manual loop
- Workflows can automate a fixed version of this loop
- Agents can run it dynamically, deciding when to continue, stop, or change direction.
13.2.3 Constraint Hierarchy
Not all constraints are equally important. Focus on the critical few instead of the “messy many.”
Suggested Approach: Prioritize constraints in the following order and check constraints in this order as errors are often caused by missing or unclear high-priority constraints.
- Output Goal
- code vs explanation
- table vs paragraph
- Tools / Libraries
- ggplot2, pandas, etc.
- Assumptions
- missing values
- data types
- Scope
- one solution vs multiple options
- Style
- concise vs detailed
Example of weak versus strong:
- Weak constraint: Make it clear and nice.
- Strong constraint: Output only R code using ggplot2 with labeled axes and a title.
Example: Poor vs Structured Iteration
- Poor Iteration: User repeatedly adds vague follow-ups such as “Make it better”, “Fix it” or “Change it a bit”
- Results can be inconsistent outputs, drifting logic, confusion in tracking the logical flow.
- Improved Approach:
- Reset with structure:
- Role: You are a coding assistant.
- Task: Create a ggplot line chart.
- Context: Data frame with year and revenue.
- Constraints: Use ggplot2, include labels and title
- Output: Code only
- Then iterate systematically using the loop.
- Reset with structure:
The key difference is not more prompts, but better structure in each prompt.
TipInput Constraints Inform Error Checking and Evaluation Tests on Output
Constraints are not just input instructions, they also inform tests for whether the output is correct”.
Well-designed constraints make it easier to identify problems such as:
- missing required elements
- incorrect format
- use of the wrong tools or libraries
- logically inconsistent results
Example prompt with weak constraints: Plot revenue over time.
- This is difficult to evaluate because there are few clear criteria for correctness.
Example Prompt with strong constraints: Output R code using ggplot2 with labeled axes and a title.
- Now you can define simple tests:
- Did it use ggplot2?
- Are the axes labeled?
- Is there a title?
Good constraints inform evaluation or test criteria.
If you cannot easily test whether the output meets your constraints, the constraints are not specific enough, so revise them with additional details or guidance.
“If you don’t know where you are going, you’ll end up someplace else.” Yogi Berra (and many others)
Rule of Thumb: If you can’t evaluate it, you haven’t specified it clearly enough. A vague constraint gives the model nothing to aim at.
13.2.4 Transition to Agentic Systems
These ideas extend directly into working with agentic systems more effectively.
In prompt engineering, you structure instructions; in agentic systems, you structure processes over time.
The same components apply:
- clear tasks
- explicit constraints
- iterative refinement
The difference is agents can:
- use tools
- execute code and
- interact with external services
Prompt engineering is not just about wording; it is about building a repeatable structure for interacting with LLMs in agentic systems.
“In the next section, we take this structure a step further: instead of typing a prompt into a chat interface, we encapsulate it into a function which makes it callable, testable, and reusable as a building block for more complex systems.
13.3 Agentic Systems Overview
Agentic systems are a rapidly evolving area and terminology varies across platforms and providers.
- Terms like tools, functions, skills, and agents are broadly shared, but their precise meaning and implementation differ — For example, skills has a specific technical meaning in Anthropic’s Claude ecosystem that is more structured than casual usage implies.
- This section uses terms consistent with current practice and notes where platform-specific usage may differ from the general concept.
The goal of this section is not to settle every definition, but to give a clear and practical mental model for building and understanding LLM-based systems.
- You do not need to understand all of these in detail yet
- We will revisit these ideas and explore their complexities and tradeoffs as we work through examples and build systems in later sections.
We’ll start with defining augmented LLMS and agentic systems and then make a progression from Prompts to Agents.
Table 13.2 summarizes the core terms and concepts in the mental model for moving from writing prompts to building systems where agents decide what to do next.
| Stage | What It Is | Who Controls the Process |
|---|---|---|
| Prompt | Task + instructions | User |
| Function | Prompt wrapped in code | Code (you call it) |
| Workflow | Sequence of steps | Code (fixed control flow) |
| Agent | A goal-directed system | Model pursues goal using available tools and skills |
The kitchen analogy in Table 13.3 illustrates how these components relate to each other.
| Concept | Kitchen Analogy | Key Point |
|---|---|---|
| Prompt | An order ticket | States what is wanted |
| Function | A named recipe step | Repeatable, callable by name |
| Tool | A kitchen appliance | Does one thing when switched on |
| Skill | A recipe or technique | Encodes how to do a class of tasks |
| Workflow | A fixed meal service | Steps are predetermined by the chef to produce a pre-defined meal |
| Agent | The cook | Has a goal for a meal, selects tools and skills, decides what to do next |
Figure 13.1 provides an alternate visual representation of the progression from prompts to functions and workflows, and then to agents.
- This progression is aligned with a shift from user-driven interactions to model-assisted processes.
- There are tradeoffs across the approaches so no single approach is the best for every problem.
- With appropriate effort, all approaches are capable of producing validated results.
13.3.1 Augmented LLMs and Agentic Systems
A standalone LLM is powerful, but limited. On its own, it:
- responds to a single prompt
- does not take actions in an external environment
- does not retain or manage state across interactions
- does not evaluate or refine its own outputs.
To move beyond these limitations, we work with an augmented LLM: a large language model embedded within a broader system.
As illustrated in Figure 13.2, the LLM is connected to:
- Tools: functions or APIs that allow it to take actions
- Memory: mechanisms for storing and retrieving information across steps
- Control logic: code that manages how the system operates
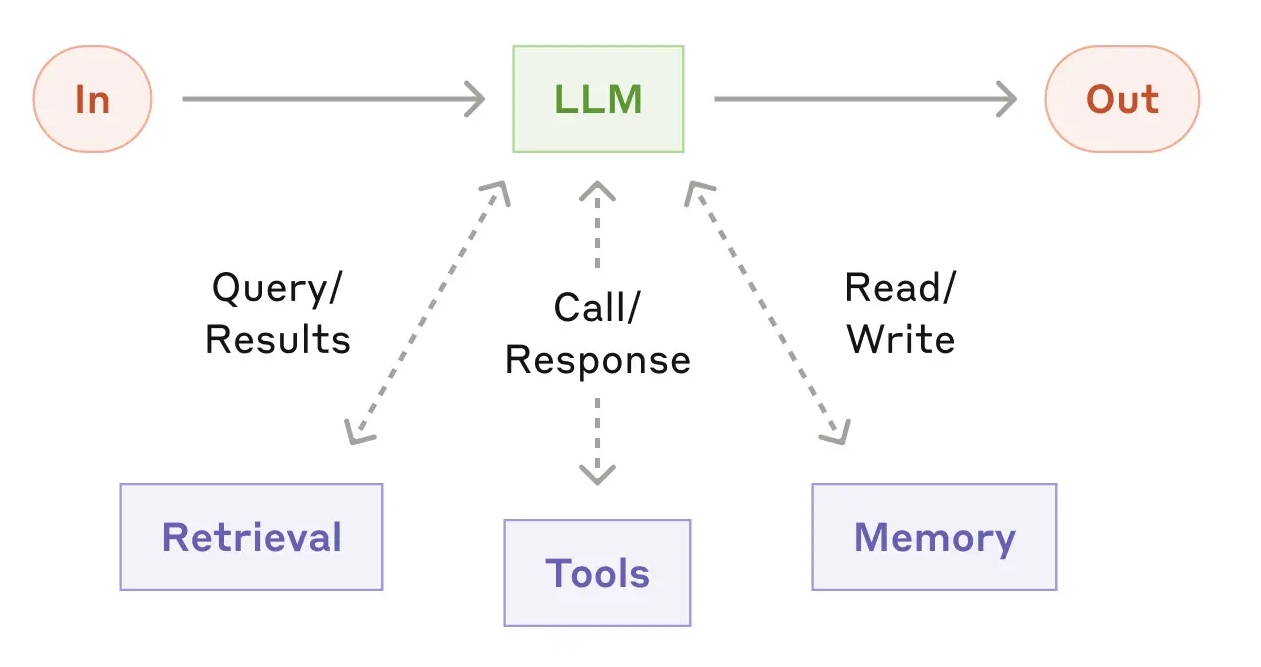
This allows the system to:
- generate follow-up queries
- retrieve additional information
- select tools or skills to perform analysis
- retain and reuse relevant information across steps
Building on this idea, an agentic system is an LLM embedded with tools, memory, and control logic, organized to accomplish tasks in a code-driven manner rather than through a sequence of independent chat interactions.
Important
An LLM becomes truly useful for complex tasks when it is embedded in a system that allows it to act, remember, and iterate, not just respond.
This is the foundation for everything that follows: tools enable action, memory enables persistence, and evaluation enables iteration.
In agentic systems, prompts are no longer one-time interactions.
They become designed components the system can use repeatedly and reliably. The user’s questions shift from:
“What should I ask the LLM right now?”
to “What prompt should this system use every time it performs this task?”
This shift from conversational prompt to designed component is what the progression in Table 13.2 describes.
13.3.2 From Prompts to Functions
To work effectively with LLM APIs, especially when building workflows and agents, we need to move beyond individual prompts and instead convert prompts into functions that are repeatable and structured.
This means explicitly defining in code:
- the inputs
- the instructions and constraints
- the expected type of output
For example:
This makes our prompt now:
- repeatable
- reproducible
- testable
- easier to version (in Git) and refine
- easier to integrate into larger agentic systems
Conceptually, this is the bridge from experimentation to system design:
- Prompts enable experimentation
- Functions provide reusable, callable building blocks
- Workflows organize capabilities into structured processes
- Agents decide which capabilities to use
13.3.3 Workflows
A workflow organizes LLM calls and tools into a predefined sequence of steps.
- The process and control flow are explicitly written in code.
- The sequence of operations is fixed.
- The model fills in details, but does not control the overall structure.
A simple workflow built on the earlier function might look like this:
Here:
generate_code_summary()is a function that encapsulates a prompt to generate code to produce a summary ofmy_data.evaluate_code_summary()is function that checks whether the resulting code is acceptable- the loop defines the workflow
- the control logic is explicit in code
13.3.4 Evaluation
Any time we have a model generate code or an output we want to use, we need to evaluate it before using it in a larger system.
- The evaluation criteria come directly from the constraints you defined in the prompt.
- This is why well-specified constraints matter as much for testing as they do for generation.
The evaluate_code_summary() function performs three conceptual tasks that map to the constraint hierarchy introduced earlier:
- Check execution — does the code run without errors? (Output Goal constraint)
- Validate output structure — is the output the expected type and shape? (Tools / Assumptions constraints)
- Validate output semantics — does the result actually answer the question? (Scope / Output Goal constraints)
A simplified pseudo-code version might look like:
evaluate_code <- function(code, data_context) {

  try:
    output <- execute(code, environment = data_context)
    execution_success <- TRUE
  catch error:
    execution_success <- FALSE
    error_message <- error$message

  if (!execution_success) {
    return(list(
      valid = FALSE,
      feedback = paste("The code failed with error:", error_message)
    ))
  }

  if (!is_expected_type(output)) {
    return(list(
      valid = FALSE,
      feedback = "The output is not in the expected format."
    ))
  }

  if (!passes_reasonableness_checks(output)) {
    return(list(
      valid = FALSE,
      feedback = "The output does not appear to answer the question correctly."
    ))
  }

  return(list(
    valid = TRUE,
    output = output
  ))
}
13.3.5 Agents
While workflows provide structure and reliability, they are limited to predefined sequences of steps.
An agent shifts some of that control to the model itself.
- The model decides which action to take
- The sequence of steps is not fully predetermined
- The system may choose among multiple tools or strategies
A concise working definition:
An agent is a system where the model decides what to do next, rather than following a fixed sequence of steps.
for (i in 1:max_steps) {
  action <- call_model("
    Given the task and current state,
    choose the next action:
    - generate_code_summary
    - plot_data
    - stop
  ")
  if (action == "generate_code_summary") {
    code <- generate_summary_code("nyc311_clean")
    result <- evaluate_code_summary(code)

  } else if (action == "plot_data") {
    plot <- generate_code_plot("nyc311_clean")
    result <- evaluate_code_plot(plot)

  } else if (action == "stop") {
    break
  }
  # model sees results and decides next step
}
The distinction can be summarized as:
- Workflow: we define the process and control flow, and the model fills in the details
- Agent: we define the available functions and tools, and the model helps determine which to use and in what order.
Analogy: Workflows vs Agents and Programming Models
If you are familiar with R Shiny or Dash, it may be helpful to think about workflows and agents in terms of declarative versus reactive programming.
- A workflow is similar to declarative or pipeline-based programming:
- The sequence of steps is explicitly defined
- The control flow is fixed
- Each step executes in a predictable order
- An agent is closer in spirit to reactive systems:
- The next action depends on the current state
- The system adapts dynamically based on intermediate results
- The sequence of operations is not fully predetermined
Note: This is an analogy, not an exact equivalence.
- Reactive systems like Shiny are deterministic and event-driven, while agents rely on probabilistic model outputs to decide what to do next.
- The analogy is useful for intuition about fixed vs dynamic control, but the underlying mechanisms are different.
ImportantWhat an Agent Can Do
An Agent acts by calling functions and tools, the concrete building blocks you define in code and make available to the model.
These building blocks typically take three forms:
- Functions: functions you write that the model can invoke (e.g.,
generate_code_summary()) - Tools: connections to external services or execution environments (e.g., run code, query a database, call an API)
- Skills: reusable packages of instructions and code for recurring tasks.
- These are a more structured form of prompt-based function, used in some platforms including Claude Code.
- The concept is platform-portable even if the specific format varies.
The term capabilities appears frequently in general discussion of LLM systems and means roughly the same thing: what the system is able to do.
- We use the more specific terms here because they correspond directly to things you will write and call in R.
Agents are:
- more flexible
- better suited for open-ended tasks
- capable of adapting based on intermediate results
But they are also:
- harder to debug
- less predictable
- more sensitive to prompt and evaluation design
13.3.6 Choosing Between Workflows and Agents
Many tasks can be handled effectively without using agents.
Well-designed workflows are often:
- easier to implement
- more reliable
- simpler to debug
- sufficient for structured tasks
As with machine learning, increasing flexibility and capability comes with increased complexity and reduced predictability.
Important
The goal is to match the level of system complexity to the problem.
- Use workflows when the task is structured and predictable
- Use agents when the task requires flexibility, adaptation, or decision-making
The concepts introduced here, prompts, functions, workflows, and agents, become easier to understand through working code than through description alone.
The next section works through examples of each of these components to illustrate how they work and how they fit together in practice.
13.4 Working with an LLM API
Previous sections provided a conceptual framework for agentic systems
- Section 10.5 introduced prompt engineering as an interactive practice of writing, refining, and iterating on prompts through a chat interface.
- Section 13.2 discussed developing a more structure approach for code-driven interactions with LLMs.
- Section 13.3 introduced the concept of agentic systems as code-driven systems that use LLMs to generate and execute code, evaluate results, and make decisions about next steps.
It is time to move from discussion to practice.
- This section works through concrete examples of calling a model from R, encapsulating prompts as functions, and building workflows that generate, evaluate, and refine code.
To do that we need a way to call a model programmatically from R. In this section, we will use the Groq API.
- The reference document is at Groq API Reference (Groq, n.d.)
NoteOptional: Running a local model with Ollama
Students who want to experiment without using an API can install Ollama, R, and RStudio/Positron on their own computer.
- In that setup, R can send requests to the local Ollama server at http://localhost:11434
- You will need to save the Groq API key locally using an environment variable or {keyring}.
- You will need to ensure you have sufficient computer storage and memory to install and run the ollama models you choose.
13.4.1 Connecting with the API for the Groq LLM
NoteWhy Groq?
Groq is useful for our class because it provides fast access to capable cloud-hosted models through an API.
- This makes it well suited for Posit Cloud, where we want to focus on building workflows rather than local model installation.
- Groq is not the only possible provider but it does gives us a fast, API-based way to practice code-driven LLM workflows from R.
For workflow development, speed matters. A workflow that makes several model calls in sequence is better when each response returns quickly.
Groq is a good choice for learning and prototyping because:
- it works from Posit Cloud,
- it avoids having to install Ollama, R, and RStudio locally,
- it supports OpenAI-compatible API patterns, and
- it is fast enough for repeated testing and iteration
Groq is not the best choice for every task; for complex reasoning, frontier models, from providers such as OpenAI, Anthropic, or Google, may be stronger.
- The design pattern we will use with Groq however, is the same: send structured input to a model, receive text output, evaluate that output, and decide what to do next.
13.4.1.1 Getting a Groq API Key
Groq provides a free tier that is sufficient for our exploratory work; it has rate limits but no cost for modest usage.
- Go to https://console.groq.com and sign up for a free account
- Navigate to API Keys at the top menu bar
- Click Create API Key, give it a name, and copy the key
- Store it immediately by adding to the
.Renvironfile.
13.4.1.2 Add Your Key to .Renviron
We will store the Groq API key as an environment variable in the .Renviron file in Posit Cloud.
- Environment variables allow code to access credentials without hard-coding them into scripts or Quarto documents.
- Many cloud-based systems allow you to store environment variables as part of the security settings for a project.
- Posit Cloud does not have that capability; it looks for environment variables in the account’s
.Renvironfile.
Environment variables provide several advantages:
- Credentials remain separate from code
- Quarto documents and scripts can be shared safely
- GitHub repositories can be made public without exposing keys
- Multiple projects can reuse the same credential
- You can set environment variables for multiple cloud services or LLMs in a consistent manner
Important
In a cloud-based environment, the environment variables are often encrypted for additional security beyond the account password.
- In Posit Cloud and locally on your computer,
.Renvironis not encrypted; it is plain text. - Therefore, anyone with access to your computer can view your API keys.
- Normally, we would not use the .Renviron file to store sensitive API keys. We would use {keyring} to put them into your local computer credential manager as discussed in Section 11.4.2.3
Step 1: Open .Renviron*
- If the file does not exist, R will create it.
Step 2: Add Your API Key
Add a new line similar to the following where you paste in your API key to the right of the = sign:
- Your key should start with
gskas above. - Do not use quotes.
Save the file and close it.
Step 3: Restart the R Session
When R starts (including in Posit Cloud), it reads .Renviron and loads any environment variables that are present.
After saving and closing the .Renviron file
- Restart the R session, or
- Reopen the project.
Step 4: Verify the Variable Exists
You can verify that the variable is available from R.
To avoid displaying the key in the console, a safe test is either of the following
If the result is greater than zero, or TRUE the variable has been loaded successfully.
Step 5 Retrieve the API Key when needed
The R Sys.getenv() function retrieves the named key from the environment variable when it is needed:
- You can add a safety check as well to stop running if it is not found instead of having the API return an status message that is an error.
Step 6 Test the Connection
Let’s test our setup by building a minimal function to perform a request to the Groq API with a specific model and prompt and parse the response.
- Does it get a valid API key?
- Does it connect to the API?
- Do we get a valid response?
We will go into the structure of the prompt in more detail later but you can see it looks similar to the API requests we built in Section 12.4.
library(httr2)

test_groq <- function() {
  request("https://api.groq.com/openai/v1/chat/completions") |>
    req_auth_bearer_token(Sys.getenv("GROQ_API_KEY")) |>
    req_body_json(list(
      model = "llama-3.1-8b-instant",
      messages = list(
        list(role = "user",
          content = "Relate data science to AI in one sentence?"))
    )) |>
    req_perform() |>
    resp_body_json() |>
    purrr::pluck("choices", 1, "message", "content")
}- Note: Notice that the API key is retrieved inside the function rather than stored as a global variable. This keeps credentials out of the global workspace and limits their scope to the API call itself.
Now let’s test the connection.
[1] "Data science is a crucial backbone for artificial intelligence (AI), as it provides the necessary data and analysis to train AI models, allowing them to learn, make predictions, and improve their performance over time."If you received a reasonable response, you are connected and parsing the response!
- Run the query again and you may get a different answer (think back to Section 10.5.3)
Note
When running in Posit Cloud and connecting to Groq, do not worry if you get a warning message that secrets are being stored in environment variables.
- This is expected since our version of Posit Cloud does not provide access to local or cloud-base authentication systems supported by Groq.
13.4.2 Calling an LLM from R
As we saw with test_groq(), we access the model using a function call over HTTP using the {httr2} package.
Groq provides an OpenAI-compatible chat completions endpoint. The basic structure is:
- send a POST request to the Groq API endpoint
- authenticate with a bearer token
- include the model name
- provide one or more messages
- parse the JSON response
- extract the model’s text response
13.4.2.1 The Endpoint
We will use the Groq endpoint “https://api.groq.com/openai/v1/chat/completions”. We can break that down as follows:
https://api.groq.com/openai/v1/chat/completions
        |        |      |    |
        |        |      |    └── task
        |        |      └────── API version
        |        └───────────── OpenAI-compatible interface
└────────────────────── Groq API server- “https://api.groq.com” is the server hosting the API and where we send the request.
- “/openai” says we are using the Groq interface that is compatible with the API style popularized by OpenAI.
- This has nothing to do with the model, just like many websites uses standards developed by Facebook or Google but are not connecting to either one.
- “/v1” identifies the API version so older code will still work with the first version if they move to a new version
- “/chat/completions” specifies the task we want the server to perform. In this case:
- chat indicates we are interacting with a conversational model
- completions means we want the model to complete or continue a conversation
- Thus the endpoint is called “chat/completions” because the model completes the next part of a conversation.
Table 13.4 shows different kinds of endpoints (tasks) that used by LLM API providers that will shape the responses.
| Endpoint | Purpose |
|---|---|
/chat/completions |
Conversational interactions |
/embeddings |
Convert text into numeric vectors |
/audio/transcriptions |
Speech-to-text |
/audio/speech |
Text-to-speech |
/images |
Generate images |
/responses |
Newer unified API used by some providers |
/models |
List available models |
13.4.2.2 Two Kinds of Prompts
13.4.2.3 Two Kinds of Prompts
When interacting with a chat model, we often send two kinds of instructions:
- Role Prompt: describes who the model should be.
- User Prompt: describes what task the model should perform.
These prompts are typically placed into different messages in the API request.
- The role prompt is usually included as a system message, which helps establish the model’s role, behavior, or constraints.
- The user prompt is included as a user message, which contains the specific task, question, or instruction for the model.
- It may have the role “user” which identifies the source of the message, not the role for the system.
For example:
Conceptually, the system message defines the model’s behavior, while the user message defines the task to be completed.
13.4.2.4 The call_groq() Function
Let’s define a function to call the model, with arguments for the user prompt, the model, and a role prompt, and then parse the JSON response and return the response element.
- The function creates and sends a {httr2} request to the Groq “https://api.groq.com/openai/v1/chat/completions” endpoint.
- We set default arguments for the model and role_prompt so we do not have to enter them unless we want a different model or role.
library(httr2)
library(purrr)

call_groq <- function(user_prompt,
                      model = "llama-3.1-8b-instant",
                      role_prompt = "You are a helpful assistant.") {
  endpoint_url <- "https://api.groq.com/openai/v1/chat/completions"
  groq_key <- Sys.getenv("GROQ_API_KEY")

  if (!nzchar(groq_key)) {
  stop("GROQ_API_KEY not found. Add it to your .Renviron file and restart R.")
}
#### Build API Request Object
  request(endpoint_url) |>
    req_auth_bearer_token(groq_key) |>
    req_body_json(list(
      model = model,
      messages = list(
        list(
          role = "system",
          content = role_prompt
        ),
        list(
          role = "user",
          content = user_prompt
        )
      ),
      temperature = 0.2
    )) |>
    req_perform() |>
#### Parse Response
    resp_body_json() |>
    purrr::pluck("choices", 1, "message", "content")
}
The request body contains several important elements:
- model: the model to use
- messages: the conversation sent to the model
- the system message uses the role_prompt to set the model’s role or behavior
- the user message contains the task
- temperature: controls how much randomness the model uses when generating a response.
- Lower values (e.g., 0–0.3) tend to produce more consistent and predictable responses.
- Higher values (e.g., 0.7–1.0) tend to produce more varied and creative responses.
- For coding, data analysis, and workflow development, lower temperatures are often preferred because they make model output more reproducible. - For brainstorming, storytelling, or creative writing, higher temperatures may produce more diverse responses.
Now let’s use the function to send a prompt to the model.
[1] "A workflow is a series of interconnected tasks, processes, or activities that are performed in a specific order to achieve a particular goal or outcome, often involving multiple stakeholders and systems."The response should focus on the key distinction for this section; the model can generate text or code, but the workflow itself is still controlled by our R functions.
We can send the same prompt to different models and compare the results.
[1] "Here's a simple R code snippet using ggplot2 to plot mpg vs hp from the mtcars dataset:\n\n```r\n# Load necessary libraries\nlibrary(ggplot2)\n\n# Load mtcars dataset\ndata(mtcars)\n\n# Create a scatter plot of mpg vs hp\nggplot(mtcars, aes(x = hp, y = mpg)) +\n geom_point() +\n labs(title = \"Scatter Plot of MPG vs HP\",\n subtitle = \"From mtcars dataset\",\n x = \"Horsepower (hp)\",\n y = \"Miles per Gallon (mpg)\")\n```\n\nThis code will create a scatter plot where the x-axis represents horsepower (hp) and the y-axis represents miles per gallon (mpg). The `geom_point()` function is used to create the scatter plot, and `labs()` is used to add a title, subtitle, and labels for the x and y axes."[1] "```r\n# Install and load necessary libraries\ninstall.packages(\"ggplot2\")\nlibrary(ggplot2)\n\n# Load the mtcars dataset\ndata(mtcars)\n\n# Create a ggplot\nggplot(mtcars, aes(x = hp, y = mpg)) +\n geom_point() +\n labs(title = \"Miles Per Gallon vs Horsepower\",\n subtitle = \"mtcars dataset\",\n x = \"Horsepower\",\n y = \"Miles Per Gallon\")\n```\n\nThis code will create a scatter plot of `mpg` (miles per gallon) vs `hp` (horsepower) from the `mtcars` dataset. The `geom_point()` function is used to create the scatter plot, and `labs()` is used to add a title, subtitle, and labels to the x and y axes."- Oops! the models return formatted text, not tidyverse style code we want.
This is what models do, they return text.
LLMs don’t return answers; they return text that must be interpreted.
The text in a response may include:
- explanatory text
- formatting characters such as
\nfor new lines. - markdown code fences
- comments
- installation commands we do not want to run
To compare models more clearly, it is helpful to extract just the code portion of the response.
13.4.3 Extracting Code from Model Responses
Let’s create a function to extract code from the response and name it extract_code().
We want the function to:
- Extract the code chunks
- Remove code fences and formatting characters
- Replace the escaped new line characters with actual new lines.
Now extract the code from the responses
[1] "# Load necessary libraries\nlibrary(ggplot2)\n\n# Load mtcars dataset\ndata(mtcars)\n\n# Create a scatter plot of mpg vs hp\nggplot(mtcars, aes(x = hp, y = mpg)) +\n geom_point() +\n labs(title = \"Scatter Plot of MPG vs HP\",\n subtitle = \"From mtcars dataset\",\n x = \"Horsepower (hp)\",\n y = \"Miles per Gallon (mpg)\")\n"[1] "# Install and load necessary libraries\ninstall.packages(\"ggplot2\")\nlibrary(ggplot2)\n\n# Load the mtcars dataset\ndata(mtcars)\n\n# Create a ggplot\nggplot(mtcars, aes(x = hp, y = mpg)) +\n geom_point() +\n labs(title = \"Miles Per Gallon vs Horsepower\",\n subtitle = \"mtcars dataset\",\n x = \"Horsepower\",\n y = \"Miles Per Gallon\")\n"We now have the code from each model as a string. We can use base R functions to view it and execute it.
cat()is useful to view the code with proper formatting and new lines.eval(parse())allows us to execute the code as R code.
Fast model code
 # Load necessary libraries
library(ggplot2)

# Load mtcars dataset
data(mtcars)

# Create a scatter plot of mpg vs hp
ggplot(mtcars, aes(x = hp, y = mpg)) +
  geom_point() +
  labs(title = "Scatter Plot of MPG vs HP",
       subtitle = "From mtcars dataset",
       x = "Horsepower (hp)",
       y = "Miles per Gallon (mpg)")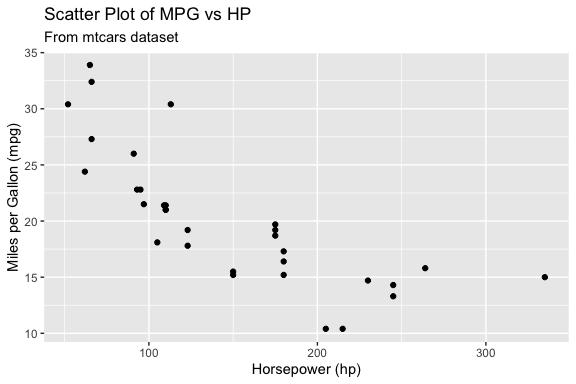
Larger model code
 # Install and load necessary libraries
install.packages("ggplot2")
library(ggplot2)

# Load the mtcars dataset
data(mtcars)

# Create a ggplot
ggplot(mtcars, aes(x = hp, y = mpg)) +
  geom_point() +
  labs(title = "Miles Per Gallon vs Horsepower",
       subtitle = "mtcars dataset",
       x = "Horsepower",
y = "Miles Per Gallon")- Querying repositories for available source packages ... Done!
The following package(s) will be installed:
- ggplot2 [4.0.3]
These packages will be installed into "~/Courses/DATA_Intro_DS_AI/course_book/renv/library/macos/R-4.6/aarch64-apple-darwin23".
# Installing packages --------------------------------------------------------
[32m✔[0m ggplot2 4.0.3 [linked from cache]
Successfully installed 1 package in 8.2 milliseconds.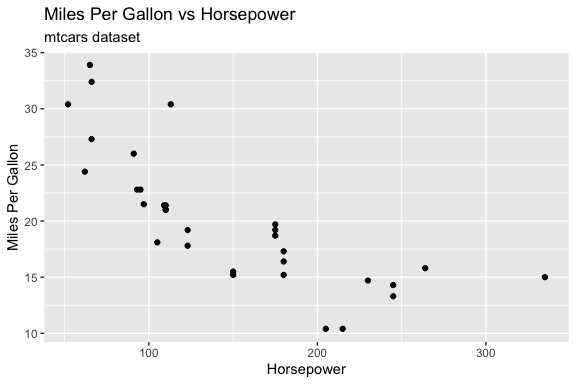
Interpretation of results
- Did the models all return usable code? =- Which response was easier to extract?
- Which model produced the best code?
- Which model seemed faster?
- Which required the least editing?
This illustrates a key idea: Model selection is part of your system design.
ImportantHandling Variability in Model Output
When working with LLMs, you must be prepared for inconsistent response structure.
The extract_code() function works well when the model returns a single code block. However,
- Repeating the same prompt may produce responses with multiple code blocks
extract_code()only extracts the first block, which may not be the one you want to run
This highlights an important principle:
Workflows should be designed for the range of outputs a model may produce, not just a single observed response.
To handle this variability, we can extract all code blocks with str_extract_all() and then decide which one(s) to use.
This approach makes the workflow more robust by separating:
- extraction (get all candidate code)
- selection (decide what to run)
In more advanced systems, this selection step may itself become part of the evaluation process.
13.5 From API Calls to Workflows
Up to this point, we have focused on interacting directly with an LLM through an API.
- We learned how to authenticate with an API key.
- We constructed requests using role and user prompts.
- We explored how different models can produce different responses.
- We saw that model output is simply text and that the structure of that text can vary from one response to the next.
While these examples are useful for understanding how an API works, repeatedly writing prompts, sending requests, extracting code, and handling errors quickly becomes tedious and difficult to manage.
More importantly, a single API call is rarely the end goal.
In practice, we usually want to build a process that:
- generates a response,
- evaluates the result,
- handles errors,
- refines the prompt if necessary, and
- repeats the process until a satisfactory result is obtained.
This shift, from making individual API calls to managing a sequence of steps, is the beginning of a workflow.
13.5.1 Encapsulating Prompts in Functions
Rather than treating each interaction as a one-off request, we will now encapsulate prompts in functions and combine those functions into reusable workflows that can generate, evaluate, and refine model output.
Listing 13.7 is is a thin wrapper function we will expand later.
Now we can reuse our prompts, get the response, extract the code, and evaluate if the response included code.
- Keeping the model response separate from the code extraction and execution at first allows for easier debugging and validation of the model output before running it.
Once you are satisfied the responses are consistent, you can wrap the two functions in a single function that generates the code and executes it.
- Run the function a few times and see what happens.
ImportantContext-limited Responses.
This code may get a plot of mpg vs hp from the mtcars dataset or it may generate a prompt in the console to install {ggplot2} as the model wanted to ensure the packages were installed.
This is an example of a context-limited response: the model is trying to be helpful by e ensuring that required packages are installed, but that creates an interactive step we do not want, especially if we want the document to render without interruption.
There are several option to handle this but the first step is to give the model more context and we do that by adding more constraints to our prompt.
Let’s refine the prompt to add more constraints
- You may also get an error due to incomplete code in the response, e.g., missing a closing parenthesis.
To make the code more robust, the next step is to add error checking into the code.
- We can use
tryCatch()to handle cases where the model response is not as expected and generates an error condition.
Let’s create a safe_execute() function to wrap the code in a tryCatch() block that returns a list with success status and either the result or the error message.
Now update generate_and_run_plot() from Listing 13.8 to use safe_execute() to run the code.
- The function in Listing 13.10 returns a structured result that
- includes success status,
- the generated code (if successful),
- the result of execution with any error message.
generate_and_run_plot <- function(user_prompt,
model = "llama-3.1-8b-instant") {
response <- get_model_response(user_prompt, model)
code <- extract_code(response)
if (is.null(code)) {
return(list(success = FALSE, error = "No code extracted"))
}
exec <- safe_execute(code)
if (!exec$success) {
cat("Execution failed:\n", exec$error, "\n")
}
return(list(
success = exec$success,
code = code,
result = if (!is.null(exec$result)) exec$result else NULL,
error = if (!is.null(exec$error)) exec$error else NULL
))
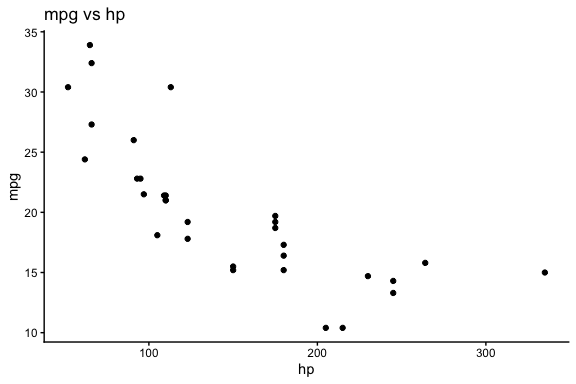
}Now when we run the function, we get a structured output that indicates whether the code execution was successful, the generated code if successful, and any error messages if it failed.
$success
[1] TRUE

$code
[1] "# Load the ggplot2 library\nlibrary(ggplot2)\n\n# Load the mtcars dataset\ndata(mtcars)\n\n# Create a scatter plot of hp vs mpg\nggplot(mtcars, aes(x = mpg, y = hp)) +\n  geom_point() +\n  labs(title = \"Scatter Plot of Horsepower vs MPG\",\n       subtitle = \"From the mtcars dataset\",\n       x = \"Miles per Gallon (mpg)\",\n       y = \"Horsepower (hp)\")\n"

$result

$error
NULL
ImportantUsing tryCatch() for Workflow Robustness
When running code generated by a model, errors are common and should be expected.
- The
tryCatch()function allows us to run code without stopping execution if an error occurs. - Instead of crashing, the error is captured and returned as information the system can use.
The tryCatch() function wraps an expression and monitors its execution.
- It attempts to run the code inside the main block
- If the code completes normally, the result is returned
- If an error occurs, execution is interrupted, and control is passed to the error handler
In python, the (try / except) block serves a similar purpose, allowing you to handle exceptions gracefully without crashing the program.
try:
    result = eval(code)
    output = {"success": True, "result": result}
except Exception as e:
    output = {"success": False, "error": str(e)}
Conceptually, this creates two possible paths:
- Success path: code runs and returns a result
- Error path: the code fails, and the error handler captures the condition and returns structured information
In this sense, tryCatch() turns execution into a controlled branching process. As shown in Listing 13.9, instead of letting an error terminate execution, tryCatch():
- intercepts the error condition
- extracts relevant information (e.g., the message)
- returns it as part of a structured output
This enables a more robust workflow:
- The code can be attempted safely
- Errors can be inspected and reported
- The system can decide what to do next (e.g., revise the prompt or try again)
Using tryCatch() converts an code-stopping error into a structured output that can be used to inform the next steps in the workflow.
This pattern is critical in workflows and agentic systems because:
- it allows the system to continue running
- it makes errors observable and usable
- it enables decisions such as retrying, revising prompts, or selecting a different action
tryCatch() does not prevent errors, it makes them part of the system’s output that can be evaluated by humans or by code.
13.5.2 Building Workflows
Up to this point, we have focused on building individual components.
We now combine them into workflows, the fixed, code-controlled sequences of steps described in Table 13.2.
A workflow is not yet an agent. In this section:
- R controls the sequence of steps.
- R decides when to call the model.
- R decides how to extract code.
- R decides how to evaluate the result.
- R decides whether to retry.
The model generates text, but the workflow remains deterministic and code-controlled.
13.5.2.1 Workflow 1: Generate -> Execute -> Evaluate (baseline loop)
This is Listing 13.9 converted into a workflow pattern.
- This is a baseline workflow where the control flow is fixed and defined entirely in code and we get results (plot or error) that can be evaluated.
run_once <- function(user_prompt,
                     model = "llama-3.1-8b-instant") {
  response <- get_model_response(user_prompt, model)
  code <- extract_code(response)

  if (is.null(code)) {
    return(list(
      success = FALSE,
      code = NULL,
      result = NULL,
      error = "No code extracted"
    ))
  }

  exec <- safe_execute(code)

  return(list(
    success = exec$success,
    code = code,
    result = if (!is.null(exec$result)) exec$result else NULL,
    error  = if (!is.null(exec$error)) exec$error else NULL
  ))
}$success
[1] TRUE
$code
[1] "# Load the ggplot2 library\nlibrary(ggplot2)\n\n# Load the mtcars dataset\ndata(mtcars)\n\n# Create a scatter plot of hp vs mpg\nggplot(mtcars, aes(x = mpg, y = hp)) +\n geom_point() +\n labs(title = \"Scatter Plot of hp vs mpg\", x = \"Miles per Gallon (mpg)\", y = \"Horsepower (hp)\")\n"
$result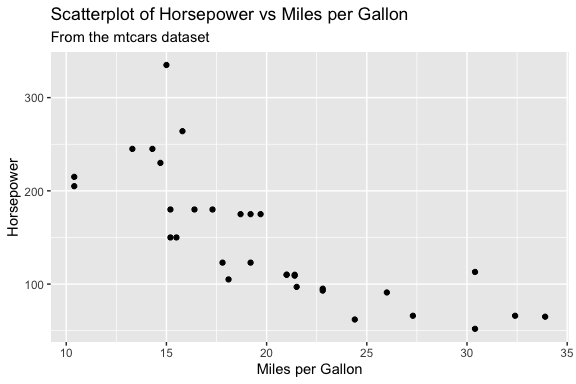
$error
NULL- Note: we removed the interactive feedback for humans to keeps the functions clean for workflows and agents, but it also means we won’t see the error in the console if it occurs.
- If we want, we can add it back in the console to see the error if it occurs.
13.5.2.2 Workflow 2: Generate -> Evaluate -> Revise using an iterative loop
This workflow introduces feedback and iteration by combining functions that perform computation (e.g., model calls, code execution) with flow-control structures such as loops.
- The loop provides a natural way to track progress across attempts and observe how the workflow evolves over time.
- When designing workflows, remember that functions return results; workflows manage and monitor the process.
Listing 13.12 is a basic “Generate -> Evaluate -> Revise” loop that allows the system to attempt a task multiple times.
- If there is an error, the workflow refines the prompt by adding the task to fix the error (message) from the unsuccessful attempt.
run_with_retry()subsumesrun_once()since settingmax_attempts = 1is equivalent.
run_with_retry <- function(user_prompt,
                           model = "llama-3.1-8b-instant",
                           max_attempts = 3) {

  for (i in 1:max_attempts) {

    cat("Attempt:", i, "\n")

    response <- get_model_response(user_prompt, model)
    code <- extract_code(response)

    if (is.null(code)) {
      prompt <- paste(
        prompt,
        "\nThe previous response did not include a fenced R code block.",
        "Return exactly one fenced R code block."
      )
      next
    }

    exec <- safe_execute(code)

    if (exec$success) {
      return(list(success = TRUE, code = code, result = exec$result))
    }

    prompt <- paste(
      prompt,
      "\nFix the error:",
      exec$error
    )
  }

  return(list(success = FALSE, error = "Max attempts reached"))
}Attempt: 1 $success
[1] TRUE
$code
[1] "# Load the ggplot2 library\nlibrary(ggplot2)\n\n# Load the mtcars dataset\ndata(mtcars)\n\n# Create a scatter plot of hp vs mpg\nggplot(mtcars, aes(x = mpg, y = hp)) +\n geom_point() +\n labs(title = \"Scatter Plot of Horsepower vs MPG\",\n subtitle = \"From the mtcars dataset\",\n x = \"Miles per Gallon (mpg)\",\n y = \"Horsepower (hp)\")\n"
$result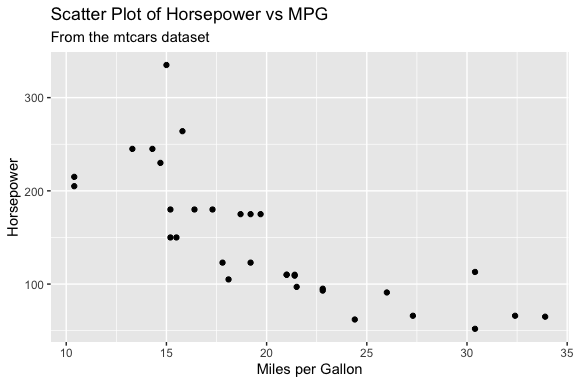
- It’s good practice to avoid printing messages inside functions to keep them reusable and composable.
- However, it is appropriate to use
cat()messages as part of the flow control within the workflow to log progress.- In agentic systems, using logging to track the flow is important because the sequence of actions is not fixed.
- In more complex systems, logging data is often written to files rather than printed to the console, allowing results to be stored, analyzed, and reused across runs.
This simple workflow works, but it exposes limitations:
- the prompt can keep growing and becoming noisy
- missing code is handled only minimally
- constraints may be lost across iterations
- evaluation is minimal
- execution success does not guarantee that the code solved the intended task
We can improve the workflow by making the evaluation and refinement steps more explicit.
13.5.2.3 A Refined Workflow 2: Generate -> Evaluate -> Revise
So far, evaluation has been minimal: the workflow only checks whether the generated code can be extracted and executed.
- In practice, that is often not enough.
A stronger evaluation strategy separates at least three kinds of checks in addition to Execution checks:
- Structure checks: ensure the code contains expected building blocks or elements.
- Task-specific checks: require you to know specific elements of the prompt, e.g., the data set or variables, to ensure the code appears to satisfy the specific analytical goal.
- Process Constraints: enforce workflow rules (e.g., disallow install.packages()).
For example, for a plotting task, these can be distinguished as follows:
- Structure checks: These ensure the code has the basic elements of a plot.
- does the code contain “ggplot(”?
- does it include at least one “geom_ layer”?
- Task-specific checks: These ensure the code is actually trying to solve the intended task, not just producing some plot.
- are the correct variables used (e.g., hp and mpg)?
- are they mapped to the correct axes?
- Process Constraints These enforce workflow constraints, not the task itself.
- does the code avoid “install.packages(”?
These try to ensure the code is actually solving the intended task, not just producing some plot.
Note
Task-specific checks require some explicit representation of what the prompt is asking for.
- If the prompt remains fully flexible, then task-specific evaluation must also remain relatively general.
One way to support stronger evaluation later is to include two parts to the prompt:
- The prompt text used for generation which can be free text
- A structured set of expected elements to be used for validation.
For example,
expected = list(
    dataset = "mtcars",
    variables = c("hp", "mpg"),
    required = c("ggplot", "geom_"),
    forbidden = c("install.packages")
  )
This allows the workflow to remain flexible while still supporting more targeted evaluation based on structured data in the prompt.
In this example, the prompt is still a flexible argument so task-specific evaluation is limited.
- It is more practical now to focus on structure, constraint, and execution checks.
- More specific evaluation becomes possible when the system has explicit expectations about the task, such as keywords, variables, datasets, or required output elements.
Let’s encapsulate the structure and process checks in a function as in Listing 13.13.
evaluate_plot_code_structure <- function(code) {
  checks <- list(
    has_ggplot = stringr::str_detect(code, "ggplot\\("),
    has_geom = stringr::str_detect(code, "geom_"),
    installs_packages = stringr::str_detect(code, "install\\.packages\\s*\\(")
  )

  list(
    success = checks$has_ggplot &&
      checks$has_geom &&
      !checks$installs_packages,
    checks = checks
  )
}
We can use the evaluate_plot_code_structure() function to make the workflow more robust by no longer treating every executable result as a successful result for our task.
Listing 13.14 shows a refined workflow that makes the stages clear and uses a better evaluation and prompt refinement strategy.
- This version now separates two kinds of failure:
- evaluation failure: the code does not meet the expected structure or task constraints
- execution failure: the code looks reasonable but still does not run
run_with_retry <- function(user_prompt,
                           model = "llama-3.1-8b-instant",
                           max_attempts = 3) {
  original_prompt <- prompt
  last_error <- NULL
  last_code <- NULL
  last_checks <- NULL

  for (i in 1:max_attempts) {
    cat("Attempt:", i, "\n")

    response <- get_model_response(user_prompt, model)
    code <- extract_code(response)
    last_code <- code

    if (is.null(code)) {
      last_error <- "No executable code block was extracted from the response."

      prompt <- paste(
        original_prompt,
        "\nThe previous response did not contain a usable R code block.",
        "Return exactly one fenced R code block.",
        "Do not include explanation."
      )

      next
    }

    eval_result <- evaluate_plot_code_structure(code)
    last_checks <- eval_result$checks

    if (!eval_result$success) {
      refinement_messages <- c()

      if (!eval_result$checks$has_ggplot) {
        refinement_messages <- c(
          refinement_messages,
          "The previous code did not include ggplot()."
        )
      }

      if (!eval_result$checks$has_geom) {
        refinement_messages <- c(
          refinement_messages,
          "The previous code did not include a geom_ layer such as geom_point()."
        )
      }

      if (eval_result$checks$installs_packages) {
        refinement_messages <- c(
          refinement_messages,
          "The previous code included install.packages(), which should not be used."
        )
      }

      last_error <- paste(refinement_messages, collapse = " ")

      prompt <- paste(
        original_prompt,
        "\nRevise the code to address the following problems:",
        last_error,
        "Assume required packages are already installed.",
        "Do not include install.packages().",
        "Return exactly one fenced R code block and no explanation."
      )

      next
    }

    exec <- safe_execute(code)

    if (exec$success) {
      return(list(
        success = TRUE,
        attempts = i,
        prompt = prompt,
        code = code,
        checks = eval_result$checks,
        result = if (!is.null(exec$result)) exec$result else NULL,
        error = NULL
      ))
    }

    last_error <- exec$error

    prompt <- paste(
      original_prompt,
      "\nThe previous code passed the structural checks but failed with this execution error:",
      last_error,
      "Revise the code so that it runs successfully.",
      "Assume required packages are already installed.",
      "Do not include install.packages().",
      "Return exactly one fenced R code block and no explanation."
    )
  }

  return(list(
    success = FALSE,
    attempts = max_attempts,
    prompt = prompt,
    code = last_code,
    checks = last_checks,
    result = NULL,
    error = paste("Max attempts reached.", last_error)
  ))
}# Load the ggplot2 library
library(ggplot2)
# Load the mtcars dataset
data(mtcars)
# Create a scatter plot of hp vs mpg
ggplot(mtcars, aes(x = mpg, y = hp)) +
geom_point() +
labs(title = "Scatter Plot of hp vs mpg", x = "Miles per Gallon (mpg)", y = "Horsepower (hp)")- The evaluation step in Listing 13.14 uses deterministic code-based checks.
- We will see later how the model itself can take on the evaluator role.
- That is one step toward more agentic behavior, because the model begins to participate not only in generation but also in deciding what should happen next.
Note
As you’ve seen, even a relatively simple plotting task requires a lot of code once you handle extraction, evaluation, and refinement and include error handling.
- Converting prompts into functions and structuring them into workflows keeps this complexity manageable.
- It also makes your code reusable, testable, and easier to extend, and easier to debug.
- This approach is key as tasks grow beyond simple demonstrations.
13.5.3 From Workflows to Agents
The workflows in this section are fixed. They follow a sequence that we wrote in R:
- generate
- extract
- evaluate
- execute
- revise
- retry
- The model does not decide which step comes next. The R code does.
That is why this section is about workflows, not full agents.
In the next section, we will extend this pattern toward agentic systems by allowing the model to participate more directly in decisions about what to do next.
13.6 From Workflows to Agents
In the workflow section, we built systems where the sequence of steps was explicitly defined in code:
- The model generated content, but R controlled the process.
An agent changes that relationship.
- Rather than defining every step in advance, we define a set of available tools and allow the model to help decide which tool should be used next.
The model participates in the decision-making process, while the surrounding software system remains responsible for execution, evaluation, and safety.
This distinction is important because it separates what the model does well from what code does well.
Models are good at reasoning, interpretation, and choosing among alternatives.
Code is good at enforcing rules, validating results, and performing deterministic operations.
Modern agentic systems combine both.
13.7 Functions Become Tools
Tools are simply functions that have been made available to the model.
- For example, the following functions could be exposed as tools:
- Once these functions are registered with an agent, the model can choose to invoke them.
Agent tools generally fall into three categories:
| Tool Type | Purpose | Example |
|---|---|---|
| Deterministic | Executes predictable code | summarize_dataset() |
| Prompt-based generation | Produces new content using a model | generate_plot_code() |
| External service | Retrieves information or performs actions | Web search, database query, API call |
A useful way to think about tools is:
A tool is simply a function that the model is allowed to use.
This idea appears throughout modern agent frameworks.
- Whether a tool performs a web search, queries a database, creates a plot, or calls another model, the underlying mechanism is usually just a function call.
13.8 Information Requirements for Different Agent Calls
A minimal agent requires three components:
- A set of available tools
- A mechanism for choosing among those tools
- A loop that executes the chosen action
Suppose we define three possible actions:
The model’s job is not to perform the analysis itself; instead, it decides which action should happen next.
- A simplified action-selection function might look like:
choose_action <- function(task_description,
                          model = "llama-3.1-8b-instant") {

  prompt <- paste(
    "Available actions:",
    "- summarize",
    "- plot",
    "- stop",
    "",
    "Task:",
    task_description,
    "",
    "Return exactly one action.",
    sep = "\n"
  )

  get_model_response(
    prompt = prompt,
    model = model,
    role = "You are a data analysis agent selecting the next action."
  )
}
An agent loop then repeatedly asks the model what to do:
A possible sequence might be:
- Notice that the model is not creating the summary or the plot.
- The model is acting as a router that selects which tool should be used.
This illustrates one of the most important ideas in agent design:
The model chooses the action. The tool performs the work.
13.9 Designing Effective Agents
Once an agent can select tools, the next question becomes how much freedom the model should have.
- Most agent designs fall somewhere along a spectrum between flexibility and specificity.
13.9.1 High-Flexibility Agent
Task:
Explore the penguins data set and create an interesting visualization.
The model decides:
- what variables to analyze,
- what summary statistics to compute,
- what plot to create,
- how to structure the output.
Advantages:
- Adaptable
- Creative
- Can discover unexpected solutions
Disadvantages:
- Less predictable
- More difficult to evaluate
- More likely to require retries
13.9.2 High-Specificity Agent
Task:
Summarize the numeric variables and create a scatter plot of bill length versus bill depth.
The model may only choose among a few predefined tools:
Advantages:
- Reliable
- Easier to test
- Easier to debug
Disadvantages:
- Less flexible
- Requires more development effort
- New tasks often require new tools
13.9.3 Balanced Agent
Most production systems live somewhere in the middle.
- A balanced agent might expose tools such as:
- The model chooses among those tools, but each tool performs a well-defined task.
This approach combines:
- flexibility from the model,
- reliability from deterministic code,
- evaluation from structured checks.
Many modern systems use some variation of this design.
TipThe Goldilocks Principle
Effective agents are rarely completely open-ended and rarely completely rigid.
A useful rule is:
- Give the model enough flexibility to explore solutions.
- Give the software system enough structure to enforce correctness.
Most agent development involves finding the balance between those two goals.
13.10 Context Engineering and Memory
As agents become more capable, a new challenge emerges.
- The question is no longer: How do I write a better prompt?
- Instead, the question becomes: What information should be sent to each model call?
This is often called context engineering.
- Prompt engineering focuses on improving a single call.
- Context engineering focuses on managing information across many calls.
13.10.1 A Simple Agent:
A simple agent has multiple needs for each possible call to create an effective response.
Action Selection needs:
- a task description
- a list of available tools (encoded as functions it can call)
Task
+
Tool List
Code Generation needs:
- a specific subtask
- constraints
- relevant feedback from prior iterations (if any)
Subtask
+
Constraints
+
Previous Feedback
Evaluation needs:
- generated output
- evaluation criteria
Output
+
Evaluation Rules
Each call requires different information.
- Sending everything to every call is usually ineffective.
A useful rule is:
Each model call should receive the smallest amount of information necessary to do its job well.
13.10.2 Stateless Models
Large language models do not automatically remember previous calls.
- Every call starts fresh.
Call 2has no knowledge about
Call 1unless information from the previous call is explicitly included.
- This means memory is usually implemented by storing information and re-inserting it into later prompts.
- For example:
- The memory can then be included in future prompts
Previous Result:
The numeric variables are mpg, hp, wt, and disp.

New Task:
Create a scatter plot.- The model is not truly remembering.
- The agentic software system is “managing memory” on the model’s behalf.
This is the foundation of many modern agent systems, retrieval systems, and coding assistants.
13.11 Building Agentic Systems is Complicated
Building even a small agent quickly becomes complicated; a robust agentic system may require:
- tool registration
- structured outputs
- retries and error handling
- memory management
- context engineering
- logging
- debugging
- security controls
- model-specific integrations
If we had time, we could build all of these capabilities ourselves using R.
- The challenge is that the supporting infrastructure often becomes much larger than the task the agent is trying to perform.
For example, suppose we wanted to build a small data-analysis agent that could:
- summarize a data set,
- create a scatter plot,
- create a box plot, and
- inspect variable characteristics.
Even with only four tools, the supporting infrastructure might look something like this:
R/
├── agent_config/
│   ├── source_config.R
│   ├── source_config_memory.R
│   └── source_config_pipeline.R
│
├── core/
│   ├── core_groq.R
│   └── core_model.R
│
├── agent_helpers/
│   ├── agent_execution.R
│   ├── agent_feedback.R
│   ├── agent_step.R
│   └── agent_debug.R
│
├── tools/
│   ├── tool_summary_numeric.R
│   ├── tool_scatterplot.R
│   ├── tool_boxplot.R
│   └── tool_vars_df.R
│
└── agents/
    ├── agent_balanced.R
    ├── agent_balanced_memory.R
    └── agent_pipeline.R
Table 13.5 summarizes the major components required to support an agent with only four analytical tools.
| Category | Function | Purpose |
|---|---|---|
| Infrastructure | call_groq() |
Send prompts to the Groq API |
| Infrastructure | get_model_response() |
Apply roles and workflow defaults |
| Infrastructure | extract_code() |
Extract executable code from model responses |
| Infrastructure | safe_execute_code() |
Execute generated code safely |
| Infrastructure | build_eval_feedback() |
Convert failures into targeted feedback |
| Infrastructure | process_agent_step() |
Coordinate generation, evaluation, and execution |
| Infrastructure | print_agent_debug() |
Display execution history for debugging |
| Infrastructure | make_tool_registry() |
Register tools available to the agent |
| Infrastructure | choose_action() |
Decide which tool to run next |
| Infrastructure | run_agent() |
Manage the overall agent loop |
| Infrastructure | run_agent_memory() |
Add memory across steps |
| Infrastructure | run_agent_pipeline() |
Coordinate multi-step workflows |
| Tool | generate_code_summary_numeric() |
Generate code to summarize data |
| Tool | evaluate_code_summary_numeric() |
Verify summary code meets requirements |
| Tool | generate_code_scatterplot() |
Generate code for scatter plots |
| Tool | evaluate_code_scatterplot() |
Verify scatter plot code |
| Tool | generate_code_boxplot() |
Generate code for box plots |
| Tool | evaluate_code_boxplot() |
Verify box plot code |
| Tool | vars_df() |
Inspect variable characteristics |
| Tool | call_vars_df() |
Agent wrapper for variable inspection |
One detail is worth emphasizing.
- The example above supports only four analytical tools.
- Yet the supporting infrastructure requires more than a dozen additional functions for execution, evaluation, memory management, debugging, logging, configuration, and orchestration.
- In practice, the infrastructure often becomes substantially larger than the tools themselves.
- Most of the code exists to make the system:
- reliable,
- extensible,
- debuggable,
- maintainable, and
- robust to failure.
ImportantBuilding Agent Infrastructure Is Advanced Software Engineering
The complexity of an agent often comes less from the individual analytical tools and more from the infrastructure required to make those tools work together reliably.
Building an effective agent requires following many software-engineering principles/practices that extend well beyond prompting:
- Separation of concerns so each component has a clear responsibility.
- Layered architecture so tools can be added without rewriting the entire system.
- Design by contract through evaluation and validation functions.
- Informative failure handling so errors become feedback rather than crashes.
- Documentation and testing to support long-term maintenance.
- Configuration management so capabilities can be extended without changing core logic.
The software design principles discussed above are summarized in Table 13.6. While these ideas are not unique to agentic systems, they become increasingly important as systems grow in complexity and the number of interacting components increases.
| Principle | Suggested Reference | Why It Fits |
|---|---|---|
| Separation of concerns | Separation of Concerns (Wikipedia) | Concise overview of the core idea and its role in software design. |
| Layered architecture | Layered Architecture Pattern (Microsoft) | Practical explanation of organizing systems into layers and managing dependencies. |
| Design by contract | Design by Contract (Wikipedia) | Good introduction to specifying expectations through inputs, outputs, and validation. |
| Informative failure handling | Advanced R: Conditions and Error Handling | Directly relevant to R users and demonstrates structured error handling using conditions and tryCatch(). |
| Documentation and testing | R Packages (2e): Testing Basics and R Packages (2e): Function Documentation | Practical references showing how documentation and testing support maintainable code. |
| Configuration management | The Twelve-Factor App: Config | Classic discussion of separating configuration from application logic. |
In practice, creating a reliable agent is often a software-design challenge as much as an AI challenge.
The amount of infrastructure becomes even more apparent as the number of tools grows.
A four-tool agent is relatively small. Imagine extending the system with tools to support a larger portion of the R ecosystem:
- over 50 {ggplot2} geoms as well as functions for scales, coordinate systems, themes, and statistical transformations.
- hundreds of model-fitting functions,
- hundreds of data-transformation tools,
- hundreds of statistical tests,
- dozens of machine-learning algorithms,
- numerous database operations, and
- numerous file-management functions.
In the infrastructure above, adding a new tool requires only a few lines of code to register the new functions as tools.
However, developing and supporting hundreds of tool functions quickly becomes a substantial engineering effort. As the number of tools grows, so do the challenges of:
- tool registration,
- tool discovery,
- evaluation,
- logging,
- memory management,
- context management, and
- security.
Modern agent frameworks exist largely because managing this infrastructure at scale is difficult.
Rather than building the infrastructure themselves, developers can focus on defining:
- objectives,
- tools,
- constraints,
- evaluation criteria, and
- measures of success
while the framework handles much of the orchestration.
The key idea is that modern agent systems are not simply collections of model calls.
- They are software systems that coordinate models, tools, memory, evaluation, and execution.
- Understanding these concepts helps explain what agent frameworks are doing behind the scenes and why they can dramatically reduce the amount of code required to build useful agentic systems.
13.11.1 Not Every Problem Requires an Agent
For many short-term projects, a well-designed workflow provides an excellent balance between flexibility, reliability, and development effort.
- Workflows are often easier to build, test, debug, and maintain.
- They allow the model to contribute where it adds value while keeping the overall process deterministic.
- Evaluation and retry logic can often provide much of the benefit of an agent without requiring action selection, memory management, or tool orchestration.
As a result, workflows are frequently the most cost-effective solution when:
- the task is well understood,
- the sequence of steps is relatively stable,
- reproducibility is important, and
- the expected lifetime of the project is limited.
Agents become more attractive as tasks become less predictable, require multiple tools, involve longer planning horizons, or must adapt dynamically to changing circumstances.
A second consideration is that building an agent requires translating human decision-making into software.
- In a workflow, the developer specifies the sequence of steps directly:
- The software follows those instructions exactly.
In an agent, however, the developer must pre-decide and encode:
- what actions are available,
- when each action should be used,
- what information should be provided to support those decisions,
- how success should be evaluated,
- what should happen when a step fails, and
- when the task should stop.
These decisions often seem obvious when performed by a human, but expressing them explicitly in software can be surprisingly difficult.
As a result, building effective agents is not simply a programming challenge; it is also a knowledge-engineering challenge.
- The developer must encode enough of the decision-making process that the agent can make reasonable choices while still allowing the model flexibility to adapt to the task.
- The hard part is rarely calling the model. The hard part is figuring out:
- What tools should exist?
- When should they be used?
- What information should be available?
- How do we know success when we see it?
Those are fundamentally human decision-making problems that must somehow be translated into code, prompts, tools, evaluations, and constraints; that’s exactly why agent design is difficult. - This is one reason why many projects begin with workflows. - The decision process is already known, making it easier to encode as a fixed sequence of steps.
Agents become more valuable when the possible paths through a task are numerous, uncertain, or difficult to specify in advance.
13.12 Most Practitioners Build on Existing Agent Frameworks
When a problem genuinely benefits from an agent, most practitioners today start with an existing framework rather than building the entire system themselves.
- There is still significant work involved in selecting an appropriate framework, designing tools, managing context, defining evaluation criteria, and integrating the agent into existing workflows.
- The framework reduces the amount of infrastructure that must be built, but it does not eliminate the need for thoughtful system design.
Building a small agent from scratch can nevertheless be an excellent learning exercise because it exposes the major components of an agentic system:
- tools,
- action selection,
- evaluation,
- memory, and
- context management.
Understanding these components makes it easier to evaluate frameworks, understand their tradeoffs, troubleshoot failures, and customize their behavior when necessary.
Once those concepts are understood, however, most organizations choose to use an existing framework rather than build and maintain their own infrastructure. The reason is largely a cost-benefit tradeoff.
- Building an agent framework internally requires significant investment in infrastructure which can be far more effort than building the actual analytical tools the agent will use.
- By contrast, frameworks such as OpenAI Agents, Claude Code, LangGraph, CrewAI, and similar systems already provide much of this infrastructure.
- Using third party frameworks means developers can focus on defining objectives, tools, constraints, and evaluation criteria rather than implementing the underlying orchestration system.
However, third-party frameworks are not always the right choice; organizations may decide to build their own agent infrastructure when they have requirements that commercial frameworks cannot easily satisfy, such as:
- strict privacy or regulatory requirements,
- highly specialized workflows,
- integration with proprietary internal systems,
- requirements for complete control over agent behavior,
- long-term strategic investment in AI infrastructure.
Even in these cases, organizations often start with an existing framework and customize or extend it rather than building everything from scratch.
For most users, the goal is not to become an expert in building agent infrastructure.
- Rather, it is to understand enough about how agents work that you can make informed decisions about when a workflow is sufficient, when an agent is appropriate, and how to use existing frameworks effectively.
The goal is to understand enough about how agents work to:
- select appropriate tools,
- write effective prompts,
- design useful workflows,
- troubleshoot failures,
- evaluate results critically, and
- recognize when additional context or constraints are needed.
The concepts introduced in this chapter provide a foundation.
In the next chapter, we will examine several popular agent frameworks and explore how they implement these concepts while hiding much of the underlying complexity.
13.13 Summary
Table Table 13.7 summarizes the progression in this chapter from simple prompts to modern agent frameworks and highlights how responsibility for lower-level tasks gradually shifts from the user to the software system.
As systems become more capable:
- users spend less time executing individual tasks,
- software handles more of the orchestration,
- and the user’s role shifts toward defining objectives, constraints, and measures of success.
| Level | Main Idea | What It Adds |
|---|---|---|
| Prompt | One model call | A single interaction with an LLM. The user provides instructions and context, and the model returns a response. Useful for simple tasks but difficult to reuse systematically. |
| Function | Reusable prompt | Wraps a prompt in a function so it can be reused, parameterized, tested, and version controlled. Functions turn one-off interactions into repeatable components. |
| Workflow | Fixed sequence of steps | Organizes multiple functions into a predefined process such as generate → evaluate → retry. The control flow is determined entirely by code rather than the model. |
| Agent | Model chooses actions | Provides the model with a set of tools and allows it to decide which action to take next. The model participates in determining the process while code still controls execution and evaluation. |
| Agent Framework | Infrastructure manages the agent | Frameworks such as OpenAI Agents SDK, Claude Code, LangGraph, and CrewAI provide built-in support for tools, memory, context management, evaluation, logging, and orchestration, reducing the amount of infrastructure developers must build themselves. |
The key distinction is that workflows define a fixed process, while agents choose among available actions at runtime.
Modern agent frameworks automate much of the implementation, but the underlying concepts remain the same:
- models generate content and reasoning,
- tools perform actions,
- agents select tools,
- evaluation checks correctness,
- memory preserves context,
- context engineering determines what information reaches the model.
Understanding these components helps you use modern agent frameworks more effectively because it clarifies what the framework is doing on your behalf.
- You may never need to build an agent from scratch, but understanding how agents work makes it easier to design better tools, provide better context, evaluate results more critically, and troubleshoot systems when they fail.
13.14 Exercise 13: Agentic Systems
In this exercise, you will investigate the relationship between bill length and bill depth in the base R penguins data set.
- You will first use a fixed workflow to explore the data and then consider how an agent might approach the same task.
The goal is to observe how a relationship that appears in the aggregate data can change after accounting for species membership, a phenomenon related to Simpson’s paradox.
Learning Objectives
By completing this exercise, you should be able to:
- Build a simple analytical workflow.
- Compare workflows and agents as approaches to solving a problem.
- Recognize how grouping variables can alter apparent relationships in data.
- Explain why context and tool selection matter in agentic systems.
13.14.1 Load and Prepare the Data
Library the {tidyverse} and load the base R penguins data set.
- Select species, bill_len and bill_dep
- Remove observations with missing values in the variables of interest
- Save the data frame
13.14.2 Part 1: A Fixed Workflow
The workflow below follows a predefined sequence of steps:
13.14.2.1 Step 1: Plot the Overall Relationship
Create a scatter plot of bill length versus bill depth for all penguins and add a linear smoother.
Questions
- Is the overall relationship positive or negative?
- Does the fitted line appear strong or weak?
- What conclusion might you draw from this plot alone?
13.14.2.2 Step 2: Fit an Overall Linear Model
Fit a linear model using all observations and check the summary
Questions
- What is the sign of the slope coefficient?
- Does the model support your visual interpretation?
- What is the \(p\)- value for the model and what is the \(R^2\)?
13.14.2.3 Step 3: Account for Species
Now incorporate species into the visualization.
Questions
- How do the species-specific lines compare with the overall line?
- Does the relationship appear different within species?
- Why might species be an important variable to consider?
13.14.2.4 Step 4: Fit a Species Model
Fit a model that includes species and allows the slope to differ by species and check the summary.
Questions
- How does this model differ from the overall model?
- What is the \(p\)-value for the model and what is the \(R^2\)?
- Do the within-species relationships match the aggregate relationship?
- Is there evidence of Simpson’s paradox or a related aggregation effect?
13.14.3 Part 2: Designing Tools for an Agent
In Part 1, you followed a fixed workflow to investigate the relationship between bill length and bill depth in the penguins data.
Suppose you wanted to build an agent that could investigate relationships between variables automatically.
Working in groups, identify the tools you would provide to an agent.
For each proposed tool:
- Give the tool a name.
- Describe what it does. Consider both the explicit steps in the workflow and the implied choices you made along the way.
- Explain why the agent might need it.
- Indicate whether the tool is deterministic or LLM-based.
Create a table with four columns:
| Tool | Purpose | Why Needed | Deterministic or LLM |
|---|---|---|---|
| Tool | Purpose | Why Needed | Type |
|---|---|---|---|
| inspect_variables() | List variables and types | Determine available analysis options | Deterministic |
| plot_relationship() | Create a scatter plot | Explore relationships visually | Deterministic |
| fit_linear_model() | Fit a regression model | Quantify associations | Deterministic |
| group_by_variable() | Split analysis by category | Investigate potential confounding | Deterministic |
| compare_models() | Compare overall and grouped models | Detect differing patterns | Deterministic |
| summarize_findings() | Explain results in plain language | Communicate conclusions | LLM |
| choose_next_step() | Decide which tool to run next | Agent control flow | LLM |
Notice that most of the tools are deterministic.
- This is common in practical agent systems.
The LLM is often used for:
- deciding what to do next,
- interpreting results,
- communicating findings,
Traditional code still performs the statistical analysis, plotting, and model fitting.
In many real-world agent systems, the LLM acts primarily as a coordinator rather than as the system that performs all computations.
Notice that the analytical work has not changed; only the organization has changed.
13.14.4 Part 3: Using Groq to Propose an Agent Plan
In Part 2, you proposed tools an agent might use to investigate relationships between variables.
Now we will use Groq as a lightweight planning agent. The goal is not to let the model run the analysis. Instead, we ask the model to propose which steps an agent should take.
This lets us compare:
- the fixed workflow you completed,
- the tools your group proposed, and
- the plan suggested by the model.
13.14.4.1 Prompt 1: General Relationship Prompt
Ask Groq:
prompt_general <- paste(
  "You are a data analysis agent.",
  "",
  "Task:",
  "Investigate the relationship between bill length and bill depth",
  "in the penguins data set.",
  "",
  "Available tools:",
  "- inspect_variables",
  "- plot_relationship",
  "- fit_linear_model",
  "- group_by_variable",
  "- compare_models",
  "- summarize_findings",
  "- stop",
  "",
  "Create an analysis plan.",
  "",
  "Return ONLY a markdown table with the columns:",
  "Step | Tool | Reason",
  "Each row should contain exactly one tool invocation.",
  "The final row should be stop.",
  "",
  "Do not include any explanation before or after the table.",
  "Do not use code fences.",
  sep = "\n"
)

get_model_response(
  user_prompt = prompt_general,
  model = "llama-3.1-8b-instant",
  role_prompt = "You are a data analysis agent planning an analysis."
) |>
cat()- What do you think of the plan?
- Will it reveal Simpsons paradox?
13.14.4.2 Prompt 2.
Try a more specific prompt.
prompt_hidden <- paste(
  "You are a data analysis agent.",
  "",
  "Task:",
  "Investigate the relationship between bill length and bill depth",
  "in the penguins data set.",
  "",
  "Determine whether the overall relationship is consistent",
  "across important subgroups in the data.",
  "",
  "Available tools:",
  "- inspect_variables",
  "- plot_relationship",
  "- fit_linear_model",
  "- group_by_variable",
  "- compare_models",
  "- summarize_findings",
  "- stop",
  "",
  "Return ONLY a markdown table with columns:",
  "Step | Tool | Reason",
  "",
  "Each row should contain exactly one tool invocation.",
  "The final row should be stop.",
  "Do not include any text before or after the table.",
  sep = "\n"
)

get_model_response(
  user_prompt = prompt_hidden,
  model = "llama-3.1-8b-instant",
  role_prompt = "You are a data analysis agent planning an analysis."
) |>
cat()- What changed?
Comparing the Agent Plans
The two plans differ in an important way.
- The first plan treats the data as a single population. The proposed analysis consists of visualizing the relationship, fitting a model, and reporting the results.
- The second plan includes additional steps that investigate whether the relationship is consistent across subgroups. The agent proposes grouping the data, creating additional plots, and comparing models across groups before drawing conclusions.
Notice what changed:
- The available tools were identical.
- The data were identical.
- The model was identical.
- Only the task description changed.
This illustrates an important principle of agentic systems:
The quality of an agent’s plan depends heavily on the context and objectives provided to it.
The second prompt encouraged the model to look for potential subgroup effects. As a result, it proposed a more comprehensive analysis that is capable of revealing patterns that would be hidden in an aggregate analysis.
13.14.5 Reflection
Answer the following questions in complete sentences.
- What steps in the workflow were predetermined?
- What decisions was the agent responsible for making?
- Which parts of this analysis should remain deterministic and why?
- Why can an overall trend differ from trends observed within groups?
- How does species act as a confounding or grouping variable in this example?
- What information would an agent need in order to decide that species should be investigated?
- How could poor tool selection lead an agent to miss the underlying pattern?
- Which of the two plans would be more likely to discover that species changes the interpretation of the overall relationship? Explain why.
TipKey Takeaway
The workflow guarantees that both the overall relationship and the species-specific relationships are examined because those steps were explicitly programmed.
An agent can reach the same conclusion, but only if it has access to appropriate tools and enough context to decide that species should be investigated.
This illustrates both the power and the risk of agentic systems: flexibility allows exploration, but important patterns can be missed if the agent does not select the right tools or gather enough information.
13.14.5.1 Closing Discussion on the Exercise
This exercise highlights a lesson that extends well beyond this particular example.
- The difference between the two agent plans was not caused by changing models, adding tools, or providing additional data. The same model was given access to the same tools and the same data in both cases.
The only thing that changed was the task description and the context provided to the model.
- The first prompt focused narrowly on the relationship between bill length and bill depth. As a result, the agent proposed a straightforward analysis involving a plot, a linear model, and a summary of the results.
- The second prompt asked whether the relationship was consistent across important subgroups. This additional context encouraged the agent to consider grouping variables, compare relationships across species, and perform a more comprehensive investigation.
This illustrates an important principle of working with LLMs and agentic systems:
The quality of the solution often depends as much on the quality of the prompt and the provided context as it does on the model itself.
As models become more capable, users sometimes assume that larger models will automatically produce better results.
- In practice, however, even highly capable models can only reason with the information and objectives they are given.
- A powerful model operating with incomplete context may produce a less useful solution than a smaller model operating with a clear objective, appropriate constraints, and relevant information.
This observation is one reason why the field has increasingly shifted its attention from prompt engineering to context engineering.
- Prompt engineering focuses on writing effective instructions for a single interaction.
- Context engineering focuses on ensuring that the model receives the information, constraints, tools, examples, and prior results needed to perform its task effectively.
In many real-world applications, improvements in context and task design produce larger gains than switching to a larger or more expensive model.
For agentic systems, success often depends on four factors:
- Clearly defining the objective.
- Providing the right context.
- Exposing appropriate tools.
- Evaluating the results.
The model is only one component of the overall system.
As you begin working with modern agent frameworks and coding assistants, remember that your role increasingly shifts from performing individual steps to designing the environment in which the model operates.
- The better you define the task, context, constraints, and tools, the more likely the system is to produce useful and reliable results.
Effective agents are rarely the result of a single clever prompt. They are usually the result of thoughtful problem formulation, appropriate tools, useful context, and iterative refinement.
13.15 Looking Ahead
In this chapter, we examined what it takes to build agents from the ground up and exxplored many of the components that appear in modern agentic systems:
- prompts and roles,
- tools and functions,
- workflows and control flow,
- evaluation and refinement,
- memory and context,
- planning and tool selection.
We covered an important reality:
Building reliable agents yourself requires a substantial amount of infrastructure.
Fortunately, most practitioners do not build these systems entirely from scratch.
- Modern agent frameworks provide much of this infrastructure automatically.
- As a result, the focus shifts from implementing agent infrastructure to designing and configuring agent behavior.
- The concepts developed in this chapter remain essential because the frameworks are built on the same underlying ideas.
In the next chapter, we move from building agents to working with agent frameworks. Rather than implementing the infrastructure ourselves, we will explore how modern frameworks expose these capabilities and how thoughtful design choices continue to determine whether an agent succeeds or fails.
- The goal is not to replace the concepts introduced here, but to see how they scale when supported by purpose-built tooling.